S T E P 5
S T E P 5 – X / Z A s s e m b l y
28
docs.carbide3d.com
29
5.2 Open Eccentric Nuts
1. Locate the carrier plate assembly box and
the X-Axis drag chain support panel set aside
from the step 3 box.
2. Lay the X/Z carrier plate on the work surface
with the eccentrics face up and to the bottom.
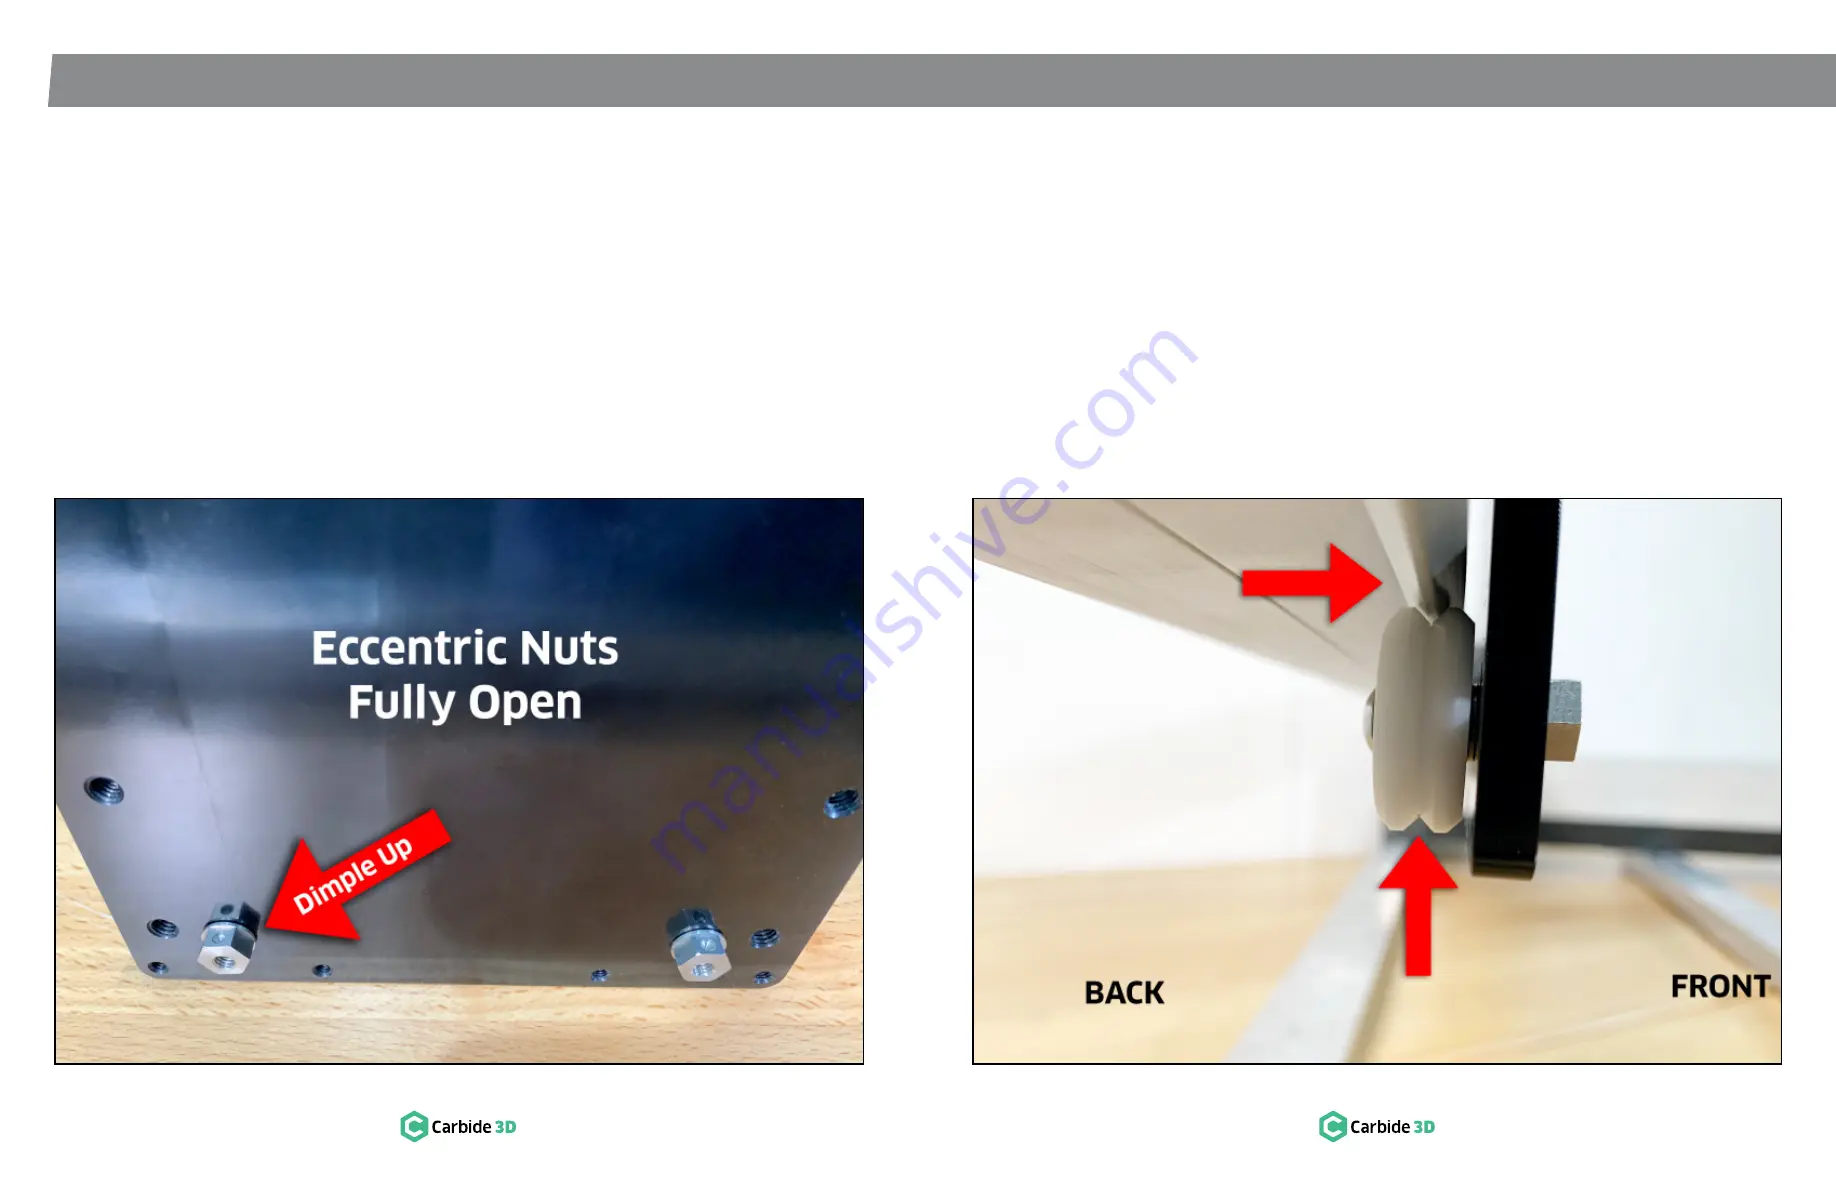
3. Use the 10mm wrench to open the eccentrics.
See
Fig. 5-2
.
a. Dimple faces UP.
b. Refer back to
Figure 5-2
Figure 5-3
5.3 Pre‑Assemble V‑wheels
1. Pre-assemble the bottom two V-wheels for the
X/Z carrier plate in order (
see
Fig. 5-3
):
a. M5×22mm BHCS
b. V-wheel
c. M5 shim (washer)
NOTE:
Be sure the shim goes between the
V-wheel and the X/Z carrier plate.
5.4 Install X/Z Carrier Plate
1. Place the X/Z carrier plate onto the gantry,
aligning the two pre-installed V-wheels on the
top with the upper V-rail.
2. Use the 3mm hex key to install the bottom two
V-wheels on the back of the carrier plate.
See
Fig. 5-3
.
a. Be sure the V-wheels are properly seated
on the lower V-rail.
b. Use a 10mm wrench to hold eccentric nuts
in the fully open position (dimples up).
c. Use a 3mm hex key to tighten the BHCS to
secure the V-wheels to the eccentric nuts.
3. Check the carrier plate movement by rolling it
back and forth along the X-Axis gantry.
4. Use a 10mm wrench to tension the eccentric
nuts.
a. Rotate the eccentric nuts CLOCKWISE to
tension. Adjust a little at a time. Not much
tension is needed.
b. Reach under and spin the V-wheel with
your finger. If it rotates freely, keep
tightening until you feel some friction
against the rail.
Содержание Shapeoko 4 XXL
Страница 1: ...Shapeoko 4 XXL ASSEMBLY GUIDE...


