36
CaUTiOn
Exterior wall surface must be reasonably flat to
attach the Outside Wall Plate. When exterior wall
surface is not flat (covered with vinyl or wood
shingle siding etc.) the siding must be removed,
and a flat surface build up flash or above siding
exterior surface to secure/seal the terminal
Outside Wall Plate.
•
.
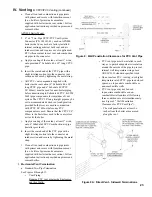
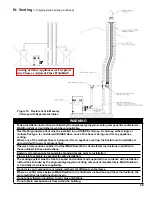
Install the supplied Inside Wall Plate onto
the shortened Horizontal (Wall) Terminal
interior end and move the plate to cover
interior wall cut opening. Secure the
plate with provided fasteners, then, apply
the sealant around plate sides to seal it to
interior wall (refer to Figure 26).
• Lubricate the brown gasket inside boiler
concentric vent collar or the last section
of the vent pipe with small amount of
water.
• Ensure that inner pipe of the terminal
is evenly engaged into the gasket all
around, then push the termination male
end inside boiler concentric vent collar or
the last section of the vent pipe, until the
mark (see Step
v
) is no longer visible.
• Re-install locking band clamp onto the
joint to secure the terminal to the collar
or the last section of the vent pipe.
5.
Vertical Vent Termination
a. Standard Concentric Termination
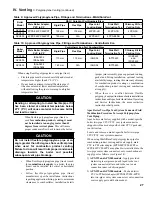
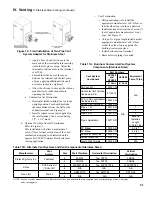
Refer to Figures 27 thru 31.
i.
In addition to the vertical terminal, either a
Flat Roof Flashing or Sloped Roof Flashing
is required for this installation. Refer to
Table 12 ‘Concentric Vent Components’ for
details.
• Determine the centerline of the terminal
location on the roof. For flat roof, cut
6½” (100/150 mm) for the terminal. For
sloped roof, cut a hole in the roof large
enough for the terminal to pass through
the roof while remaining plumb.
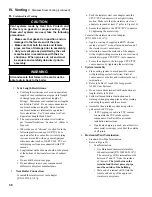
CaUTiOn
if the boiler is located directly under the hole,
cover it while cutting the hole to prevent debris
from falling onto boiler.
iV. Venting
E. Concentric Polypropylene Venting (continued)
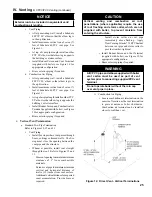
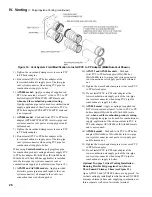
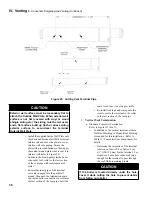
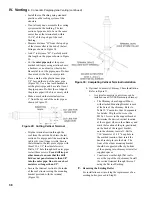
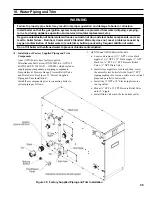
Figure 25: Cutting Vent Terminal Pipe
Содержание Apex APX399
Страница 7: ...7 I Product Description Specifications and Dimensional Data continued Figure 1A Apex Model APX399 ...
Страница 8: ...8 Figure 1B Apex Model APX500 I Product Description Specifications and Dimensional Data continued ...
Страница 9: ...9 I Product Description Specifications and Dimensional Data continued Figure 1C Apex Model APX800 ...
Страница 65: ...65 VIII Electrical continued Figure 43 Ladder Diagram ...
Страница 66: ...66 VIII Electrical continued ...
Страница 67: ...67 Figure 44 Wiring Connections Diagram VIII Electrical continued ...
Страница 110: ...110 1P 3 1P 2 1P 1 XIII Repair Parts continued 1C 1D 1E ...
Страница 116: ...116 XIII Repair Parts continued ...
Страница 118: ...118 XIII Repair Parts continued ...
Страница 129: ...129 SERVICE RECORD DATE SERVICE PERFORMED ...
Страница 130: ...130 SERVICE RECORD DATE SERVICE PERFORMED ...
Страница 131: ...131 SERVICE RECORD DATE SERVICE PERFORMED ...

