


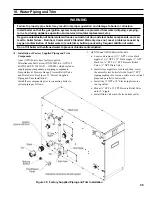
33
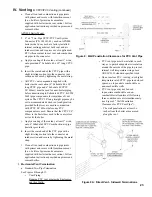
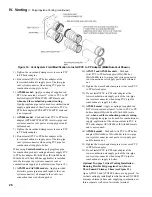
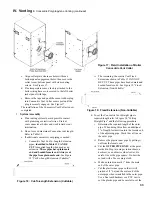
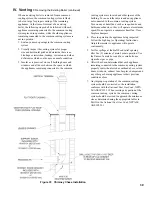
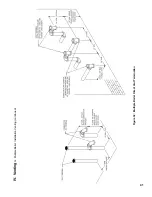
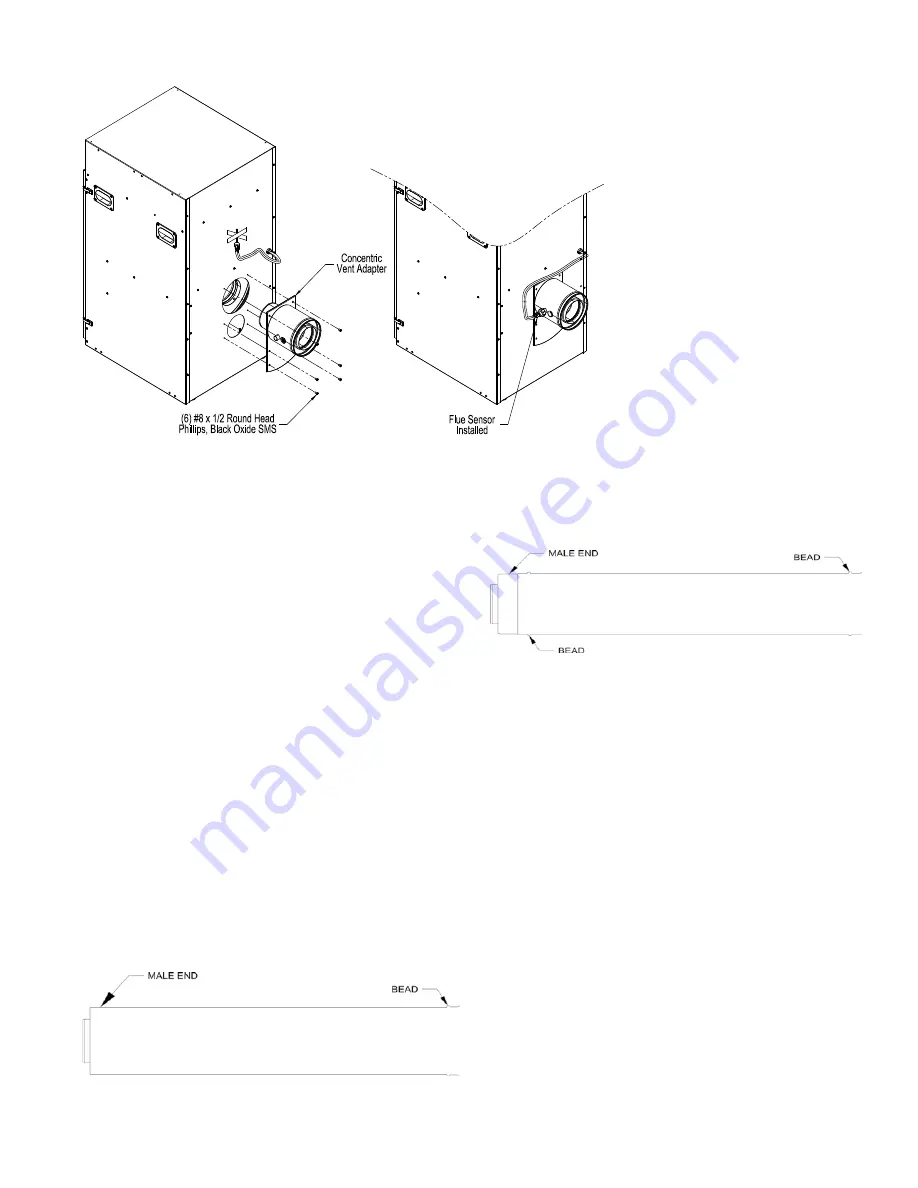
c. Align collar plate clearance holes with rear/
bottom panel engagement holes; then secure the
collar to rear/bottom panel with six mounting
screws. See Figure 17.
d. Flue temperature sensor, factory attached to the
boiler wiring harness, is secured to the left boiler
jacket panel with tape.
e. Remove the tape and push the sensor rubber plug
into Concentric Vent Collar sensor port until the
plug is securely engaged. See Figure 17.
The installation of the Concentric Vent Collar is now
completed.
3.
System Assembly
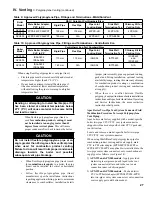
a. Plan venting system to avoid possible contact
with plumbing or electrical wires. Start at
vent connector at boiler and work towards vent
termination.
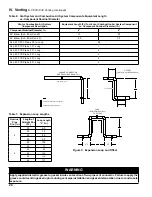
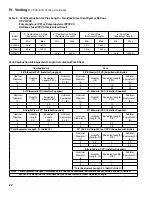
b. Do not exceed maximum Concentric vent length.
Refer to Table 12.
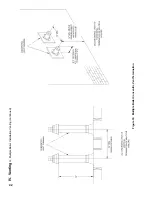
c. If additional concentric vent piping is needed:
i.
Concentric Vent Cut-To-Length Extension
pipes,
identified in Table 13 CAN BE
CUT
to required length when used as an
extension.
These pipes have plain male
end and beaded female end.
Always cut
the pipe from plain male end.
See Figure
18 ‘Cut-To-Length Extension (Cuttable)”.
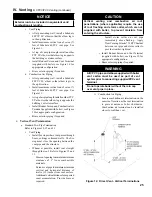
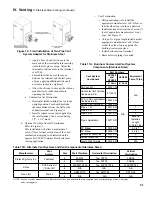
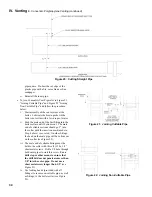
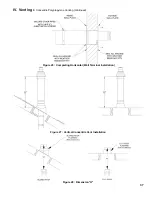
d. To cut the Concentric Vent Straight pipe to
required length refer to Figure 20 “Cutting
Straight Pipe” and the following procedure:
i.
Determine the required length of the outer
pipe. When doing this allow an additional
1” of length for insertion into the female end
of the adjoining pipe. Mark the cut line on
the outer pipe.
ii.
Remove the plastic inner pipe by pulling it
out from the female end.
iii.
Cut the
OUTER PIPE ONLY
at the point
marked in Step (a) using aviation shears, a
hacksaw, or an abrasive wheel cutter. Be
careful to cut the pipe square. De-burr the
cut end with a file or emery cloth.
iv.
Make an insertion mark 1” from the male
end of the outer pipe.
v.
Cut the plastic inner pipe so that it will
protrude 3/8” beyond the male end of the
outer pipe when reinstalled in the outer pipe.
Use a fine tooth hacksaw or a PVC saw to
cut the plastic pipe and be careful to cut the
Figure 17: Field installation of Boiler
Concentric Vent Collar
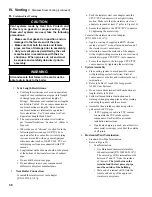
iV. Venting
E. Concentric Polypropylene Venting (continued)
Figure 18: Cut-To-Length Extension (Cuttable)
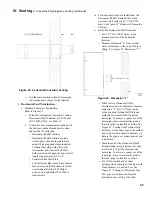
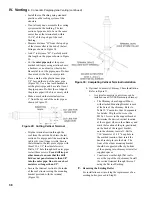
ii.
The remaining Concentric Vent Fixed
Extensions shown in Table 13 CANNOT
BE CUT. These pipes have beaded male and
beaded female ends. See Figure 19 “Fixed
Extension (Non-Cuttable)’.
Figure 19: Fixed Extension (non-Cuttable)
Содержание Apex APX399
Страница 7: ...7 I Product Description Specifications and Dimensional Data continued Figure 1A Apex Model APX399 ...
Страница 8: ...8 Figure 1B Apex Model APX500 I Product Description Specifications and Dimensional Data continued ...
Страница 9: ...9 I Product Description Specifications and Dimensional Data continued Figure 1C Apex Model APX800 ...
Страница 65: ...65 VIII Electrical continued Figure 43 Ladder Diagram ...
Страница 66: ...66 VIII Electrical continued ...
Страница 67: ...67 Figure 44 Wiring Connections Diagram VIII Electrical continued ...
Страница 110: ...110 1P 3 1P 2 1P 1 XIII Repair Parts continued 1C 1D 1E ...
Страница 116: ...116 XIII Repair Parts continued ...
Страница 118: ...118 XIII Repair Parts continued ...
Страница 129: ...129 SERVICE RECORD DATE SERVICE PERFORMED ...
Страница 130: ...130 SERVICE RECORD DATE SERVICE PERFORMED ...
Страница 131: ...131 SERVICE RECORD DATE SERVICE PERFORMED ...


