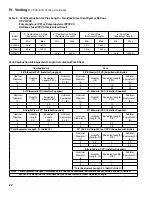
35
v.
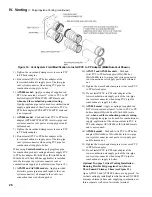
Use the same method to join all remaining
vent components except for the terminal.
4.
Horizontal Vent Termination
a. Standard Concentric Termination
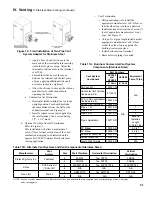
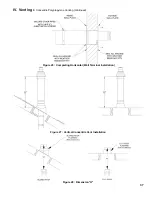
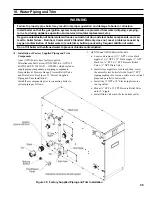
Refer to Figure 23.
i.
Permitted terminals for horizontal venting:
Horizontal (Wall) Terminal, [100/150 mm
(P/N 101809-01)] - see Table 13.
ii.
Concentric Vent components supplied with
the boiler are packed inside boiler carton
and include the following:
• Horizontal (Wall) Terminal,
• Horizontal (Wall) Terminal consists
of Straight section having plain male
end with locking band clamp installed;
Terminal Assembly with offset vent
termination, and Outside Wall Plate,
both riveted on the opposite end; overall
length is approximately 28-1/8”.
• Separate Inside Wall Plate
• Two Hardware Bags (each bag contains
four screws and four anchors) to attach
vent terminal Outside Wall Plate to
exterior wall and Inside Wall Plate to
interior wall.
iii.
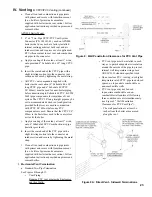
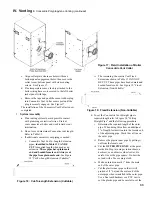
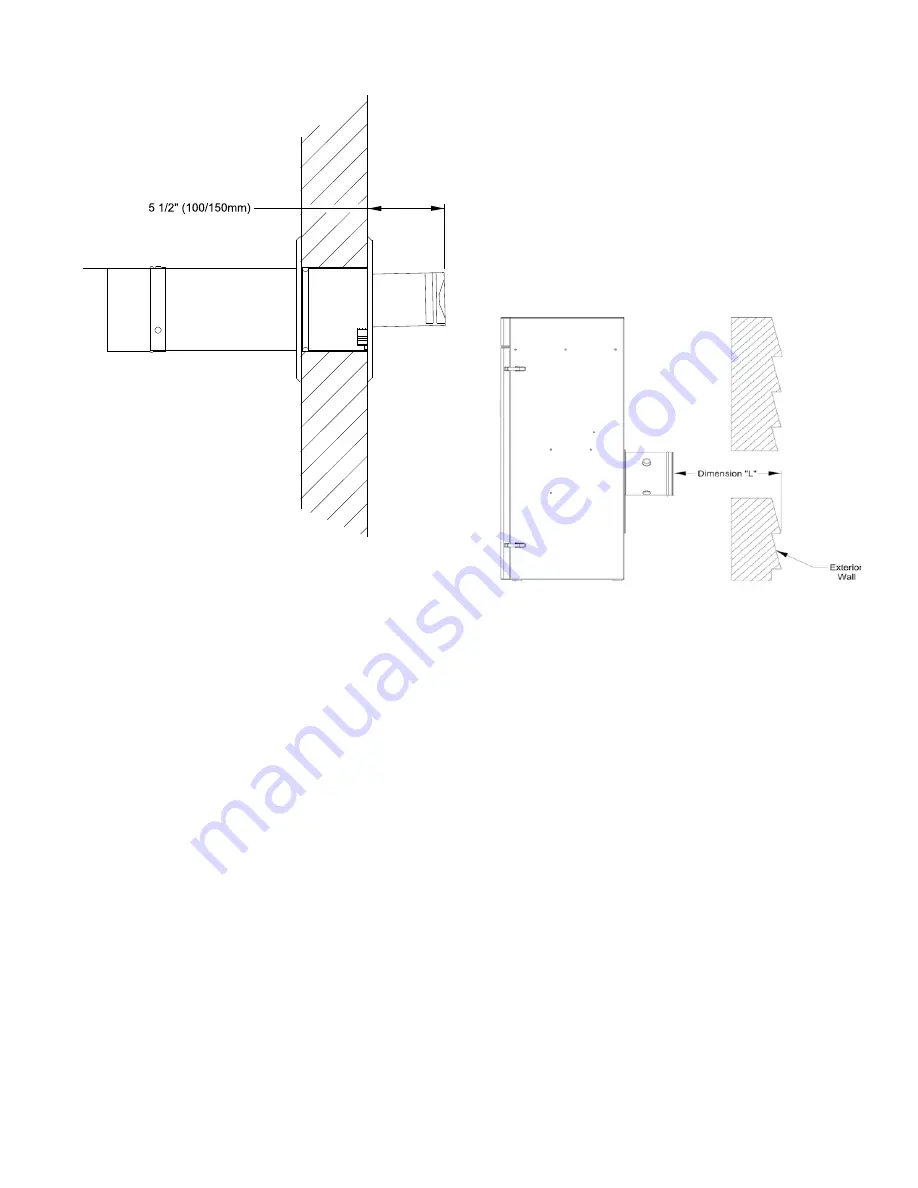
For horizontal (sidewall) installation, the
Horizontal (Wall) Terminal will extend
past outer wall surface by 5½” (100/150
mm). See Figure 23 “Horizontal Concentric
Venting”.
iv.
Install the Horizontal (Wall) Terminal:
• Cut a 6½” (for 100/150 mm) at the
planned location of the horizontal
terminal.
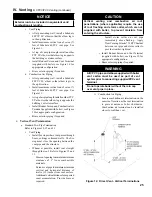
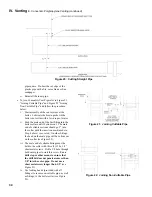
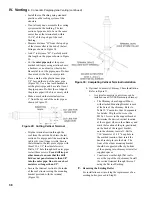
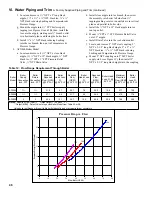
• Measure dimension “L” from exterior
wall outer surface to the end of the last
fitting. See Figure 24 ‘Dimension “L”’.
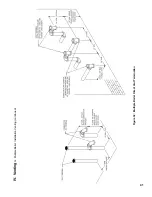
Figure 23: Horizontal Concentric Venting
iV. Venting
E. Concentric Polypropylene Venting (continued)
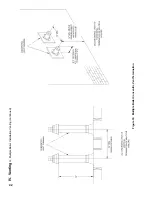
Figure 24: Dimension “L”
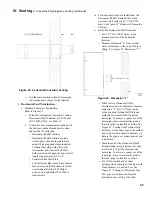
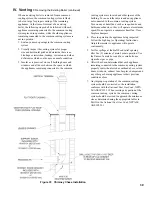
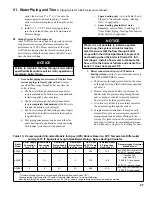
• When factory Horizontal (Wall)
Terminal needs to be shortened, measure
dimension “L” plus 1¼” from inside
of the attached Outside Wall Plate and
mark the Horizontal (Wall) Terminal
outer pipe. To achieve a square cut of the
outer pipe, place several marks around
the outer pipe to establish a cut line. See
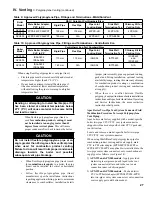
Figure 25 ‘ Cutting Vent Terminal Pipe’.
• Carefully cut the outer pipe at the marked
line using aviation shears, a hacksaw etc.
Ensure the pipe is cut square and cut end
is de-burred.
• Mark the end of the Horizontal (Wall)
Terminal inner polypropylene vent pipe
to extend 3/8” past the cut end of the
outer pipe. To achieve a square cut of the
inner pipe, place several marks around
the inner pipe to establish a cut line.
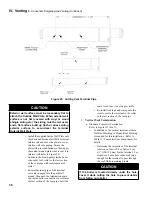
• Cut off the marked end of inner
polypropylene vent pipe with a fine tooth
blade hacksaw etc. and de-burr. See
Figure 25 “Cutting Vent Terminal Pipe.
This pipe can be removed from the
terminal to ease cutting, if desired.
Содержание Apex APX399
Страница 7: ...7 I Product Description Specifications and Dimensional Data continued Figure 1A Apex Model APX399 ...
Страница 8: ...8 Figure 1B Apex Model APX500 I Product Description Specifications and Dimensional Data continued ...
Страница 9: ...9 I Product Description Specifications and Dimensional Data continued Figure 1C Apex Model APX800 ...
Страница 65: ...65 VIII Electrical continued Figure 43 Ladder Diagram ...
Страница 66: ...66 VIII Electrical continued ...
Страница 67: ...67 Figure 44 Wiring Connections Diagram VIII Electrical continued ...
Страница 110: ...110 1P 3 1P 2 1P 1 XIII Repair Parts continued 1C 1D 1E ...
Страница 116: ...116 XIII Repair Parts continued ...
Страница 118: ...118 XIII Repair Parts continued ...
Страница 129: ...129 SERVICE RECORD DATE SERVICE PERFORMED ...
Страница 130: ...130 SERVICE RECORD DATE SERVICE PERFORMED ...
Страница 131: ...131 SERVICE RECORD DATE SERVICE PERFORMED ...


