181
Contents
Before Using
Getting Started
Design Center
Layout & Editing
Programmable
Stitch Creator
Quick Reference
Alphabetic Index
Deleting an image:
Press
. The image will be deleted from the Design Page.
■
Image to Stitch Wizard
Purpose:
Gives step-by-step instruction for creating embroidery data from image data.
Shortcut key:
No shortcut key for this function
Toolbar:
Operation:
1
Use one of the commands on the
Input
sub-menu of the
Image
menu to prepare the image data
that will be used to create the embroidery data.
2
Click
Image
, then
Modify
, and then re-size and re-position the image data for creating the embroi-
dery data.
3
Click
Image
, then
Image to Stitch Wizard
.
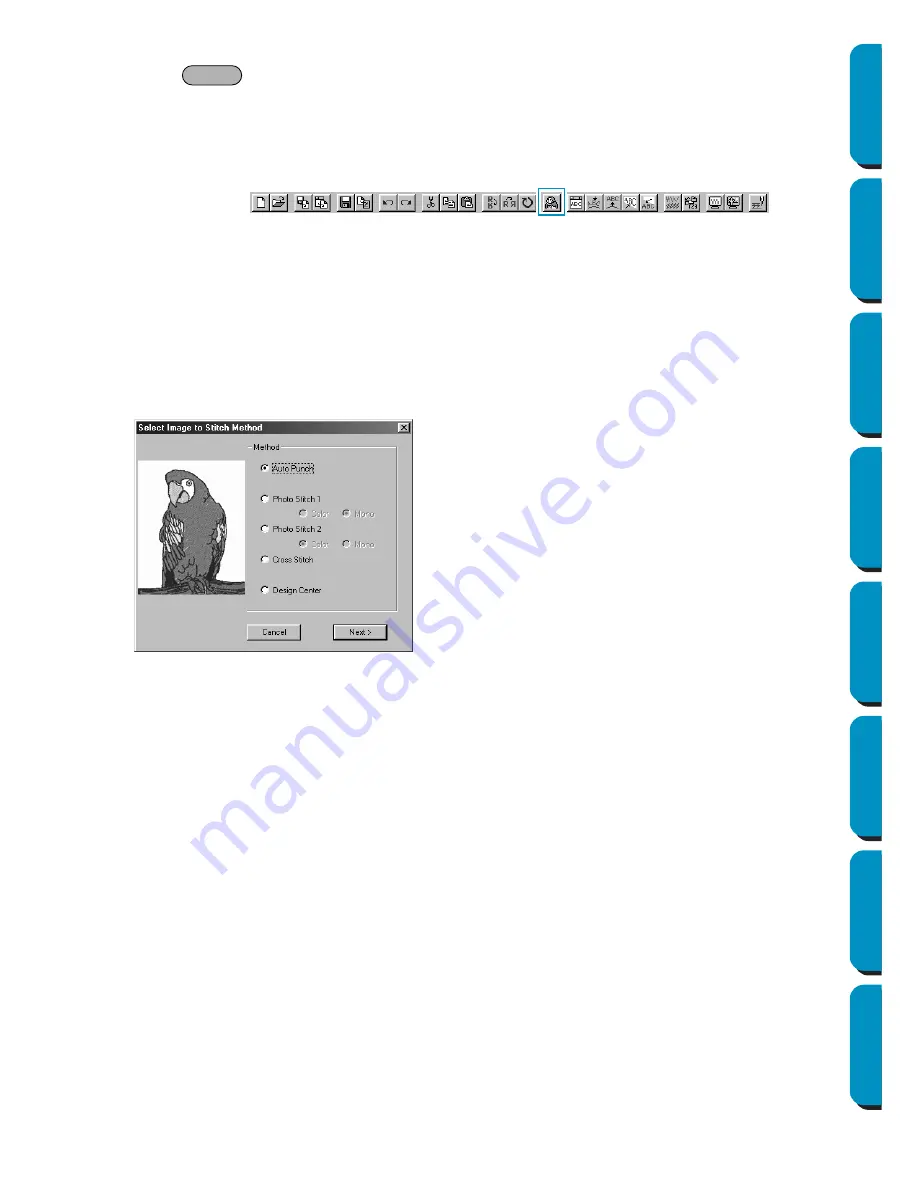
The following dialog will appear. (If there is no image in the Design Page, the dialog appears after
an image is imported from a file.)
◆
Select
Auto Punch
to automatically
extract the image boundaries in order
to create the embroidery data.
◆
Select
Photo Stitch 1
to automatically
create realistic photo embroidery. This
can be set to color or black and white.
◆
Select
Photo Stitch 2
to automatically
create realistic photo embroidery in 4
colors or 1 color.
◆
Select
Cross Stitch
to create cross-
stitch.
◆
Select
Design Center
to run Design
Center with the Design Page Image.
◆
Select the type of embroidery that you
wish to create, and then click
Next
.
◆
Click
Cancel
to quit the operation.
Delete
Содержание PE-DESIGN
Страница 1: ...PE DESIGN PE DESIGN Version 5 0 Instruction Manual ...
Страница 274: ...ENGLISH XC3894 001 Printed in Japan ...


