1 5 8
SERIAL LINKS
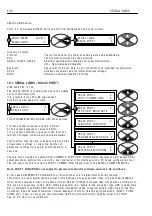
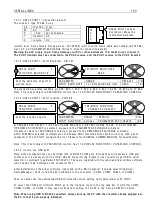
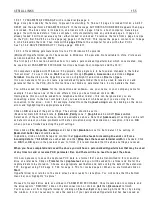
Note.
The w
i
res on
p
i
ns Y and Z
are transposed
Read on
l
y va
l
ues w
ill
sho w the
l
eve
l
perta
i
n
i
ng at the t
i
me. Once data
i
s rece
i
ved and the dr
i
ve reports
“ F
i
n
i
shed”, c
li
ck on the d
i
sconnect
i
con or c
li
ck on
C
a
ll
then
D
i
s
c
onn
ec
t
to f
i
n
i
sh.
You may no w ex
i
t from H yperTerm
i
na
l
by c
li
ck
i
ng on
F
il
e
then
Ex
i
t
or by press
i
ng A
l
t and F 4 or by c
l
os
i
ng
the w
i
ndo w . You w
ill
be asked
i
f you w
i
sh to save the sess
i
on, th
i
s
i
s not necessary as your persona
li
sed
H yperterm
i
na
l
a
l
ready ex
i
sts.
If you prev
i
ous
l
y se
l
ected
C
a
ptu
r
e
t
e
xt,
the f
il
e of rece
i
ved menu
li
st
i
ng can no w be
l
oaded
i
nto w h
i
chever
w ord processor you are us
i
ng to be v
i
e w ed or pr
i
nted etc.
1 0.2.3. 2 PAR A ME TER E X C H A N GE / Dr
i
ve to dr
i
ve
See 1 0.2.4 Ru
Dur
i
ng ma
i
ntenance
i
t
i
s somet
i
mes not poss
i
b
l
e to transfer parameter sett
i
ngs us
i
ng computers, but may be
necessary to transfer sett
i
ngs from one un
i
t to another.
To overcome th
i
s prob
l
em the PL/X has a bu
il
t
i
n ab
ili
ty to exchange parameters bet w een t w o funct
i
on
i
ng
contro
l
cards. Th
i
s method may be used
i
f there
i
s a prob
l
em w
i
th the po w er chass
i
s but the un
i
t st
ill
responds to the app
li
cat
i
on of the contro
l
supp
l
y as norma
l
. For fau
l
ty un
i
ts see 1 0.2.3.3 P AR A ME TER
E X C H A N GE / Eeprom transfer bet w een un
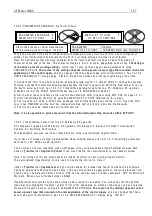
Socket p
i
n
funct
i
on P
l
ug 1
P
l
ug 2
W
0 V
0 V
0 V
X
Open
Open
Open
Y
transm
i
t W
i
re 3
Z
rece
i
ve
W
i
re 4
(Un
i
t to un
i
t 2 metre cab
l
e part number L A 1 0 2 5 9 6. Un
i
t to host, 9 w ay fema
l
e Dtype part no. L A 1 0 2 5 9 5).
Turn on the contro
l
supp
l
y to the source and target PL/X s. The d
i
sp
l
ay and keys on both un
i
ts shou
l
d be
w ork
i
ng
i
n order to proceed w
i
th th
i
s transfer techn
i
que. Connect the RS2 3 2 PORT 1 of the source PL/X to
the RS2 3 2 PORT 1 of the target PL/X us
i
ng an appropr
i
ate
l
ead w
i
red bet w een p
l
ug 1 and p
l
ug 2 as above,
w
i
th p
i
ns Y and Z transposed, and p
i
n X d
i
sconnected.
Th
e
so
cke
t
i
s typ
e
FCC68 4 w
a
y
The rec
i
pe page of the transm
i
tted f
il
e depends on the rec
i
pe page se
l
ect
i
on
i
n the source PL/X . See 13.1 3.2
l
y one page
i
s sent each t
i
me. To send a
ll
three pages
requ
i
res three separate transm
i
ss
i
on sequences. The rec
i
pe page se
l
ected on the source PL/ X a
l
so determ
i
nes
i
ts page dest
i
nat
i
on on the target PL/X .
Prov
i
ded the d
i
sp
l
ays and keys are operat
i
ng on both un
i
ts you may proceed to 1 0.1.2 RS2 3 2 PORT 1 / Port1
Baud rate PIN 1 8 7 and set the baud rates for each un
i
t to be 9 6 0 0.
Then proceed to 1 0.2.1 P AR A METER E X C H A N GE / Dr
t on the source PL/X , fo
ll
o w ed by 1 0.2.2
PAR A ME TER E X C H A N GE / Dr
ve on the target PL/X .
W
i
th the target PL/X
i
n the DRIV E RECEIV E w
i
ndo w , press the up key to p
l
ace
i
t
i
n a RE CEIVIN G mode.
Return to the source PL/X and
i
n the DRIV E TRA NSMIT w
i
ndo w press the up key to commence /
TRA NS MIT TIN G.
Note. If the message A U T H ORIS A TIO N NEEDED appears
i
t means rec
i
pe page 3 has been
l
ocked O N THE
RECEIVIN G un
i
t and cannot be overwr
i
tten. See 1 3.1 3.2.1 Rec
agram or refer to supp
li
er.
W hen the messages change to FINISHED, press the
l
eft key on the target PL/X . Look at the ca
li
brat
i
on
parameters and other un
i
que parameters to ascerta
i
n w
i
th conf
i
dence that the conf
i
gurat
i
on has been
transferred, then turn off both the contro
l
supp
li
es. Remove the
i
nterconnect
i
ng
l
ead. The target PL/X
i
s no w
l
oaded w
i
th the parameter f
il
e from the source PL/X.
W
X
Y
Z
W
X
Y
Z
Содержание PLX
Страница 2: ...2 Contents ...
Страница 202: ......


