Chapter 9: Replacing Modules
180
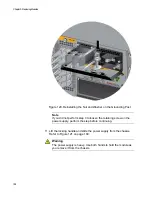
Warning
The power supply is heavy. Use both hands to hold the module as
you remove it from the chassis.
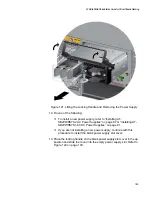
Figure 112. Removing the AT-SBxPWRSYS2 AC Power Supply
5. Do one of the following:
To install a new power supply, refer to “Installing AT-
SBxPWRSYS2 AC Power Supplies” on page 87 for instructions.
If you are not installing a new power supply in the switch, cover the
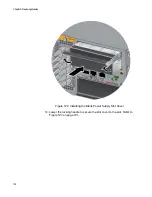
empty PSU slot with the blank panel, as explained in “Installing the
Blank Power Supply Slot Cover” on page 101.
Содержание AT-FAN08
Страница 10: ...Figures 10...
Страница 12: ...Tables 12...
Страница 16: ...Preface 16...
Страница 38: ...Chapter 1 Overview 38...
Страница 60: ...Chapter 2 Virtual Chassis Stacking 60...
Страница 80: ...Chapter 4 Installing the Chassis 80 Figure 32 Chassis Orientations in the Equipment Rack Continued...
Страница 82: ...Chapter 4 Installing the Chassis 82 Figure 34 Example of Adjusting the Equipment Rack Brackets...
Страница 104: ...Chapter 4 Installing the Chassis 104...
Страница 140: ...Chapter 5 Powering On the Chassis 140...
Страница 166: ...Chapter 7 Cabling the AT XEM2 Line Card Ports 166...
Страница 214: ...Appendix A Technical Specifications 214...


