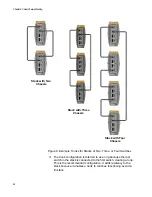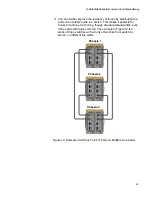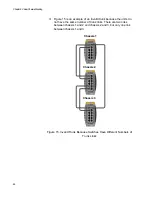
AT-SBx908 GEN2 Installation Guide for Virtual Chassis Stacking
33
You can install either one or two power supplies in the chassis. A
single power supply can power a fully equipped chassis. Installing
a second power supply adds power redundancy. If a power supply
fails or loses power, the second power supply continues to power
the system, thus preventing a disruption to network operations.
The power supplies are installed in the PSU A and PSU B slots in
the front panel of the chassis. If you are installing only one power
supply, Allied Telesis recommends installing it in PSU A slot
because that slot does not come with a blank slot cover.
The switch does not come with power supplies. They must be
purchased separately.
The power supplies are field-replaceable and hot-swappable. You
do not have to power off the switch to replace them.
Caution
The AT-SBxPWRSYS2 and AT-SBxPWRSYS1-80 Power Supplies
are not compatible with each other. Do not install both types of
power supplies in the chassis.
Содержание AT-FAN08
Страница 10: ...Figures 10...
Страница 12: ...Tables 12...
Страница 16: ...Preface 16...
Страница 38: ...Chapter 1 Overview 38...
Страница 60: ...Chapter 2 Virtual Chassis Stacking 60...
Страница 80: ...Chapter 4 Installing the Chassis 80 Figure 32 Chassis Orientations in the Equipment Rack Continued...
Страница 82: ...Chapter 4 Installing the Chassis 82 Figure 34 Example of Adjusting the Equipment Rack Brackets...
Страница 104: ...Chapter 4 Installing the Chassis 104...
Страница 140: ...Chapter 5 Powering On the Chassis 140...
Страница 166: ...Chapter 7 Cabling the AT XEM2 Line Card Ports 166...
Страница 214: ...Appendix A Technical Specifications 214...


