Chapter 7: Cabling the AT-XEM2 Line Card Ports
164
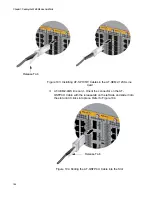
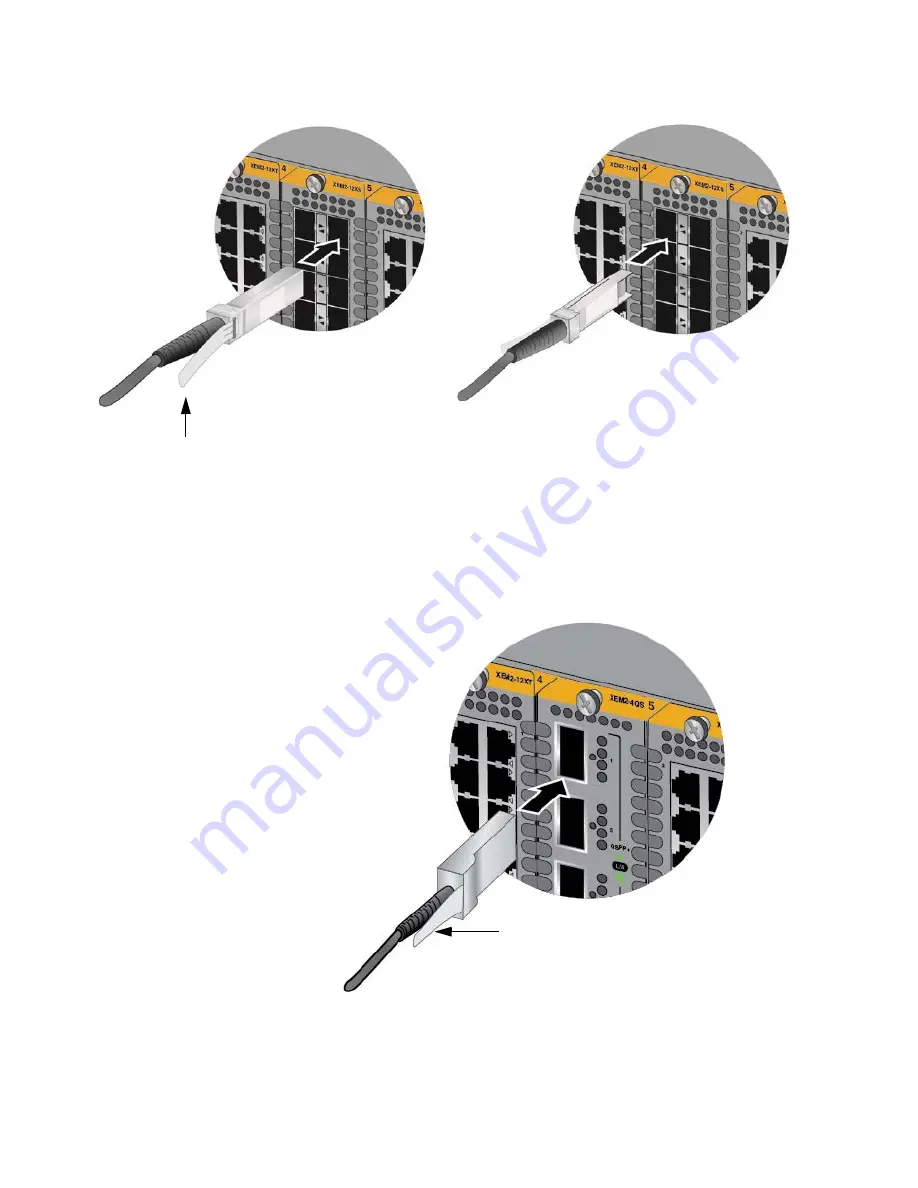
Figure 103. Installing AT-SP10TW Cables in the AT-XEM2-12XS Line
Card
AT-XEM2-4QS line card - Orient the connector on the AT-
QSFPCU Cable with the release tab on the left side and slide it into
the slot until it clicks into place. Refer to Figure 104.
Figure 104. Sliding the AT-QSFPCU Cable into the Slot
Release Tab
Release Tab
Содержание AT-FAN08
Страница 10: ...Figures 10...
Страница 12: ...Tables 12...
Страница 16: ...Preface 16...
Страница 38: ...Chapter 1 Overview 38...
Страница 60: ...Chapter 2 Virtual Chassis Stacking 60...
Страница 80: ...Chapter 4 Installing the Chassis 80 Figure 32 Chassis Orientations in the Equipment Rack Continued...
Страница 82: ...Chapter 4 Installing the Chassis 82 Figure 34 Example of Adjusting the Equipment Rack Brackets...
Страница 104: ...Chapter 4 Installing the Chassis 104...
Страница 140: ...Chapter 5 Powering On the Chassis 140...
Страница 166: ...Chapter 7 Cabling the AT XEM2 Line Card Ports 166...
Страница 214: ...Appendix A Technical Specifications 214...

