


Operation,
Screen Layout and Navigation
139187 / Rev. 500
RGS-2000NG TCAS Test Set Operation Manual
1-2-3
September 2021
Subject to Export Control. See Cover Page for details.
Page 205
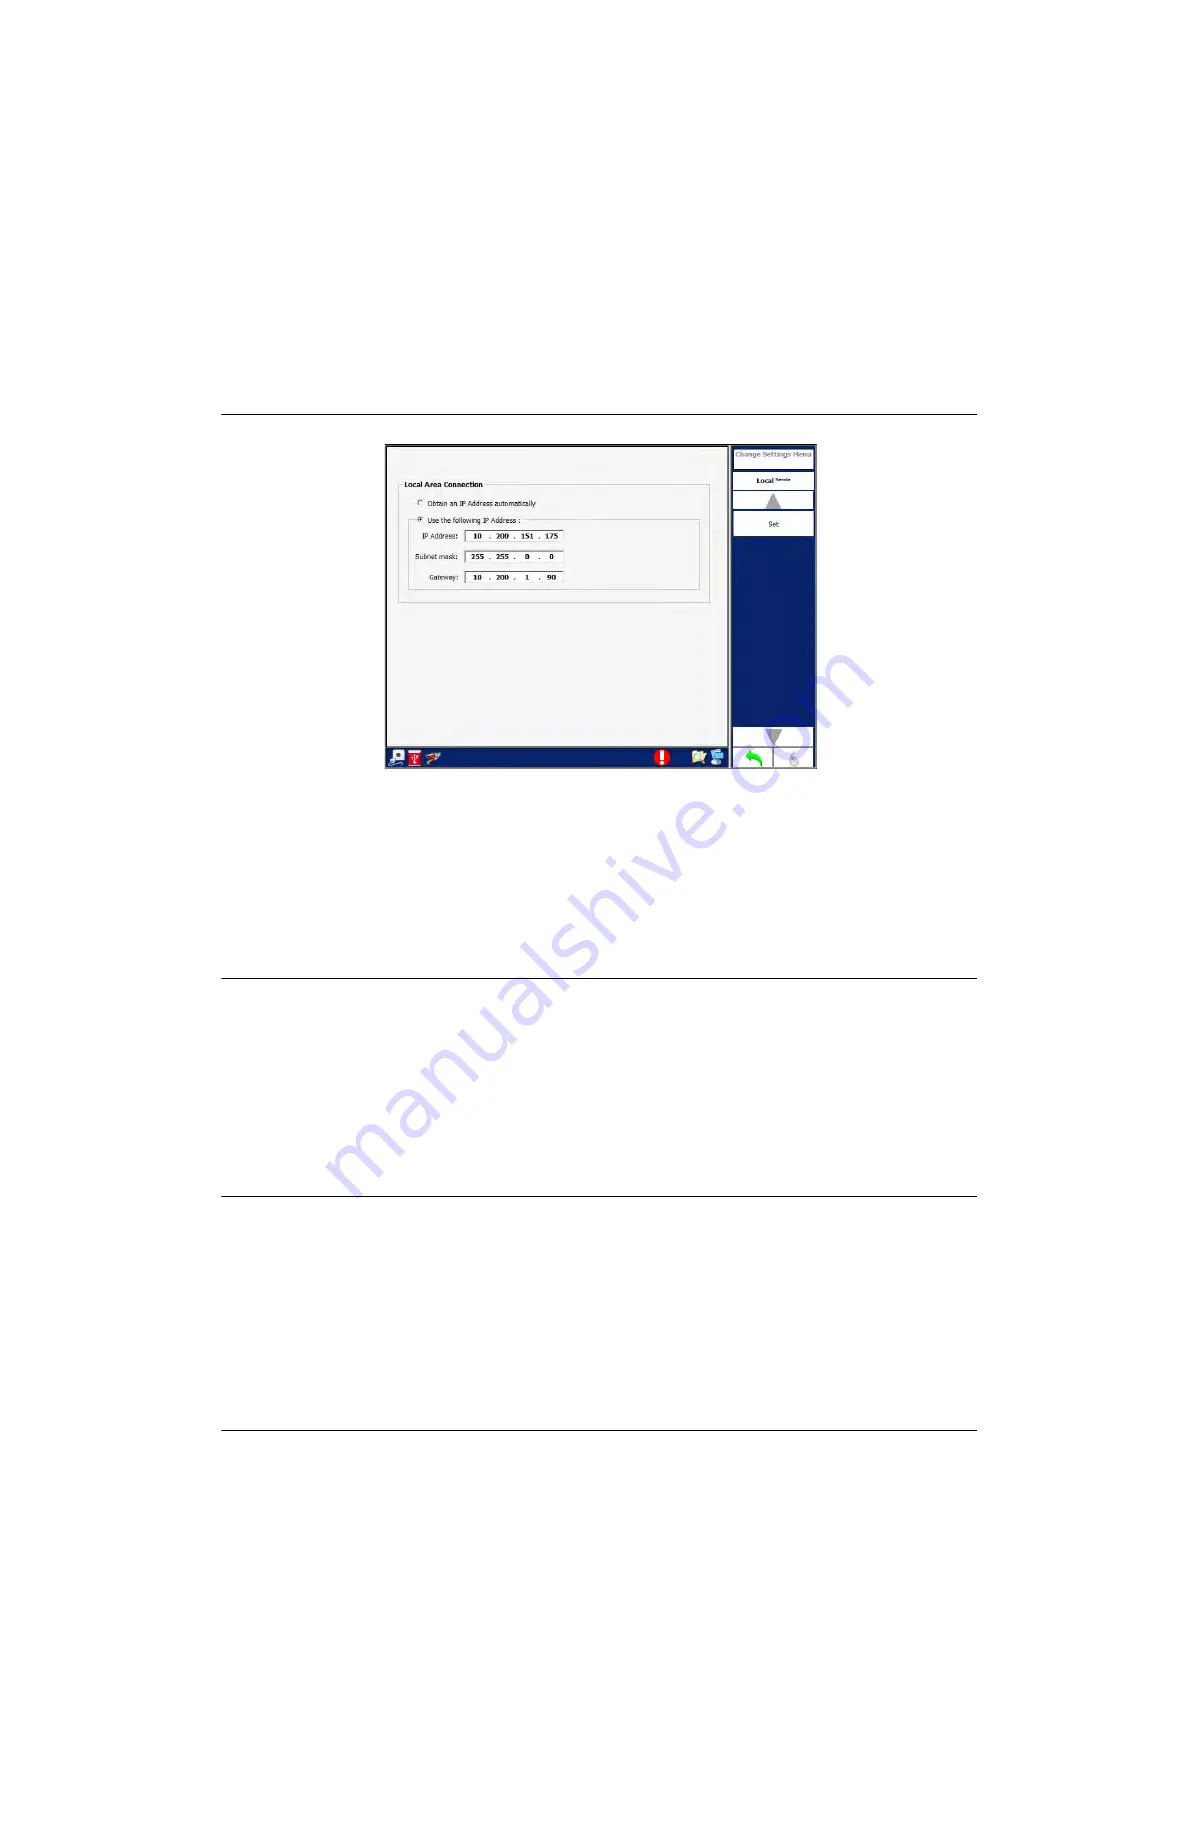
F i g u re 1 . 2 . 3 - 1 7 8 S t a t i c IP N e t w o r k S e t t i n g s E x a m p l e
3.7.3
HOW TO CONFIGURE NETWORK CONNECTIONS
3.7.3.1
Static IP Network Connection
NOTE:
USERS SHOULD CONTACT THE IR IT DEPARTMENT T O ENSURE THE STATI C IP
ADDRESS BEING ASSIGNED TO THE TEST SE T I S NO T ALREA D Y IN US E ON THE
NETWORK. ASSIGNING A STATIC IP ADDRESS TO THE TES T SET IF THE IP
ADDRESS IS ALREADY IN USE BY ANO THER DE VI CE ON TH E NE TWOR K WI LL
CAUSE A NETWORK CONFLICT.
STEP
PROCEDURE
1
Connect an active Ethernet cable to the test Set’s Front or Rear Panel LAN Connector.
2
Navigate to the Network Connections Screen.
3
Select the LAN Connector from the Network Connection Table.
4
Press the Change Settings Softkey.
5
Select the Use the following IP Address tick box.
6
Enter the IP Address, Subnet Mask and Gateway fields according to network settings.
7
Press the Set Softkey to initialize the network settings.
3.7.3.2
DHCP Network Connection
STEP
PROCEDURE
1
Connect an active Ethernet cable to the test Set’s Front or Rear Panel LAN Connector.
2
Navigate to the Network Connections Screen.
3
Select the LAN Connector from the Network Connection Table.
4
Press the Change Settings Softkey.
5
Select the Obtain an IP Address automatically tick box.
6
Press the Set Softkey to initialize the network settings.
7
Wait while the server configures the Test Set’s network connection.


