Installing the Dektak 150 System
2-23
Adjusting the Optics
1
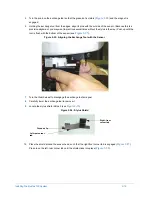
Locate the vertical standard in Box 3 and gently remove it from its case. Follow these steps:
a.
Over a table or countertop, snap open the yellow clasp and spread the opened two parts of the case (see
b.
Pick up the standard by the edges, and turn it over so that the blank is facing up.
c.
Inspect the standard for dust. If dust is present, clean the standard with isopropyl alcohol and a lint-free
tissue.
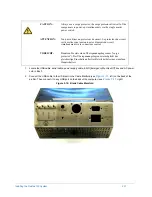
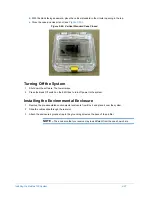
Figure 2-32: Vertical Standard Case Opened
2
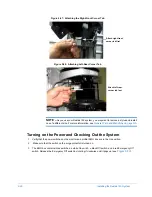
Position the standard on the stage beneath the stylus, with the printing facing the front of the system (see
). The system scans from front to back, so be sure there are at least a few millimeters of the
standard located to the back of the stylus tip
NOTE –
The above activity cannot damage the stylus/sensor. However, clipped data may
appear on the monitor.
3
Press the
Stylus Down
button
to lower the stylus onto the standard (see
).
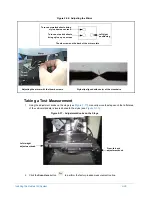
Figure 2-33: Stylus Lowered onto the Standard
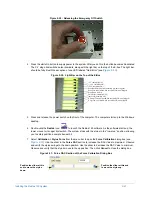
4
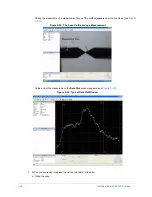
Near the base of the optical assembly, loosen the zoom lock screw. Watching the computer monitor, turn
the focus ring until the stylus tip on screen is as sharp as possible (see
). Finger-tighten the
focus lock screw.
Vertical standard
Standard block
Stylus
Summary of Contents for Dektak 150
Page 1: ......
Page 7: ......
Page 17: ......
Page 81: ......
Page 105: ......
Page 149: ......
Page 191: ......
Page 251: ......
Page 257: ...A 6 Facilities Specifications Figure A 6 Dektak 150 without Enclosure Side View ...
Page 258: ...Facilities Specifications A 7 Figure A 7 Dektak 150 Dimensions without Enclosure Top View ...
Page 259: ...A 8 Facilities Specifications Figure A 8 Dektak 150 without Enclosure Center of Mass ...
Page 273: ......
Page 283: ......
Page 321: ......
Page 331: ......
Page 333: ......
Page 336: ......
Page 337: ......
Page 349: ......


