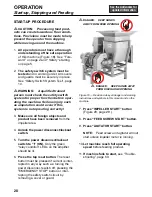
29
STOPPING PROCEDURE
WARNING:
Never attempt to open
or remove covers or guards while
machine is running! Contact with
exposed rotating parts may cause
severe injury such as amputation!
1.
Stop feeding product.
This allows
remaining product to be cut and dis-
charged.
2.
Flush the feed area thoroughly
with a
generous amount of water BEFORE
stopping the machine. See pages
36–37 for complete cleaning proce-
dures.
3.
Press the “IMPELLER STOP” button.
The feed screw and agitator will stop
immediately; the impeller will stop 5 to 6
seconds later in order to cut and dis-
charge any remaining product.
Disconnect and lock out power
source.
After the motor has come to a
complete stop, push the “IMPELLER
START” button to verify that the machine
will not start.
To stop the agitator only when the
machine is running, press the “AGITATOR
STOP” button. The feed screw and
impeller will continue to run. To stop the
agitator and feed screw only, press the
“FEED SCREW STOP” button. The
impeller will continue to run.
OPERATION
Start-up, Stopping and Feeding
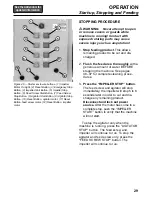
Figure 20 — Starter enclosure buttons. (1) Impeller
Motor On Light, (2) Reset Button, (3) Emergency Stop
Button, (4) Impeller Start Button, (5) Impeller Stop
Button, (6) Feed Screw Start Button, (7) Feed Screw
Stop Button, (8) Agitator Start Button, (9) Agitator Stop
Button, (10) Reset Button, agitator motor, (11) Reset
Button, feed screw motor, (12) Reset Button, impeller
motor
3
2
1
4
6
8
10
5
7
9
12
11
Summary of Contents for COMITROL 2100
Page 2: ......
Page 28: ...Addendum A 26 This page intentionally left blank...
Page 84: ...6 This page intentionally left blank...
Page 94: ...16 This page intentionally left blank...
Page 95: ...17 GENERAL INFORMATION...
Page 101: ...23 INSTALLATION...
Page 104: ...26 This page intentionally left blank...
Page 110: ...32 This page intentionally left blank...
Page 131: ...53 PARTS...
Page 132: ...54 This page intentionally left blank...
Page 134: ...56 PARTS Tools See the Addendum for updated information...
Page 138: ...60 PARTS Agitator Feed Screw See the Addendum for updated information...
Page 146: ...PARTS Motor and Drive Parts 68 See the Addendum for updated information...
Page 148: ...PARTS Electrical Assembly NEMA 70 See the Addendum for updated information...
Page 152: ...PARTS Electrical Assembly CE compliant 74 See the Addendum for updated information...
Page 156: ...78 PARTS Electrical Assembly Switches See the Addendum for updated information...
Page 165: ......


