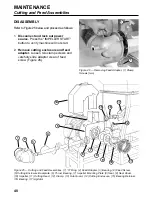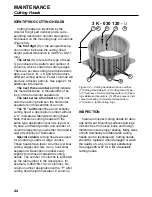
REASSEMBLY
1.
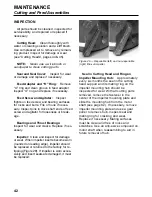
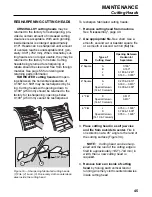
Install seal and seal cover.
Make sure
seal is properly oriented (tabs flush with
seal surface facing out). See Figure 30.
2.
Install impeller.
All mating surfaces
must be free from nicks or foreign mate-
rial. Install fasteners and tighten
securely.
3.
Replace hub guard
if removed.
4.
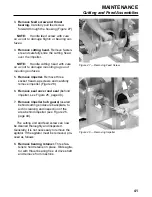
Install cutting head
and replace fas-
teners.
5.
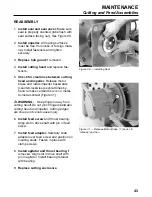
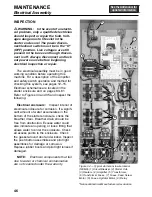
Check for clearance between cutting
head and impeller.
Release motor
brake and rotate impeller backwards
(counterclockwise) several times by
hand to make certain there is no metal-
to-metal contact (Figure 31).
WARNING:
Keep fingers away from
cutting head! Do not pinch fingers between
cutting head and impeller. Cutting edges
are sharp and could cause injury.
6.
Install feed screw
and thrust bearing.
Align slot in drive shaft with pin in feed
screw.
7.
Install feed adapter.
Carefully slide
adapter over feed screw and position on
locating studs. Fasten in place with
clamp screws.
8.
Install agitator and thrust bearing
if
removed. Align slot in drive shaft with
pin in agitator. Install bearing retainer
with bearing.
9.
Replace cutting enclosure.
43
MAINTENANCE
Cutting and Feed Assemblies
Figure 30 — Installing Seal
Figure 31 — Release Motor Brake. (1) Lever, in
“release” position
1
Summary of Contents for COMITROL 2100
Page 2: ......
Page 28: ...Addendum A 26 This page intentionally left blank...
Page 84: ...6 This page intentionally left blank...
Page 94: ...16 This page intentionally left blank...
Page 95: ...17 GENERAL INFORMATION...
Page 101: ...23 INSTALLATION...
Page 104: ...26 This page intentionally left blank...
Page 110: ...32 This page intentionally left blank...
Page 131: ...53 PARTS...
Page 132: ...54 This page intentionally left blank...
Page 134: ...56 PARTS Tools See the Addendum for updated information...
Page 138: ...60 PARTS Agitator Feed Screw See the Addendum for updated information...
Page 146: ...PARTS Motor and Drive Parts 68 See the Addendum for updated information...
Page 148: ...PARTS Electrical Assembly NEMA 70 See the Addendum for updated information...
Page 152: ...PARTS Electrical Assembly CE compliant 74 See the Addendum for updated information...
Page 156: ...78 PARTS Electrical Assembly Switches See the Addendum for updated information...
Page 165: ......

