Chapter 10: Camera setup
72
TruVision NVR 22 (SP) User Manual
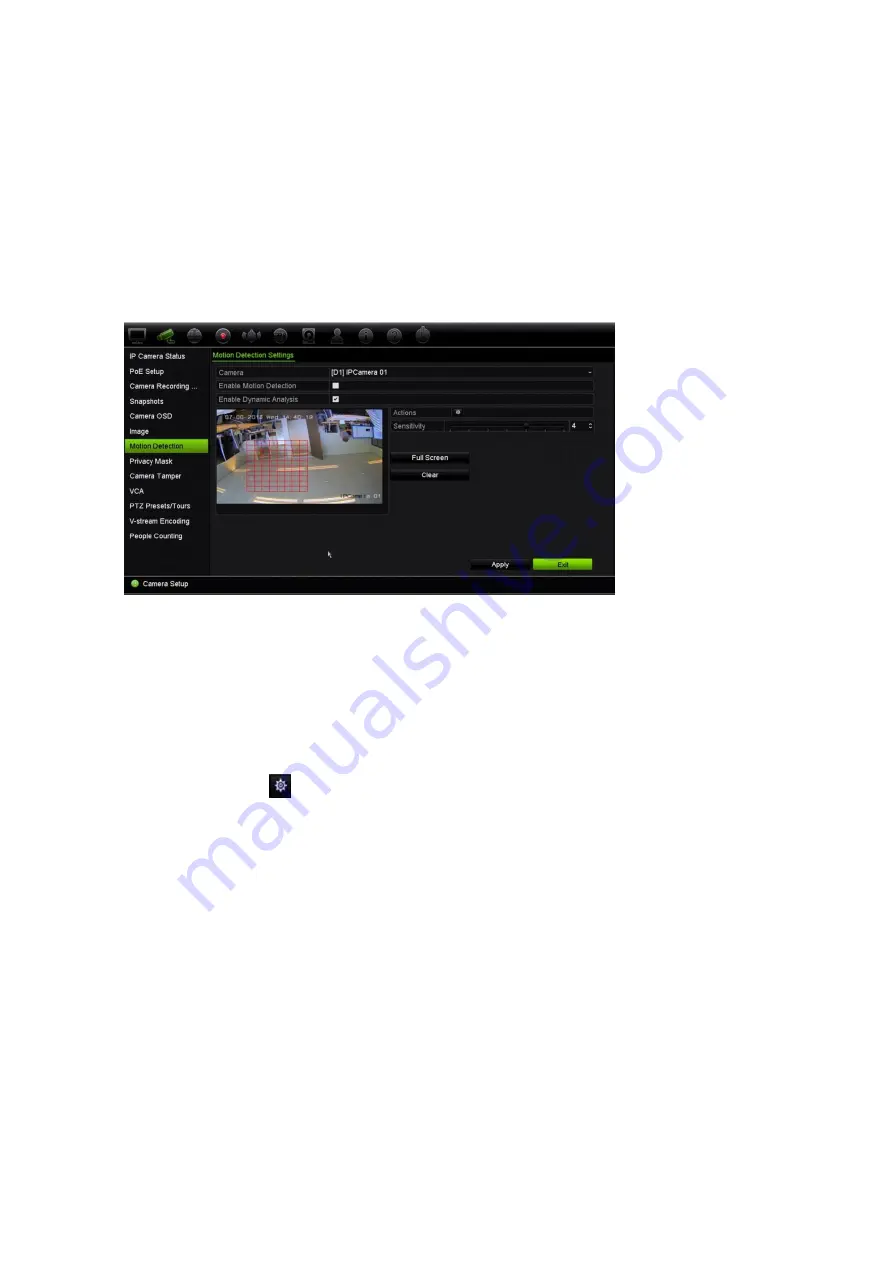
2. Select the camera to detect motion. Each camera must be set up individually.
3. Select
Enable Motion Detection
. If this is not enabled, motion will not be recorded.
4. Select
Enable Dynamic Analysis
. This allows you to see on-screen motion being
detected while setting up the feature. Areas where motion is detected are shown as
solid red squares in the motion grid.
5. Create the areas on-screen to be sensitive to motion.
Click and drag the mouse cursor across the window to select areas sensitive to
motion detection, which are shown as a red motion grid.
Click
Full Screen
to activate the whole screen or
Clear
to clear the screen.
6. Set the sensitivity level.
Drag the Sensitivity scroll bar to the desired sensitivity level. Maximum sensitivity is
6. Default is 4.
7. Select the cameras that will start the motion recording schedule once motion is
detected.
Click the
Actions
button. The Actions window appears.
8. Click the
Trigger Channel
tab and select the cameras that will record when a
motion alarm is triggered.
Click
Apply
to save the settings.
9. Select the arming schedules for motion detection.
In the Actions window, click the
Arming Schedule
tab and select the day of the
week and the time periods during the day when motion detection can trigger the
given actions. You can schedule up to eight time periods in a day. Default is 24
hours. Note that when motion detection is enabled, motion events will always trigger
event recording, regardless of the arming schedule.
Note:
Time periods defined cannot overlap.
Click
Apply
to save the settings. Click
Copy
to copy the settings to other days of
the week.
10. Link the corresponding action to motion detection.


