79
TRAK Machine Tools
Southwestern Industries, Inc.
32240 - Printer and MMS - Installation & Printing Guide
17.
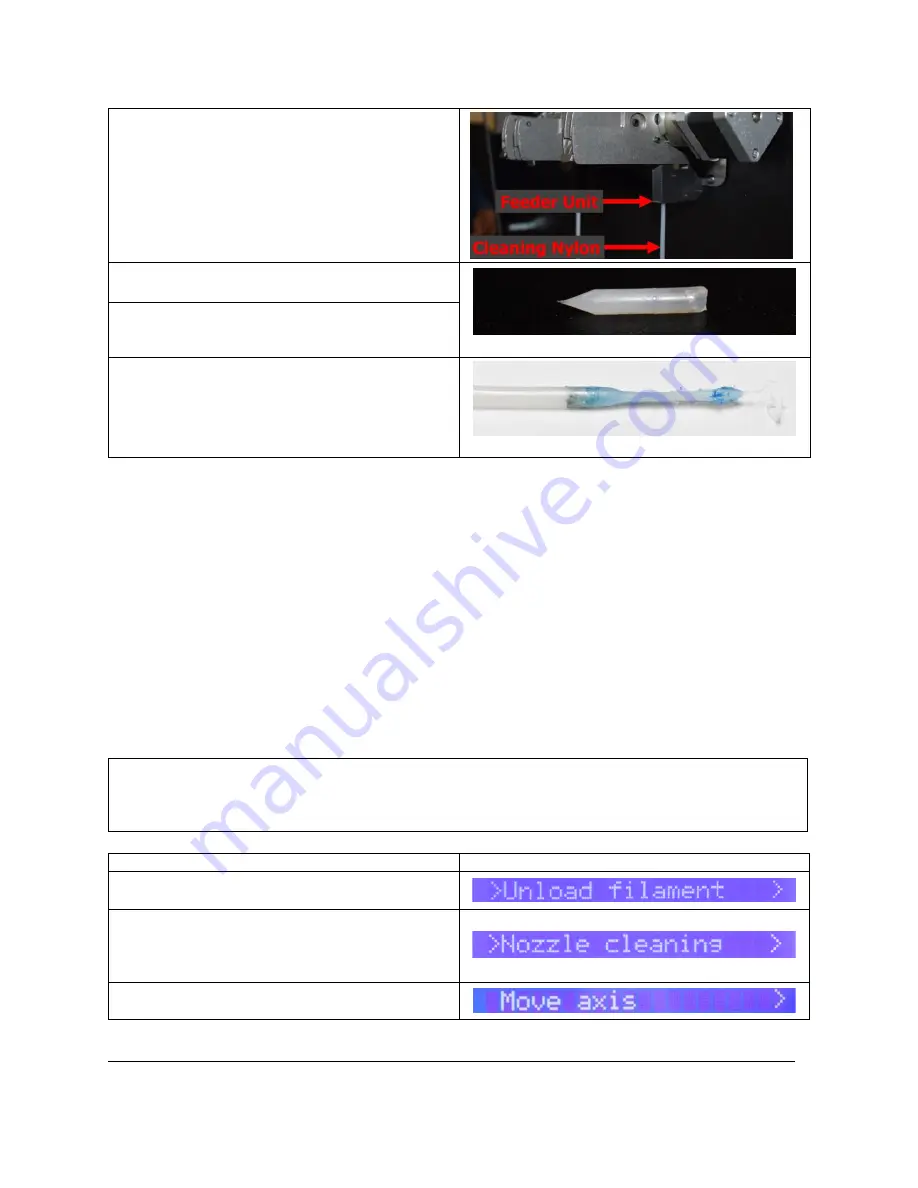
Feed the Cleaning Nylon into the Feeder
Unit.
18.
Inspect the Nylon tip to see if it is clean and
cone shaped.
Clean, Cone shaped Nylon tip
19.
If it looks like the picture on the right, your
nozzle is now ready to be loaded with new
filament!
20.
If it is not, repeat the Nozzle Cleaning
Operation until it looks clean and cone
shaped.
Dirty, misshaped Nylon Tip
5.3
Nozzle Changes
Once you verify that maintenance is up to date, have the correct file loaded, and learned to
load/unload/change filament and clean the nozzles, it's time to verify the nozzle setup! The nozzle is the
component of a 3D printer that actually extrudes the filament to build the part. There are many different
types and sizes available, and installing the correct one for the print is critical.
Nozzle Types
The nozzle type can have a large impact on the quality of your print, as well as how quickly you have to
replace the nozzles. Before you print, you should verify that you are using the correct nozzle type, based
on the material required for the print.
Nozzle Sizes
Nozzle sizes can have a huge impact on print quality, surface finish and print time. Before you print,
make sure the printers’ nozzles are configured based on the settings you selected on the slicer.
5.3.1
Nozzle Change Procedure
Step
Image
1.
Unload filament
from the nozzles being
changed.
2.
Perform the
Clean Nozzle Procedure
, this
will ensure most of the material within the
nozzle is removed, in order to make the
nozzle change much easier.
3.
Using the
Move Axis
function, move the Z
–
Axis about 200mm down.
CAUTION
When printing, you must install the correct nozzle diameter size and nozzle type based upon the print
requirements. Failure to install the correct nozzle size and type may result in bad prints, clogged
nozzles, rapid nozzle wear, and/or machine downtime.


