2-6
T1960CS/T1960CT
Check 4
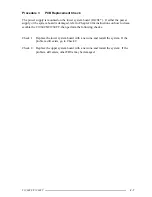
Place the computer in an environment between –20°C and 70°C until it reaches
ambient temperature. Repeat the steps which caused the computer to malfunction.
If the same problem still appears, perform Procedure 3.
Procedure 2
Battery LED Indicator Check
The Battery LED indicator shows the battery charging status. The LED, identified by a
battery icon on the front of the computer, glows orange when the AC adapter is charging the
computer’s battery pack.
❑
If the Battery
LED indicator glows green, the AC adapter is connected and the battery
is fully charged.
❑
If the indicator glows orange, the AC adapter is connected and the battery is being
charged.
❑
If the indicator does not glow, go to Check 1.
Check 1
Make sure the AC adapter’s cable and AC cord are firmly plugged into the DC IN
socket and wall outlet. If these cables are connected correctly, go to Check 2.
Check 2
Make sure the battery pack is installed in the computer correctly. If it is, go to
Check 3.
Check 3
Remove the battery pack and check that the battery terminal is clean and not bent.
❑
If the terminal appears dirty, clean it gently with a cotton swab dipped in
alcohol.
❑
If the terminal looks bent or damaged, replace the lower system board.
❑
If the battery terminal is clean and not bent, go to Check 4.
Check 4
Connect a new AC adapter. If the Battery LED indicator still does not glow, go
to Check 5.
Check 5
Install a new battery pack. If the Battery LED indicator still does not glow, go to
Procedure 3.
Summary of Contents for T1960CS
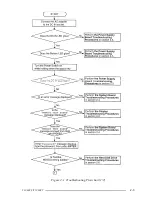
Page 20: ...T1960CS T1960CT 2 3 Figure 2 1 Troubleshooting Flowchart 1 2 ...
Page 154: ...B 2 T1960CS T1960CT Figure B 2 FA2SU FA2PU System Board back ...
Page 156: ...B 4 T1960CS T1960CT B 2 FA2SL System Board Figure B 3 FA2SL System Board front ...
Page 157: ...T1960CS T1960CT B 5 Figure B 4 FA2SL System Board back ...
Page 169: ...T1960CS T1960CT D 1 Appendix D USA Display Codes Table D 1 USA Display Codes ...


