Edit a mask
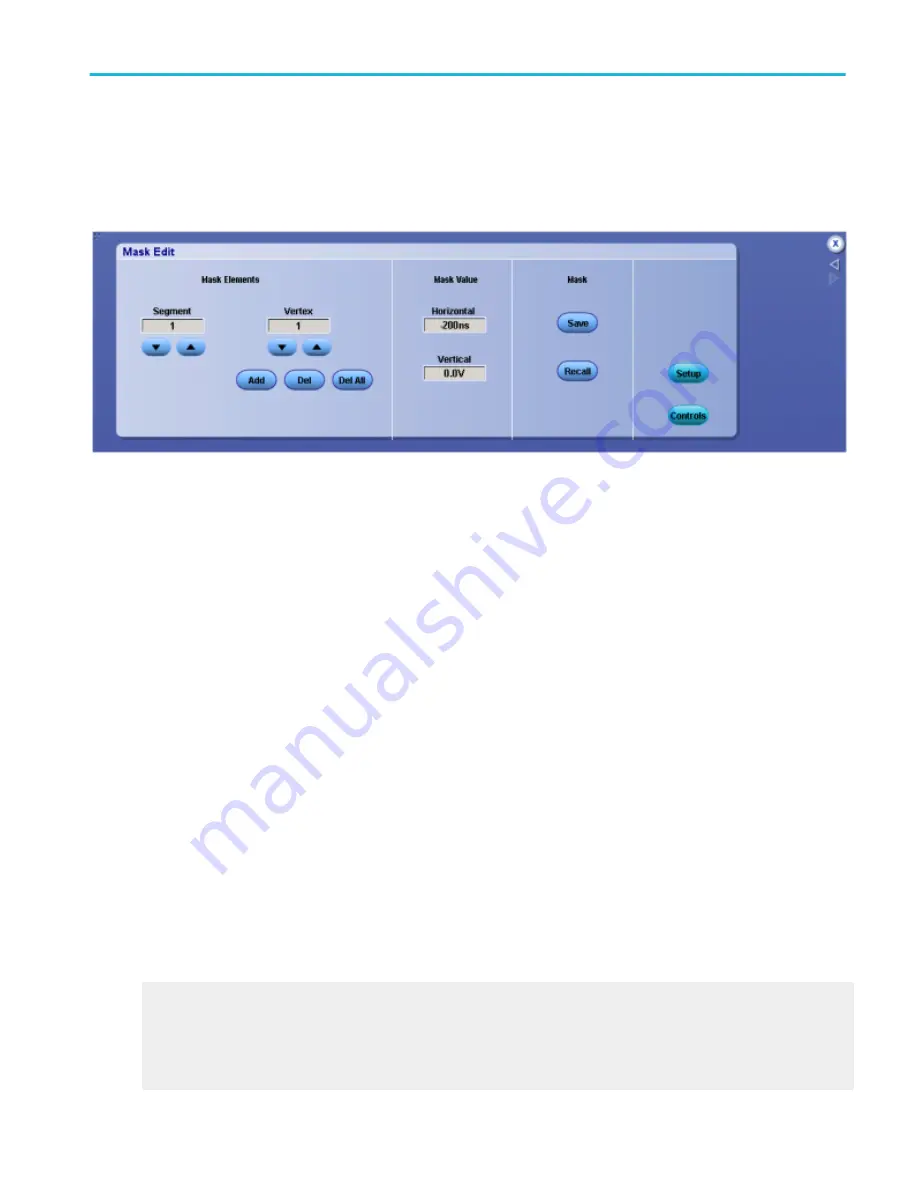
From the Mask menu, select Mask Edit Setup, or click the Edit User Mask button in the Mask Testing control window.
Overview. Use this control window to select the Segment and Vertex for editing, set the Horizontal and Vertical mask values,
and Save or Recall masks.
To use.
■
Click the Mask Segment and Vertex up and down arrows to select the segment or the vertex of the mask to be edited.
■
Click Add to add a point to the boundary in the selected segment and just after the selected vertex.
■
Click Del to delete the selected vertex from the selected segment.
■
Click Del All to remove all points in the selected segment.
■
To change the horizontal or vertical mask values for the selected segment and vertex, click in the Horizontal or Vertical entry
boxes, and then use the multipurpose knobs to set the values.
■
To save a mask, click Save to activate the Save As dialog box.
■
To recall a previously saved mask, click Recall to activate the Recall dialog box.
Behavior. The Segment up and down arrows increase or decrease the segment number by one. The Vertex up and down
arrows increase or decrease the vertex by 1. To set a specific number, click in the Vertex entry box to activate the pop-up
calculator.
Clicking the Add button adds a point to the boundary in the selected segment and just after the selected vertex in addition to
moving any points that follow the newly added point in the boundary up one. For example, if there are 6 points in the boundary of
the selected segment and you add a point when the selected vertex is 4, then the vertex which was 4 becomes vertex number 5,
number 5 becomes 6, and vertex 6 is changed to vertex 7.
Clicking Del deletes the selected vertex from the selected segment and moves any points that follow the deleted point down one
in the boundary. Clicking Del All deletes all points in the selected segment, effectively deleting that segment.
where you can make quick changes to a User mask.
What do you want to do next?
Learn about recalling saved masks.
Mask testing setups
DPO70000SX, MSO/DPO70000DX, MSO/DPO70000C, DPO7000C, and MSO/DPO5000B Series
225
Summary of Contents for DPO2304SX
Page 1: ...Tektronix Digital Phosphor Oscilloscopes Printable Help P077006219 077 0062 19...
Page 2: ......
Page 3: ...Tektronix Digital Phosphor Oscilloscopes Printable Help www tek com 077 0062 19...
Page 32: ...Introduction xxviii DPO70000SX MSO DPO70000DX MSO DPO70000C DPO7000C and MSO DPO5000B Series...
Page 130: ...Cursor setups 98 DPO70000SX MSO DPO70000DX MSO DPO70000C DPO7000C and MSO DPO5000B Series...
Page 198: ...MagniVu setup 166 DPO70000SX MSO DPO70000DX MSO DPO70000C DPO7000C and MSO DPO5000B Series...
Page 212: ...Display setups 180 DPO70000SX MSO DPO70000DX MSO DPO70000C DPO7000C and MSO DPO5000B Series...
Page 300: ...Math setups 268 DPO70000SX MSO DPO70000DX MSO DPO70000C DPO7000C and MSO DPO5000B Series...
Page 408: ...MyScope setups 376 DPO70000SX MSO DPO70000DX MSO DPO70000C DPO7000C and MSO DPO5000B Series...
Page 510: ...Trigger setups 478 DPO70000SX MSO DPO70000DX MSO DPO70000C DPO7000C and MSO DPO5000B Series...
Page 548: ...Vertical setups 516 DPO70000SX MSO DPO70000DX MSO DPO70000C DPO7000C and MSO DPO5000B Series...
Page 605: ...Utilities DPO70000SX MSO DPO70000DX MSO DPO70000C DPO7000C and MSO DPO5000B Series 573...
Page 606: ...Utilities 574 DPO70000SX MSO DPO70000DX MSO DPO70000C DPO7000C and MSO DPO5000B Series...
Page 920: ...Index 888 DPO70000SX MSO DPO70000DX MSO DPO70000C DPO7000C and MSO DPO5000B Series...


