1-82
3
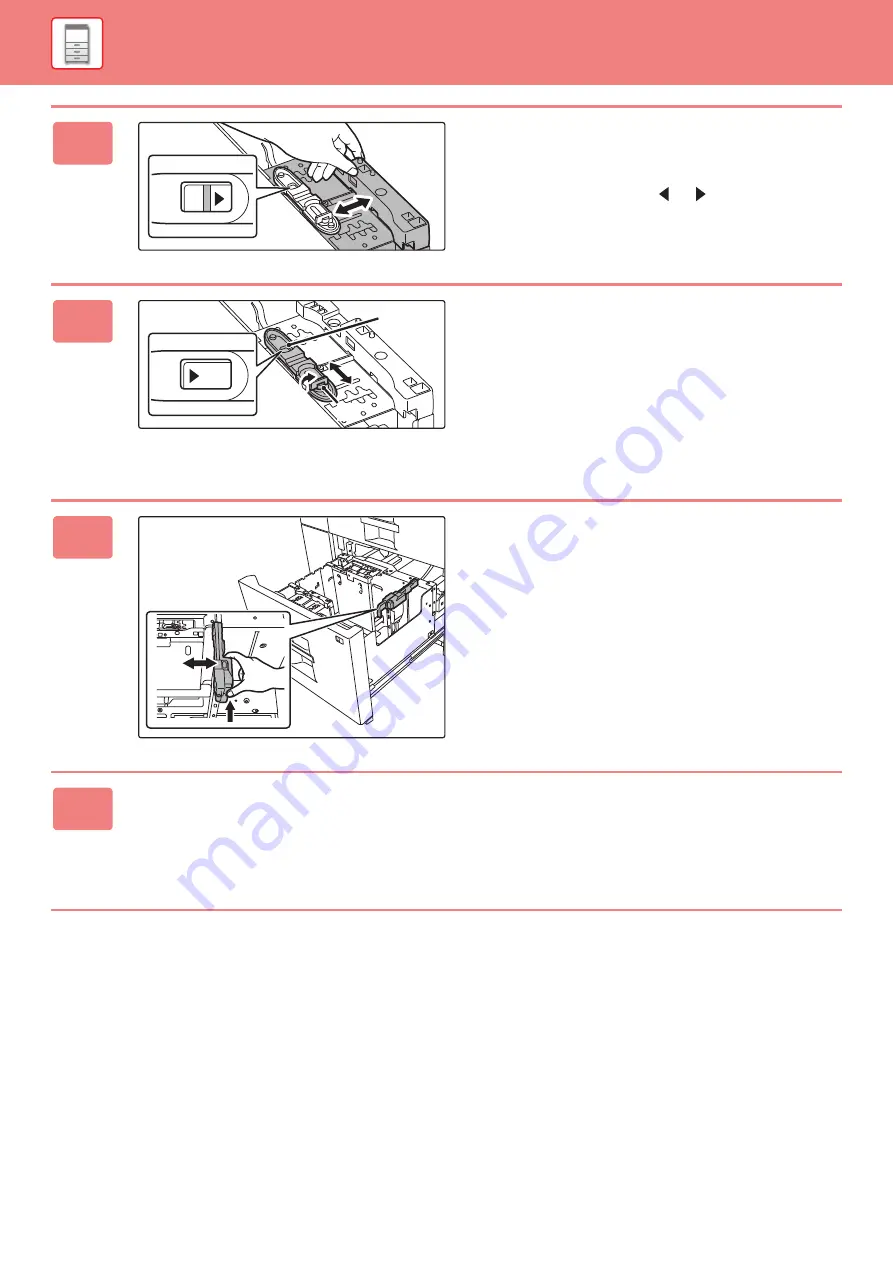
Adjust the paper guide to the paper
size that will be used.
Slide the paper guide forward or backward until the size
mark of the paper to be used (
or
) appears in the size
window of the plate.
Both near and far plates slides when you slide one of those.
4
Secure the paper guide.
(1) Slide the plate of the paper guide.
Slide the plate until the paper size to be used appears
in the size window of the plate.
Both near and far plates slides when you slide one of
those.
(2) Tighten the paper guide screw.
Tighten both far and near paper guide screws.
5
Change the right paper guide to the
paper size to be used.
(1) While holding the paper guide lock, slide
the paper guide to the paper size to be
used.
(2) Release the paper guide lock.
(3) Move the paper guide slightly to the right
and left so that it locks into place.
You will hear a "click" when the paper guide locks.
6
Set the paper size and paper type.
Be sure to set the paper size and paper type by selecting [Tray Settings] in the home screen or in "Settings", select
[System Settings]
→
[Common Settings]
→
[Paper Settings]
→
[Paper Tray Settings].
If the paper size setting is not configured correctly, automatic paper selection will not operate correctly and printing may
take place on the wrong size or type of paper or a misfeed may occur.
11
(1)
(2)


