5-28
►
2
Specify the destination.
►
RETRIEVING A DESTINATION FROM AN ADDRESS BOOK (page 5-16)
►
VIEWING A LIST OF THE SELECTED DESTINATIONS (page 5-19)
►
USING A SEARCH NUMBER TO RETRIEVE A DESTINATION (page 5-20)
►
ENTERING AN ADDRESS MANUALLY (page 5-21)
►
SPECIFYING A NETWORK FOLDER (page 5-22)
►
RETRIEVING A DESTINATION FROM A GLOBAL ADDRESS BOOK (page 5-23)
►
USING A TRANSMISSION LOG TO RESEND (page 5-25)
The icon on the key indicates the type of destination stored in the key.
Scan to E-mail
Scan to FTP
Scan to Network Folder
Scan to Desktop
• After a one-touch key is tapped, if the screen is changed without tapping
, the destination of the tapped key is
automatically specified.
• When performing Scan to E-mail, you can also send Cc or Bcc copies to other destinations. Tap the [Address Review]
key to select destinations.
►
VIEWING A LIST OF THE SELECTED DESTINATIONS (page 5-19)
• Multiple destinations can be specified.
• To change [Subject], [File Name], [Reply-To], or [Body Text] in normal mode, tap a target entry box, or tap [Options].
►
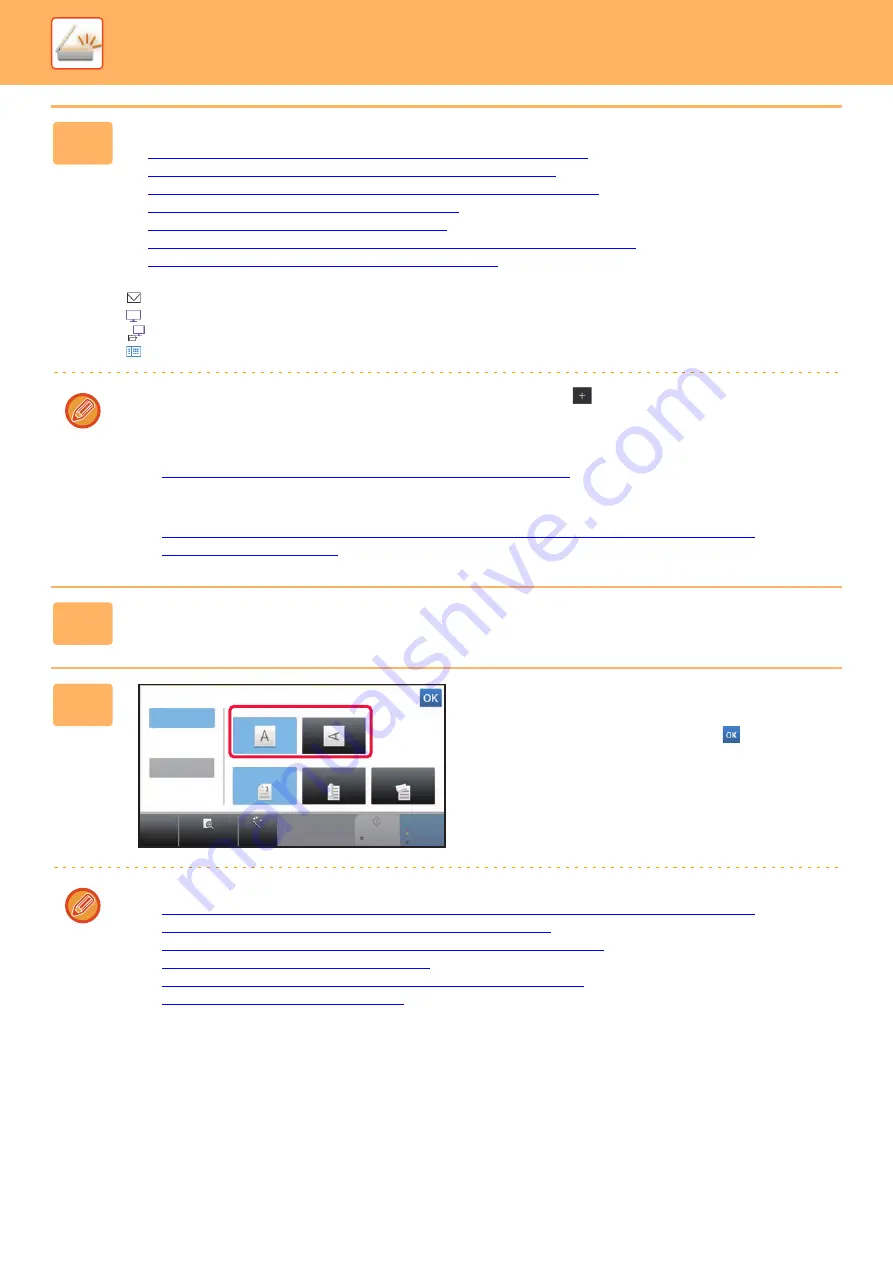
3
Tap the [Original] key.
4
Tap the appropriate orientation key.
Specify the orientation of the original placed in step 1.
After the settings are completed, tap
.
• You can change exposure, resolution, file format, color mode, and other settings.
►
AUTOMATICALLY SCANNING BOTH SIDES OF AN ORIGINAL (2-SIDED ORIGINAL) (page 5-45)
►
SCAN SIZE AND SEND SIZE (ENLARGE/REDUCE) (page 5-46)
►
CHANGING THE EXPOSURE AND ORIGINAL IMAGE TYPE (page 5-54)
►
CHANGING THE RESOLUTION (page 5-56)
►
CHANGING FORMAT IN SCAN OR DATA ENTRY MODE (page 5-57)
►
CHANGING COLOR MODE (page 5-62)
• Tapping the [Others] key allows you to configure various functions, for example, collectively sending two original
pages as one sheet or original pages with different sizes.
CA
Preview
Auto Set
B/W
Start
Color
Start
Auto
Original
Image Orientation
Duplex Setup
1-Sided
Book
Tablet
Long Size


