7
The Sapling Company, Inc.
1633 Republic Road
Huntingdon Valley, PA 19006
USA
P. (+1) 215.322.6063
F. (+1) 215.322.8498
www.sapling-inc.com
Synchronization System Setup (ctd.)
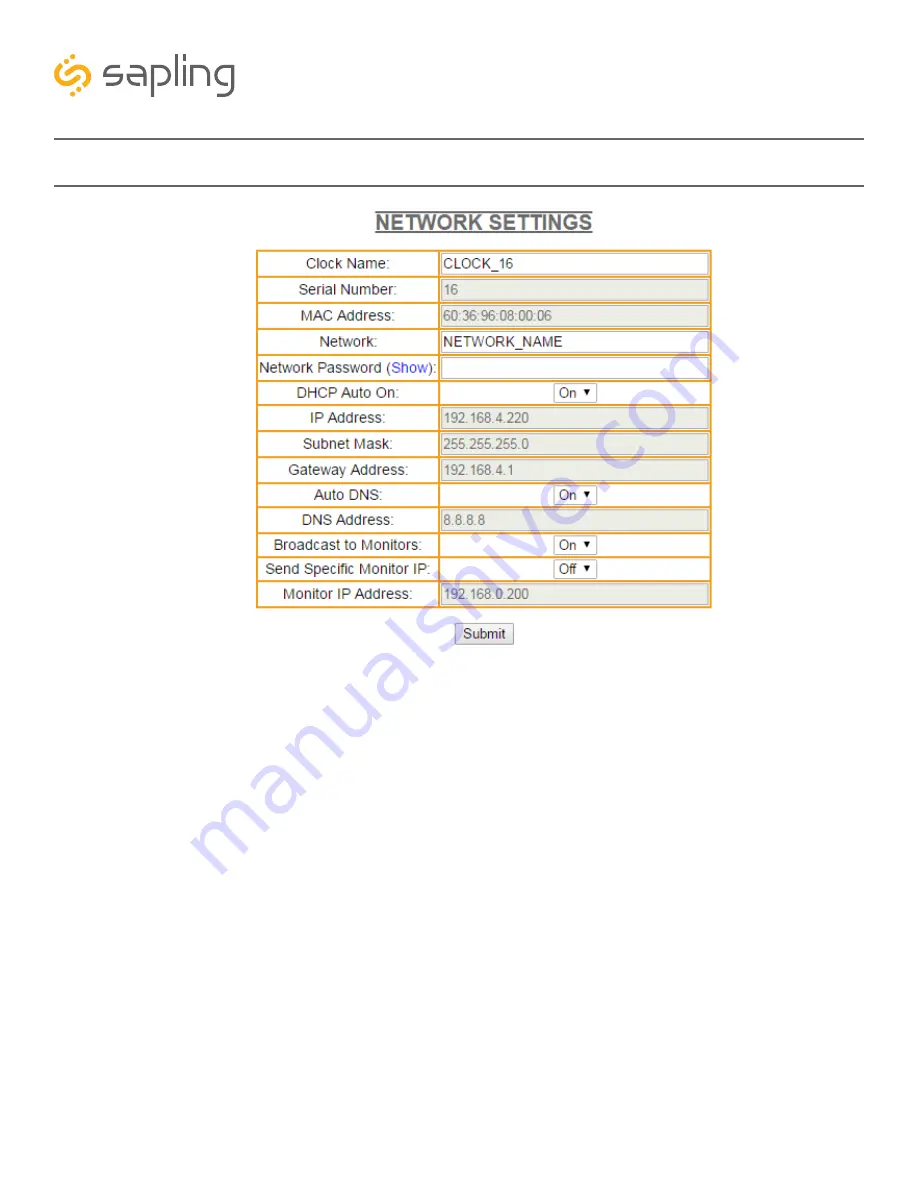
6. In the
Network
field, enter the SSID of your preferred Wi-Fi network. This is the name that appears
if you try to connect to that Wi-Fi network on any other computer, tablet, or smart phone.
7. In the
Network Password
field, enter the password of your preferred Wi-Fi network. Network
passwords must be twenty-six characters or fewer.
8. If you wish to set a static IP address, change DHCP Auto On from ON to OFF, then enter information
for the Static IP address, Subnet Mask, and Gateway Address. To acquire this information, contact your
network administrator.
9. If you wish to set a DNS server other than the one provided through DHCP, change Auto DNS from
ON to OFF, then enter an IP address for a new DNS server in the DNS Address field.
10. Press the
Submit
button, followed by the
Log Out
button.
11. The clock should connect to the new Wi-Fi network. Confirm by accessing the clock with the IP
Monitor (If clock DHCP is on and the computer is on the same subnet as the Access Point) or the new
static IP address (if clock DHCP is off). If the clock is not accessible, press the WiFi SW button once and
wait thirty seconds before trying to access the clock with the IP monitor or IP address. If the clock is still
not accessible, refer to the section of this manual labeled “Troubleshooting”
For battery powered clocks:
For the first ten minutes after powering on a new (or recently reset-to-
default) clock will be accessible once every minute. Once the user has entered and saved new network
settings, the clock will only connect to the network once to make initial contact, then it will not access
the network again until the next synchronization period four hours later. To force the clock to power its
transmitter, the user must press the WiFI SW button.
6
8
10
7
9


