


251
【
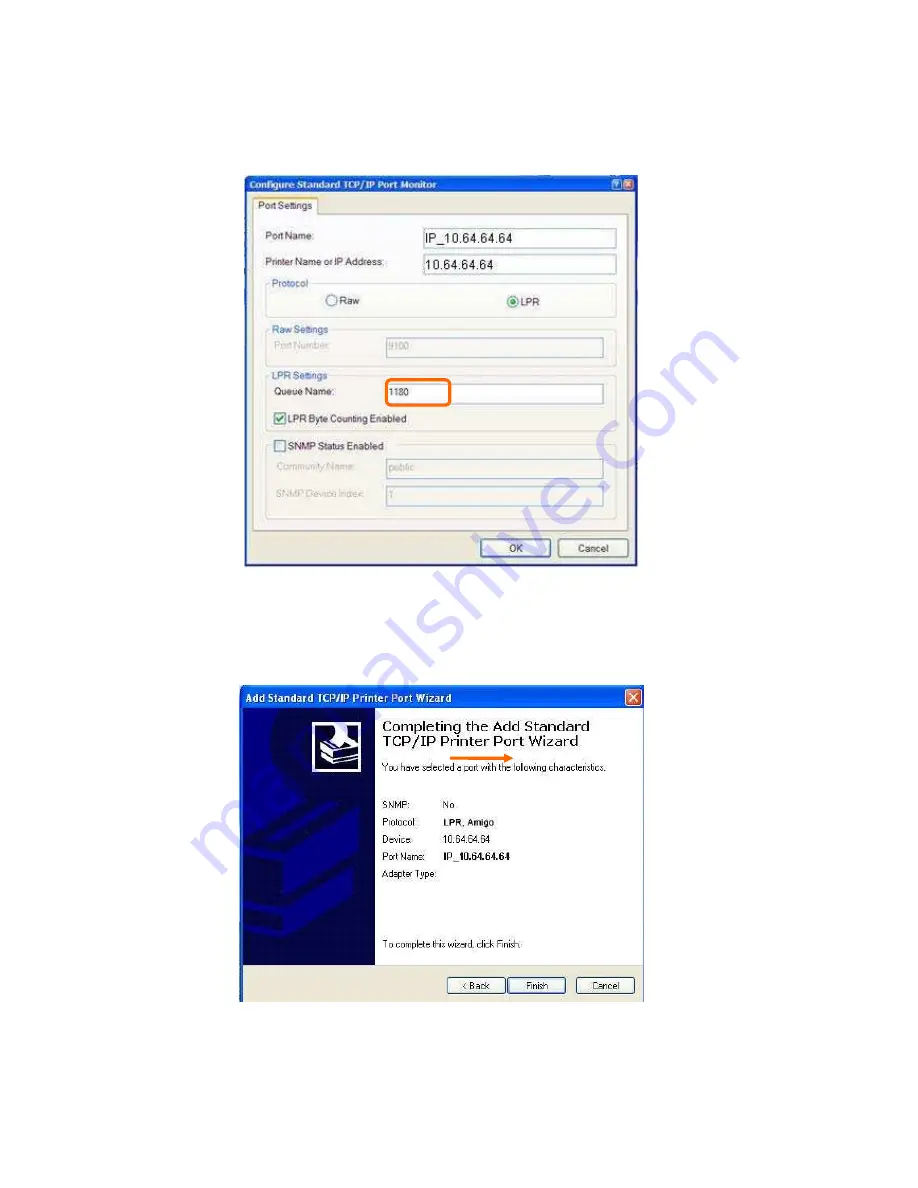
Step 9
】
Select
LPR
and give it the same
Queue Name
as USB Printer Name has shown, and mark
LPR Byte Counting Enabled
. Finally, click on
Next
button.
【
Step 10
】
Click
Finish
on the next screen after the aforesaid settings, you have to install the printer
driver as well.
It has to be the same with the
Printer
Name as shown in
section
5.5.5
Printer Server
Configuration.
Summary of Contents for WE-1530
Page 1: ...1 ...
Page 15: ...15 Step 1 Go to Start Settings Network Connections and then select Local Area Connection ...
Page 16: ...16 Step 2 Click on Properties Step 3 Double click on Internet Protocol TCP IP ...
Page 19: ...19 ...
Page 67: ...67 ...
Page 77: ...77 Step 2 Fill in blank address field with 192 168 1 1 ...
Page 92: ...92 ...
Page 97: ...97 Step 2 Click on Add a printer item ...
Page 114: ...114 ...
Page 116: ...116 ...
Page 165: ...165 ...
Page 190: ...190 ...
Page 194: ...194 Each block shows configuration status you may click Refresh to update the screen list ...
Page 215: ...215 ...
Page 282: ...282 Step 2 Fill in the form as required and then click on Create Account button ...
Page 284: ...284 Step 5 Click on login Step 6 Click My Services after logging in ...
Page 285: ...285 Step 7 Click Add New Hostname Step 8 Please click on Add Dynamic DNS Host ...


