


Section 14
182
Expense Manager
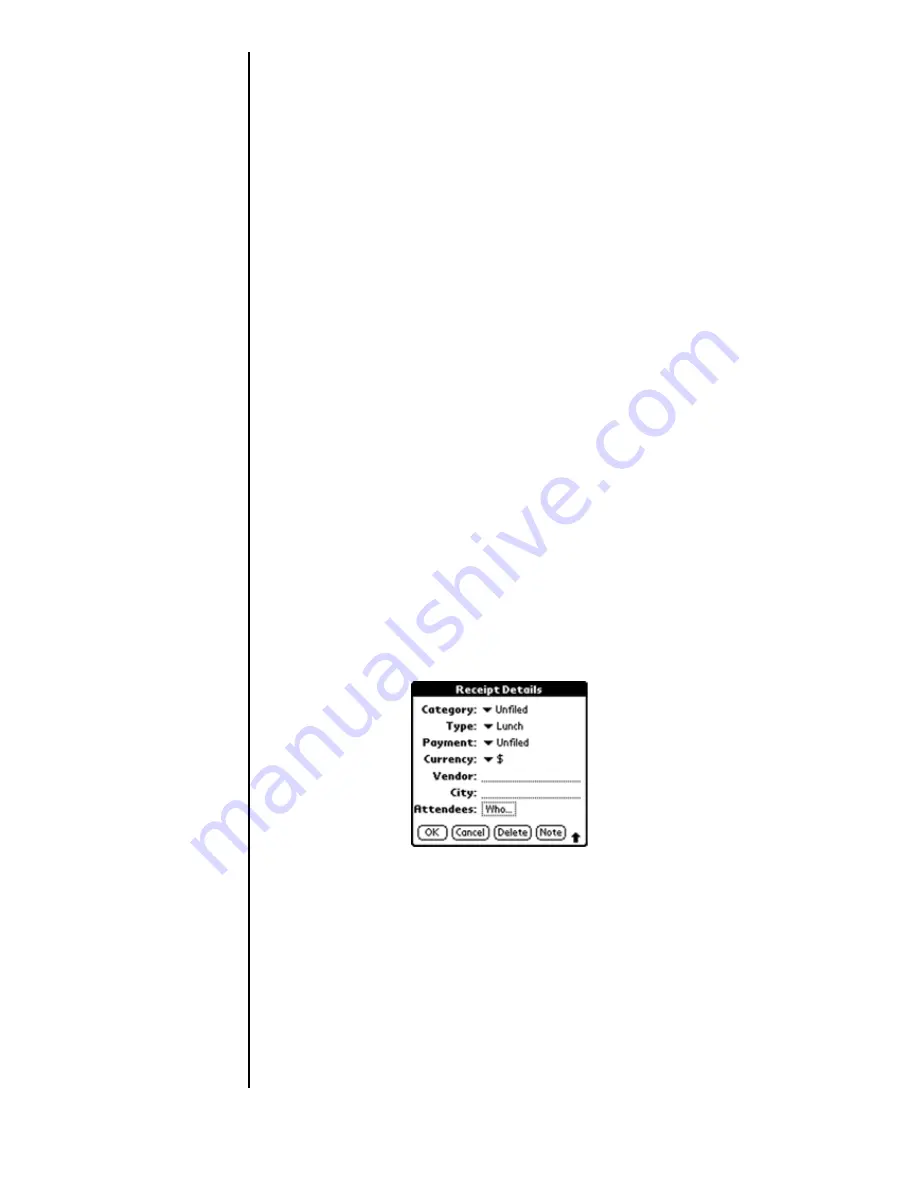
Entering Receipt Details
Detailed expense-related information can be added to the item
using the details screen. The details screen allows you to add
the following information:
䊳
Category
- Select one of the default categories or create a
custom category for the expense item.
䊳
Type
- The type of the expense can be selected from the
list.
䊳
Payment
- Select the type of payment used for the
expense.
䊳
Currency
- Select the type of currency used for the
expense.
䊳
Vendor and City
- Enter the Vendor and City information
in the spaces provided.
䊳
Attendees
- Enter the attendees of the expense if needed.
Adding Receipt Details
1.
Tap the desired expense item.
2.
Tap the “Details” button to open the “Receipt Details”
screen.
3.
Tap the drop down menu and select the desired category.
4.
Tap the drop down menu and select the desired type.
5.
Tap the drop down menu and select the desired payment.
6.
Tap the drop down menu and select the desired currency.
7.
Enter the Vendor and City information.
8.
Enter any attendees.
9.
Tap “OK” to save and exit.
Summary of Contents for SPH-I300
Page 1: ...Document Number 010505D5 Sprint PCS The clear alternative to cellular SM ...
Page 3: ......
Page 5: ...2 Understanding Roaming Getting Started Understanding Roaming Getting Started Getting Started ...
Page 15: ...Getting to Know Your Sprint PCS Phone 12 Front View of Phone ...
Page 29: ...Section 1 26 Getting to Know Your Sprint PCS Phone ...
Page 39: ...Section 2 36 Getting to Know the Handheld Computer ...
Page 101: ...Section 7 98 Using Sprint PCS Service Features ...
Page 113: ...Section 8 110 Application Menus and Entering Text ...
Page 117: ...Section 9 114 Adjusting Volume ...
Page 157: ...Section 12 154 Date Book ...
Page 201: ...Section 15 198 Memo Pad ...
Page 215: ...Section 17 212 Calculator ...
Page 223: ...Section 18 220 Security ...
Page 237: ...Section 19 234 Experiencing Sprint PCS Wireless Web ...


