P
age
37
S
amSung
W
ireleSS
r
outer
u
Ser
’
S
m
anual
n
etWork
S
ettIngS
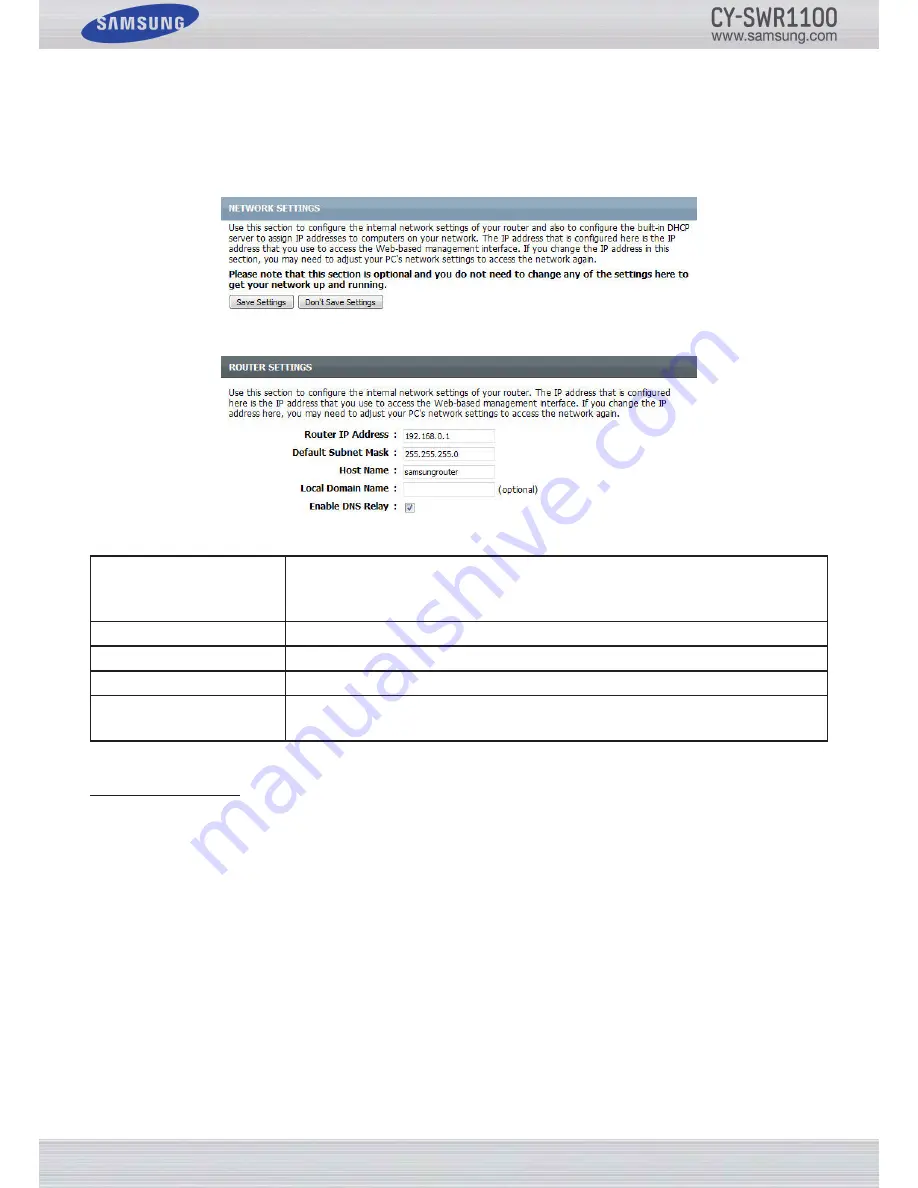
On this page, you can configure the internal network settings of the router and configure the built-in DHCP server to assign IP
addresses to computers on the network. The IP address you configure here is the IP address used to access the Web-based
management interface. If you change the IP address in this section, you may need to adjust your PC’s network settings to
access the network again.
In the next section, you can configure the router settings of this device.
You can configure the following parameters:
Router IP Address:
Enter the IP address of the router. The default IP address is 192.168.0.1. If you change the
IP address and you Click Apply, you will need to enter the new IP address in your browser
to get back into the configuration utility.
Default Subnet Mask:
Enter the Subnet Mask. The default subnet mask is 255.255.255.0.
Host Name:
Enter a Host Name to identify this device.
Local Domain Name:
Enter the Domain name (Optional).
Enable DNS Relay:
Uncheck the box to transfer the DNS server information from your ISP to your computers.
If checked, your computers will use the router for a DNS server.
DHCP Server Settings
DHCP stands for Dynamic Host Control Protocol. This device has a built-in DHCP server. The DHCP Server will automati-
cally assign an IP address to the computers on the LAN/private network. Be sure to set your computers to be DHCP clients
by setting their TCP/IP settings to “Obtain an IP Address Automatically.” When you turn your computers on, they will au-
tomatically load the proper TCP/IP settings provided by the router. The DHCP Server will automatically allocate an unused
IP address from the IP address pool to the requesting computer. You must specify the starting and ending address of the IP
address pool.
At the bottom of the page, click the
Save Settings
button to accept the changes.
Click the
Don’t Save Settings
button to discard the changes.
Summary of Contents for CY-SWR1100
Page 1: ......


