background image


66  

  Basic Operations 


Sam4POS 6600/4800II Operators Manual v2.9 

Corrections & Voids 

Clear 


Touch the 

CLEAR

 key to erase numeric entries or clear an error condition.   


Void Item 

Use the VOID ITEM key to void an item previously entered in a transaction.  To void a previous item:   


Touch the item or condiment where it is displayed – note that the item touched is now selected and 
highlighted.  Touch 

VOID ITEM

 key to remove the selected item or condiment.   

Note:  If an item is voided, condiments associated with the item are also removed.   


Cancel 

Use the cancel function to completely abort a transaction in progress.  No totals or counters are updated for 
items registered prior to cancelling a transaction.  Cancel cannot be used after tendering or finalization.  
Employee authority determines if the Cancel function is allowed.  Cancel does not open the cash drawer.   


Touch 

CANCEL

 to abort a transaction in progress.  


Transaction Void 

VOID MODE

 key must be placed on the keyboard.  If the Void Mode key is set for manager control, entry 

of the manager password is required. The Void Mode key can also be set for Pop-Up or Stay-Down operation.  

On the SAP-630 & SAP-530, you can turn the key lock the VOID position.  


1.


Touch the 

VOID MODE

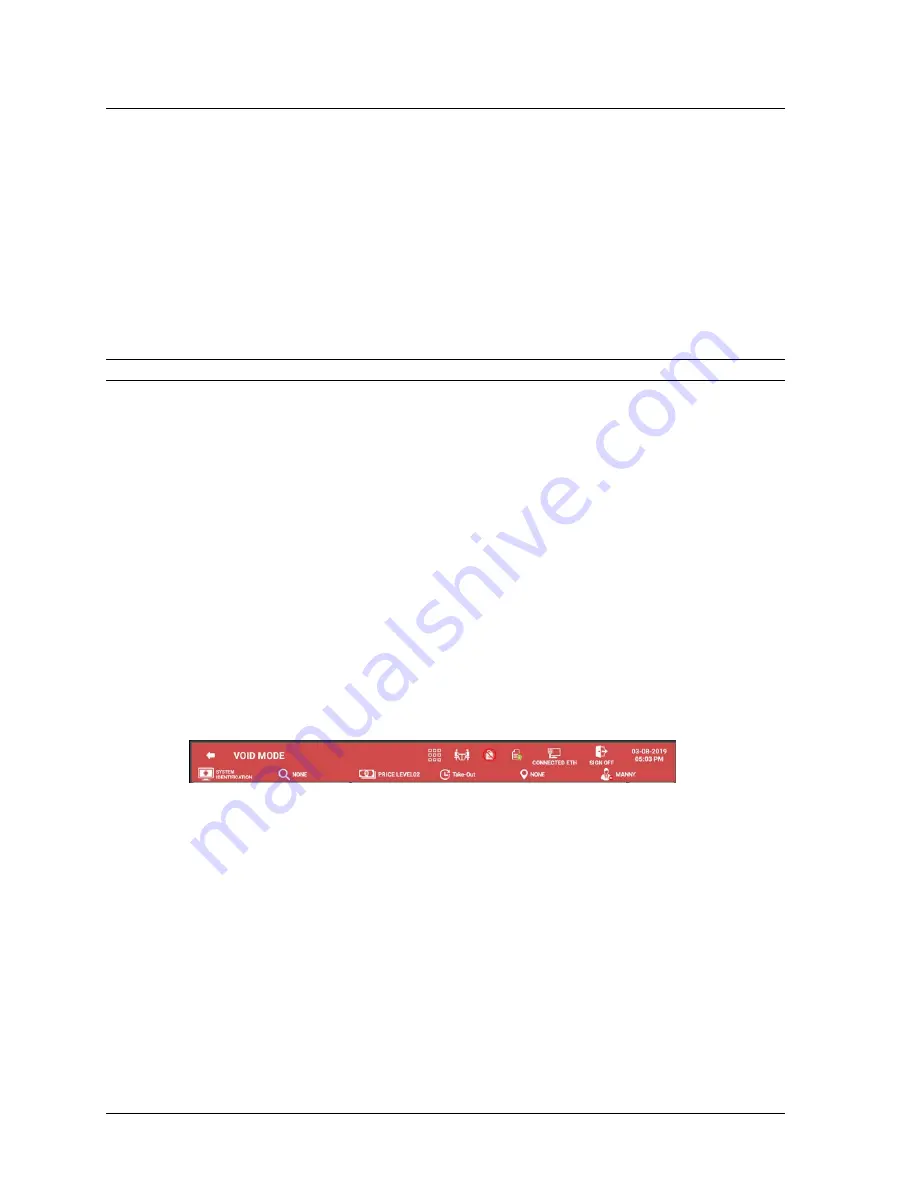
 key. If required enter the manager password. The header ribbon will turn


red 

and show VOID MODE for the header title.  


2.


Enter Items to be voided. Finalize the transaction using the appropriate tender key.   

3.


If the Void Mode key is set for pop-up, the terminal will return to the normal Register Mode. 

4.


If the Void Mode key is set for stay-down; void additional transactions as necessary.   

5.


Touch the 

VOID MODE

 key again to exit Void Mode.   


Merchandise Return 

Use this function to return (credit) merchandise inside or outside of a sale.  


Touch 

RETURN

, and then register the item to be returned. Repeat for each item to be returned.     


Summary of Contents for SAP-6600II

Page 1: ...SAP 6600 4800II SAP 630 SAP 530 Sam4POS Operator Manual Sam4POS 6600 4800II Operators Manual v2 9 All specifications are subject to change without notice 2017 CRS Inc...

Page 2: ...S THESE PRODUCT S CRS INC SPECIFICALLY DOES NOT WARRANT THAT THE OPERATION OF ANY DRIVERS SOFTWARE OR PROGRAMMING PRODUCTS LICENSED HEREUNDER WHETHER EMBEDDED IN PRODUCTS OR PROVIDED AS SEPARATE PROGR...

Page 3: ...inched out of place or frayed wiring Do not change the spacing between components and the printed circuit board Check the AC power cord for damage Make sure that leads and components do not touch ther...

Page 4: ...the instrument chassis ground before connecting the positive lead always remove the instrument s ground lead last Precautions for Electrostatically Sensitive Devices ESDs 1 Some semiconductor solid st...

Page 5: ...Display optional 17 SAP 630 SAP 530 18 Getting Started 22 Default Screens 22 Sign on Screen 22 Operator Screen Layout 23 Operator Screen Header Bar 24 Expanded Operator Screen Header Bar 25 Custom Sc...

Page 6: ...xempting Tax 65 Tax Shift 65 Food Stamp Shift 65 Corrections Voids 66 Clear 66 Void Item 66 Cancel 66 Transaction Void 66 Merchandise Return 66 Splitting Consolidated Items 67 Change Quantity 68 Disco...

Page 7: ...k by Seat Number 116 Payment by Seat Number 116 Split Table 118 Hold Print Hold 120 List Table 122 Transfer Table 123 Tip Declare 124 Using the Table Map 126 Table Management Program Notes 126 Table M...

Page 8: ...s 183 PLU Sub Menu 184 Menu Icon 189 Printing Labels from PLU 190 Quick PLU 192 Employee File Maintenance 195 Add Edit Employee s 195 Employee Option Definitions 196 Employee Authority Level 197 JOB C...

Page 9: ...manual is specific to the SAP 6600 and SAP 4800II terminals A separate manual is available for the Sam4POS application with the SAP 530 terminal Hardware The SAM4s SAP 6600 SAP 4800 II touch screen t...

Page 10: ...r Proof Front Panel Superior Serviceability and Ease of Installation SAP 4800II Sam4POS with the SAP 4800II All In One Android touch screen terminal has a stylish 15 LCD display with 5 Wire Resistive...

Page 11: ...to malfunction Avoid plugging your Sam4POS into outlets where other high current devices are connected Be aware that power quality issues including voltage fluctuations electrical noise spikes outages...

Page 12: ...wer supply in referencing digital logic Therefore networked POS systems require isolated dedicated ground circuits to insure proper operation CRS recommends POWERVAR ground guard conditioners for netw...

Page 13: ...the same the connections and controls may vary on the different terminals SAP 6600 Standard 3 Track Front Facing Magnetic Card Reader MCR Power Button located on the bottom right of the touch panel St...

Page 14: ...12V Voltage selectable in BIOS Audio Line Out port Four v3 0 USB Ports on I O Two on rear side I O LAN Port RJ45 10 100 1000 Base T VGA Port DB15F for second display Maximum resolution 1920 x 1200 Pow...

Page 15: ...OS 6600 4800II Operators Manual v2 9 Introduction 15 SAP 4800II Retired Standard 3 Track Magnetic Card Reader MCR Power Button Located on the bottom of the touch display Break out tabs for cable manag...

Page 16: ...6 Introduction Sam4POS 6600 4800II Operators Manual v2 9 SAP 4800 II Connection Panel A COM4 Powered B USB 2 C Drawer 1 D Drawer 2 E LAN F COM2 Powered G COM1 Powered H COM3 Powered I DC In Power Inpu...

Page 17: ...0 4800II Operators Manual v2 9 Introduction 17 Rear VFD Display optional Available as an option on the SAP 6600 SAP 4800II Optional Rear VFD Display USB Ports 2 SD Card Access Break out tabs for cable...

Page 18: ...ed Shown with Flat Keyboard Raised Keyboard Style also available Optional MCR Magnetic Card Reader 3 Thermal Receipt Printer USB Port 7 position Mode Key Lock 9 7 Operator Touch Display The Power LED...

Page 19: ...panel to the optimum viewing angle Customer Display Power Chord Access panel for Integrated MCR connection Rear Customer Display The SAP 630 SAP 530 terminals come equipped with an integrated rear VF...

Page 20: ...used to Load Application Program Updates Save Load Program Settings Load Graphic Images Save Screen Captures Connection Panel Front USB port located behind access door for keyboard USB memory stick o...

Page 21: ...reports Z End Of Day use to read register reports reset and or print reports P Program Mode use to program the register S MODE Not used Note Before performing any operations in the register mode a cle...

Page 22: ...ode key Use the default password 1 and touch enter to log in the first time You must sign on to be able to operate the Sam4POS in any mode key position Time In Out operations can also be performed fro...

Page 23: ...Row displays System Identification PLU Key Info Price Level KP Period Destination and Employee name B Transaction Detail Touch to hide the 10 Key pad and expand the receipt area C 10 Key pad to open t...

Page 24: ...Pad Team Viewer and Favorites selections Refer to the expanded operator screen header bar shown below Table Map Opens the Table map Receipt On Off Turns receipt printing On and Off License Info Touch...

Page 25: ...vel touch this icon to select or change to a different price level KP Period Allows the operator to select change the KP Period Destination Tap this icon to set the default destination or select None...

Page 26: ...m Viewer Allows access to the Team Viewer application for remote support directly from the register mode Favorites When selected the register mode screen is added to the Favorites list Note The Favori...

Page 27: ...Log On screen 2 Tap the register mode icon or turn mode key to REG 3 Press the More Functions Menu icon to access the Memo icon 4 Press the Memo Icon to view or add notes 5 On the note pad that displ...

Page 28: ...er The Team Viewer icon is available when you press the more functions menu icon on the register screen header bar Team Viewer is a remote access utility that can be used to remotely support the SAM4P...

Page 29: ...keys that you require Your screens will be designed using the following capabilities The Main Screen and each MLU screen provide 56 single size key locations in a 7 x 8 matrix Large wide and vertical...

Page 30: ...SCREEN EDIT is enabled you can adjust the size of the sales screen in the register mode 1 If the screen edit option is ON the gear icon will display in REGISTER MODE allowing for the screen size to b...

Page 31: ...Manual v2 9 Getting Started 31 4 Press the Save icon if you want to save the new screen configuration Note All register mode display areas are adjusted any hidden MLU FLU keys will no longer be acces...

Page 32: ...eports displays for managers to quickly see selected report information Refer to Summary Reports in the REPORTS section on page 139 for details about using the Summary Reporting To access view or prin...

Page 33: ...ows the operator to close and print the Financial PLU Group Period Employee and TIP Reports for all employees or select specific reports for specified employees Reports generated from this screen will...

Page 34: ...tivities Operations set as Manager Required can be completed only after the correct password is entered Password Notes The default password for access to the Report Mode and Program Mode is 0 meaning...

Page 35: ...ize your Sam4POS The register is in an unknown state and you wish to exit the current program or transaction without following normal procedures You have performed a function that includes a compulsor...

Page 36: ...fication dialog below is displayed 3 Press YES to proceed with the initial clear or press NO to exit without the initial clear 4 Sign on to the Sam4POS as normally Reboot 1 To Reboot the SAP 6600 4800...

Page 37: ...Option Selecting the Memo icon opens the Meno Notepad Table Map icon Receipt On Off Favorites icon white is not added to favorites gold indicates selection is added to favorites License Information fo...

Page 38: ...lection Print Typically used in reports Export file to CSV Scroll keys the single arrow keys scroll Up Down one page at a time the double arrow scroll keys go to the Beginning End of the list Sort men...

Page 39: ...NCY CONVVERSION Used to convert and display the value of the transaction in foreign currency Only cash tender is allowed after touching a CURR CONV key Change is calculated and issued in home currency...

Page 40: ...a USB or SD Card or to an FTP site MODIFIER Preceding a PLU entry a modifier key changes a digit of the PLU number causing a different PLU to be registered Modifier keys can be set to affect any of th...

Page 41: ...ilitates separate payment by seat and identifies to the food preparation staff through the kitchen printer KVS how to assemble meals Seat numbers may be assigned at the time of entry or if necessary l...

Page 42: ...ister split price items or display the time in the REG mode Tender Key Definitions There are four general tender key types available in Sam4POS for tendering sales Cash Check Food Stamp Tender and Mis...

Page 43: ...LLOWED The preceding entry is not discountable product is not available for discounting DO NOT ALLOW MANUAL ENTRY Manual entry is not allowed scale function EMPLOYEE IN USE EMPLOYEE NOT FOUND The empl...

Page 44: ...OVERRIDE NOT ALLOWED X Mode override is not allowed for this operation PLU DEOS NOT EXIST The number entered is not a valid PLU PRINTER PAPER END The guest check printer has reached the end of the fo...

Page 45: ...key before touching any tender keys VALUE IS OUT OF RANGE The number entered is out of range VOIDING OF THIS ITEM IS NOT ALLOWED Void Item operation is not allowed on this PLU WRONG SEQUENCE The prec...

Page 46: ...CARD displays above the entry pad 1 From the Main Sign On screen Type the employee operating code 2 Touch ENTER The main menu selection window displays On the SAP 630 SAP 530 terminals the screen disp...

Page 47: ...the main menu screen press the icon on the main menu screen to return to the main sign on screen Clerk Interrupt If allowed a new employee can sign on while a transaction being processed by another em...

Page 48: ...thority level programming the employee will sign on with their employee clock in code which may be different than the employee operating code Employees could also be set to clock in using the MCR in t...

Page 49: ...r entry dialog so it is selected as shown below 2 Enter the employee clock in code and touch the TIME IN OUT function key to display the clock in out window Job codes that are available for the employ...

Page 50: ...k time is displayed 3 Touch OK to complete the clock out for break Clock In from Break 1 Enter the employee clock in code and touch the TIME IN OUT function key to display the clock in out window 2 To...

Page 51: ...elected employee Edit Use to edit the current time entry for the selected employee Delete Use this selection to delete the selected time entry for the selected employee New Time Entry 1 From the Repor...

Page 52: ...v2 9 5 The NEW time entry is added Edit Time Entry 1 From the Report Mode select the Time In Out Report from the Detailed Reports menu then press SHOW to display the current employee time entries 2 Pr...

Page 53: ...the END TIME column on Davros s time entry line 4 The END TIME dialog is displayed 5 Enter the new End Time and select OUT or BREAK TIME as appropriate The new time is entered for the Employee 6 Press...

Page 54: ...e Entry 1 From the Report Mode select the Time In Out Report from the Detailed Reports menu then press SHOW to display the current employee time entries 2 Select the time entry record you wish to remo...

Page 55: ...a preset PLU or the HALO on an open entry PLU The Employee must be assigned the authority to perform the override see Program Mode Employee Authority Level REG Mode Can PLU Price HALO Override The PLU...

Page 56: ...also choose to Register the item will be added in the sale Press OK to close the price Check dialog without registering the item Edit the PLU Description and or Price See Edit PLU below Price Check s...

Page 57: ...omatically get the scale weight and register the item Scale Program Notes See Program Mode Programming PLU PLU Status Group The following options affect each PLU linked to a PLU status group SCALE Sel...

Page 58: ...r by the container or packaging By entering a tare weight as required by law in some areas the weight of the container is subtracted and only the true weight of the product is measured on the scale Ta...

Page 59: ...drop down 4 Select the appropriate Tare from the list the weight displays minus the tare 5 Press OK 6 Register the open or preset scale PLU the item is added to the sale Open Tare Weight Entry 1 Place...

Page 60: ...ht displays minus the tare weight entered 5 Touch OK 6 Register the open or preset scale PLU the item is added to the sale Promo The PROMO key allows the operator to account for promotional items i e...

Page 61: ...e on the selected item is removed PROMO will be indicated under the item Split Pricing Decimal When items are priced in groups i e 3 for 1 00 you can enter the quantity purchased and let the register...

Page 62: ...1 00 enter 3 X TIME 3 Enter an amount on the ten key pad For example if the items are priced 3 for 1 00 enter 1 0 0 4 Press the PLU Item key For example press OPEN F S PLU Note that the quantity is 0...

Page 63: ...press the X TIME key For example if the items are priced 3 for 1 00 enter 3 X TIME 3 Enter an amount on the ten key pad For example if the items are priced 3 for 1 00 enter 1 0 0 4 Press the PLU Item...

Page 64: ...l be prompted to enter PLU price and if programmed the descriptor and linking information The item is registered immediately 1 Scan or enter a PLU that is not in the PLU file a continuous error tone s...

Page 65: ...ate taxes to add the tax on the item selected Exempt Tax on an Entire Sale Occasionally you may need to exempt tax from an entire sale For example you might remove all state and local taxes when you s...

Page 66: ...l does not open the cash drawer Touch CANCEL to abort a transaction in progress Transaction Void A VOID MODE key must be placed on the keyboard If the Void Mode key is set for manager control entry of...

Page 67: ...parate items for separate seat assignment or split checks 1 Touch the consolidated item you wish to split 2 Touch SPLIT ITEM to split the items The SPLIT ITEM dialog displays 3 Enter the number of ite...

Page 68: ...tly For example The customer ordered six beers but the operator incorrectly entered in 9 X Time Beer instead of entering 6 X Time Beer To correct this 1 Highlight the item with the incorrect quantity...

Page 69: ...is preset at a set percentage allow override of the percentage or to allow override of the percentage in X mode only If the key is an item discount surcharge function net the item total or not If the...

Page 70: ...reset Percentage Sale Coupon To deduct a preset amount coupon against a sale 1 Register items 2 Touch SUBTOTAL 3 Touch the key 4 Finalize the transaction Do It Discount This function allows the operat...

Page 71: ...transaction Preset Percentage Item Discount To deduct a preset percentage discount from an item 1 Register the items 2 Touch the item to be discounted 3 Touch the key 4 Finalize the transaction Open...

Page 72: ...entage Sale Surcharge To add a preset percentage surcharge to a sale 1 Register items 2 Touch SUBTOTAL 3 Touch the Surcharge key 4 Finalize the transaction Open Amount Item Surcharge To add an open pe...

Page 73: ...select a specific coupon discount to apply The Promotion function key is used to select and apply the appropriate discount Key Sequence 1 From the REGISTER MODE register items associated with the pro...

Page 74: ...Charges Credit Debit and Gift cards Each key can be configured separately with maximum charge limits tendering requirements rules tax exemption rules and validation requirements Operation sequences wi...

Page 75: ...he total of items eligible for food stamp payment displays 3 Enter food stamp tender amount press or touch FD S TEND 4 Pay remainder due if any with CASH CHECK or by one of the miscellaneous tender fu...

Page 76: ...s batch before beginning a new sales day The new batch is opened when the previous batch is closed 1 Register a normal transaction 2 Touch the appropriate MISC TEND key At the register the message WO...

Page 77: ...02 52 INVOICE 15 REFERENCE 1002 AUTH CODE 02545A AMOUNT USD 10 99 TOTAL USD 10 99 APPROVED THANK YOU I AGREE TO PAY THE ABOVE TOTAL AMOUNT ACCORDING TO CARD ISSUER AGREEMENT MERCHANT AGREEMENT IF CRED...

Page 78: ...NCE 1002 AUTH CODE 08151A AMOUNT USD 10 99 TIP USD ________________ TOTAL USD ________________ APPROVED THANK YOU I AGREE TO PAY THE ABOVE TOTAL AMOUNT ACCORDING TO CARD ISSUER AGREEMENT MERCHANT AGRE...

Page 79: ...ey At the register the message WORKING displays At the PIN Pad the message displays Enter Tip Amount YES NO 3 Select YES to enter TIP Pin Pad displays Enter TIP Amount At the Pin Pad enter the desired...

Page 80: ...PAY THE ABOVE TOTAL AMOUNT ACCORDING TO CARD ISSUER AGREEMENT MERCHANT AGREEMANR IF CREDIT VOUCHER X____________________________ Cardholder Signature APPLICATION LABEL MASTERCARD AID A0000000041010 TV...

Page 81: ...ess the GREEN button on the PIN Pad keypad 5 Insert the EMV card into the PIN Pad The PIN Pad will display PLEASE WAIT then DO NOT REMOVE CARD and then ENTER PIN OK 6 At the PIN Pad enter the 4 digit...

Page 82: ...YOU I AGREE TO PAY THE ABOVE TOTAL AMOUNT ACCORDING TO CARD ISSUER AGREEMENT MERCHANT AGREEMENT IF CREDIT VOUCHER x_______________________________________ Cardholder Signature APP LABEL Visa Credit A...

Page 83: ...PPROVED THANK YOU I AGREE TO PAY THE ABOVE TOTAL AMOUNT ACCORDING TO CARD ISSUER AGREEMENT MERCHANT AGREEMENT IF CREDIT VOUCHER x_______________________________________ Cardholder Signature APP LABEL...

Page 84: ...PIN Pad 6 Touch CLOSE on the ECR message box The message TRY MANUAL ENTRY now displays 7 Touch YES on the ECR message box At the PIN Pad the SALE and transaction amount message displays again 8 Press...

Page 85: ...NG 7 When the processing is complete the APPROVED message will display 8 Remove the card from the PIN Pad Gift Card Notes Support for partial authorizations is a card brand mandate which eases accepta...

Page 86: ...PROCESSING 8 When the processing is complete the APPROVED message will display 9 At the register the receipt and card draft are printed Note EBT refunds returns are performed in the Void Mode not as a...

Page 87: ...PAY THE ABOVE TOTAL AMOUNT ACCORDING TO CARD ISSUER AGREEMENT MERCHANT AGREEMENT IF CREDIT VOUCHER X_____________________________ Merchant Signature APP LABEL VISA CREDIT AID A0000000031010 TVR 000000...

Page 88: ...n page 216 This procedure will not correct ECR sales totals 1 Touch the VOID MODE key Alternately on the SAP 630 530 you can turn the mode key to the VOID position 2 Register a normal transaction 3 Pr...

Page 89: ...O PAY THE ABOVE TOTAL AMOUNT ACCORDING TO CARD ISSUER AGREEMENT MERCHANT AGREEMENT IF CREDIT VOUCHER X_________________________________ MERCHANT SIGNATURE Application label VISA CREDIT AID A0000000031...

Page 90: ...evice menu selections Outside of Sale Operations Display Time Date The Time and date can be displayed anytime from any screen by pressing the Date Time on the title bar The screen saver can also be se...

Page 91: ...The Received On Account amount will reduce deduct from the current transaction total 1 Touch the RECD ACCT key 2 Select the media type to be received a Enter cash received touch CASH b Enter checks re...

Page 92: ...mount will add to the current transaction amount 1 Touch the PAID OUT key 2 Select the media type to be paid out a Enter cash paid out touch CASH b Enter checks paid out touch CHECK c Enter miscellane...

Page 93: ...ed touch the RECEIPT REPRINT key to reprint the transaction receipt If the print option Allow Multiple Receipts is enabled touch RECEIPT REPRINT a second time to print additional receipt copies Gift R...

Page 94: ...n refer to the Void Sales section on page 99 for details Use the filters to show just the specific transactions you want to view START DATE END DATE You can select a specific day or date range to view...

Page 95: ...preview screen is displayed 2 Touch the TODAY button to view paid transactions for the current day Or 3 Touch the START DATE calendar 4 Select the desired Start Date Press OK 5 Touch the END DATE cale...

Page 96: ...ees If desired you can choose to see just the transactions from selected employees 8 Touch the EMPLOYEE field to display the employee list Check Uncheck the SELECT ALL checkbox 9 Choose the employee w...

Page 97: ...Press REPRINT to print a copy of the receipt 14 Press the icon if you want to export the selected transaction 15 Choose the Export Path where you want to send the data USB EMAIL 16 The selected transa...

Page 98: ...the Paid Type is set for TENDER and the Tender Category is set for MISC you can use this key for easy TIP entry If the Employee is an ADMIN employee they can assign TIPs to other employees Other emplo...

Page 99: ...d transactions Note 1 If the Paid Type is set for TENDER and the Tender Category is set for MISC you can use this key for easy TIP entry If the Employee is an ADMIN employee they can assign TIPs to ot...

Page 100: ...Training Mode An employee can be created and designated for training purposes A training mode is available so that you can operate the cash register without updating totals and counters Sign on the de...

Page 101: ...a modifier size key before the desired item Modifiers can be programmed as Stay Down so that registrations will be modified by the same modifier until another modifier is selected Pop Up after each it...

Page 102: ...For example touch LARGE and then touch COFFEE When items are sold in different flavors or with different options registration of the item may trigger a MLU Chain o In this example the Large Coffee ha...

Page 103: ...r void items as necessary 5 Finalize the transaction with CASH CHECK or one of the miscellaneous tender charge functions Alpha Text The Alpha Text key can be used to type a customer name or special in...

Page 104: ...ogram Mode Receipt Message Message programming 1 Press the ALPHA TEXT key any time after registering an item 2 When the Alpha Text dialog displays Press the MESSAGE GROUP field to open the predefine m...

Page 105: ...ipt in the format indicated Note Alpha text entries made after a held item will not follow the item when a check is recalled and the item is released Sample Transaction Receipt Coffee Shoppe 1234 Mall...

Page 106: ...ned digit length for check s Alpha Check Tracking by manually entering customer name Open Checks using MSR Mag Stripe Reader Multiple Tracking Files The Sam4POS allows for as many tracking files as ar...

Page 107: ...options with your authorized Sam4POS dealer or refer to the Sam4POS Program Reference Manual Set the options for the Recall Table Check key as desired Options set here include Manager Required Enforc...

Page 108: ...ey enter the check number or customer name press OK to open the check c Touch the RECALL TABLE function key swipe the Mag Card to open the check 2 If guest entry is required enter number of guests and...

Page 109: ...e function or b Use the LIST Table function to select a check from a list to open 2 Touch a check from the list to select it The check detail is displayed Details for the selected check are displayed...

Page 110: ...ires application version 1 0 68 or later 1 Register a normal transaction without opening a table 2 Press the Recall Table key 3 On the Input Check dialog press the LIST CHECK button the LIST Check dia...

Page 111: ...the last items posted to a check by using the REPEAT key This simplifies registration of another round of drinks The Repeat function may require manager authorization 1 Open a check Enter Items Touch...

Page 112: ...he items you wish to REPEAT on the order Note All previously serviced items are highlighted by default Only leave the items you want to repeat highlighted Touch the items to deselect select items as d...

Page 113: ...able function touch a check from the displayed list of active checks to select it and then touch OPEN 2 Additional items can be registered before payment is made 3 If necessary enter a tip amount and...

Page 114: ...ed see General Options programming in the programming manual Enforced Seat Entry When seat is enforced as per setting on the Recall Table function it is enforced for each main item Seat entry is not r...

Page 115: ...on an item 1 Touch the item you wish to change the seat assignment on 2 Touch SEAT The Enter New Seat entry dialog displays 3 Enter a new seat number up to 2 digits and press ENTER Optional Seat Entr...

Page 116: ...ECK ONE SEAT When selected you will be prompted to select a seat number 3 After making your selection the check will print Payment by Seat Number 1 Open a check Identify items by seat number 2 Touch S...

Page 117: ...ns 117 4 The seat is highlighted and paid the seat total is adjusted accordingly 5 Continue to settle each seat until the check is completely paid or touch STORE CHECK to store the unpaid seats 6 When...

Page 118: ...er check You can choose to split items off to a new check or to an existing active check in the system 1 Open an existing guest check then Touch the SPLIT TABLE key or use the List Table button to vie...

Page 119: ...ss EXIST OPEN to add the items to an existing check in the system 7 Select the desired check in the system to add the selected item to press OK 8 Press the MOVE TO THIS CHECK button on the selected ch...

Page 120: ...ck and print the main course items so they can be prepared and served when the customer is ready to eat them A held item is indicated on the display with an H below the item next to the tax status ind...

Page 121: ...minded of other checks tables where held items may need to be released 5 Touch CLOSE to store the check Print All Held Items 1 Recall an order that has held items Program Mode Options Options Guest Ch...

Page 122: ...left column 3 The functions available on the LIST CHECK screen are a PRINT CHECK prints a customer copy of the selected check b MERGE SPLIT used to combine checks or to split the check into two or mo...

Page 123: ...e multiple times if necessary 1 Sign on employee and press the TRANSFER TABLE key 2 Select the checks from the list you wish to transfer a Press SELECT ALL if you want to transfer all of the checks li...

Page 124: ...he operator may be prompted to enter tips when clocking out Check the employee authority level option Compulsory Tip Entry The Time In Out operation can be performed from the Register Mode or you may...

Page 125: ...Operations 125 4 Alternately the TIP DECLARE function key can be used to enter tips when the time keeping feature is not used 5 Touch the TIP DECLARE key 6 Enter the TIP Declared amounts select the m...

Page 126: ...signed on to operate the register With the table layout displayed the operator can touch a table to open or recall the check for the table Assign the Table to the currently signed on employee Merge S...

Page 127: ...ble name number Date Time table was opened Table balance Touch the desired Zone to display the appropriate Seating Zone Pressing the Clip Board icon on the Table Map Header Bar will exit the table map...

Page 128: ...ng the Table When the desired items are added to the table press the corresponding Store Table key to service the Table Alternately if the Table Map icon is pressed while another table is open the cur...

Page 129: ...e Table Map You can choose a table in the same zone or you can choose to merge or split the items to a table in a different zone 1 From the Register screen Touch the Table Map icon to open the Table M...

Page 130: ...7 Press the NEW OPEN or EXIST OPEN button 8 The main Table Map screen is displayed 9 You can Merge Split items to any Table on any Zone Choose the Zone and Table you want to Merge with or Split items...

Page 131: ...ss the icon at the top of the check Note Pressing the icon will delete the table from the screen 12 Press the MOVE TO THIS CHECK button on the selected table the selected items are moved to the select...

Page 132: ...ow without having to open the table first 1 From the Register screen Touch the Table Map icon to open the Table Map screen Select the Zone you want to Merge or Split items from Touch a Table to view t...

Page 133: ...h a Table to open the check associated with the table The Check dialog is displayed 2 Touch the SEAT PAYMENT button 3 The payment dialog displays 4 Select the Seat to be paid 5 Enter the payment amoun...

Page 134: ...from Touch a Table to open the check associated with the table The Check dialog is displayed 2 Touch the PRINT CHECK button the seat selection dialog displays SINGLE CHECK ALL SEAT Prints the check wi...

Page 135: ...ter screen Touch the Table Map icon to open the Table Map screen Select the Zone you want to Merge or Split items from Touch a Table to open the check associated with the table The Check dialog is dis...

Page 136: ...for the Table Map to allow customizing table positions This option is controlled by the setting in Program Mode Options Options System Option Show Dynamic Table Check Box On Reg Mode Using Dynamic Tab...

Page 137: ...d report sub menu by touching REPORT MODE on the title bar From the sub menu report section you can view print or save the selected report as a CSV file Refer to the Detailed Reports section on page 1...

Page 138: ...cess all other reports Cash Declaration Calendar View Note Pad Edit used to show hide the edit icons on the individual report cells Press this icon to add or remove the report mode on the favorites li...

Page 139: ...record icon to add a report to the window The available quick view Summary Report Items include o Current Sales Status Graph o List Check o Top 10 Best Sales PLU o Top 10 Best Sales Group o Top 10 Be...

Page 140: ...140 Reports Sam4POS 6600 4800II Operators Manual v2 9 o If the report doesn t display touch the icon to see the report data...

Page 141: ...he edit icons for each report in the grid o Press the Favorites icon if you want to add the reports to your Favorites list selections o To exit the report mode press the button The next time you enter...

Page 142: ...r reports you would need to go to the End of Day report mode Touch REPORT MODE to view the sub menu dropdown for access to all other reports Select the specific report you wish to view from the list t...

Page 143: ...entering the Start Date the End Date will automatically be entered WEEKLY This selection allows the manager to select a specific week to review report data Select the desired week by entering the Sta...

Page 144: ...to view reports from ALL terminals or select individual terminals OPTIONS Allow you to further define the report to display specific data FILTERS The filters provide further flexibility by allowing y...

Page 145: ...MONTH 1 YEAR Additional selections in the Dates area are START DATE END DATE END OF DAY NUMBER AND TERMINAL SELECTION OPTIONS Training Data Current Data Detailed Data Zero Skip Drawer Total Tip Total...

Page 146: ...ng Data Current Data PLU Zero Sales Waste Promo Price Level Not Found PLU PLU Profit Reporting By Employee FILTERS Group 1 2 3 Select specific Groups assigned on PLU group assignment 1 2 3 EMPLOYEES C...

Page 147: ...NUMBER TERMINAL SELECTION OPTIONS Training Data Current Data Waste Promo Reporting By Employee FILTERS Group Select a specific Group or Groups to view Employee Choose ALL or selected Employees From PL...

Page 148: ...Data FILTERS EMPLOYEE Choose ALL or selected Employees TYPE TIME PERIOD Enter the desired time period in number of days i e 30 60 100 etc Press the Time Period button to select Date Period DATE PERIOD...

Page 149: ...Additional selections in the Dates area are START DATE END DATE ALL DATE When selected only the TODAY selection above is available TERMINAL SELECTION FILTERS EMPLOYEE ALL or selected Employees TRACK S...

Page 150: ...9 Stock Report DATES Only the TODAY selection is available FILTERS Group 1 2 3 Select specific Groups assigned on PLU group assignment 1 2 3 From PLU To PLU Select a PLU or PLU range for the report i...

Page 151: ...ales Labor Report is a combination of data from the Period Report and the Time In Out Report FILTERS EMPLOYEE Choose ALL or selected Employees TOP Choose to display the Top 5 10 20 30 50 100 or ALL PL...

Page 152: ...T Average amount per customer CUST and NET SALES values are from Sales by Time Period Report where AVG CUS T is division of these two values HRS LBR Sum of working hours for employees who had worked i...

Page 153: ...MBER TERMINAL SELECTION OPTIONS Training Data Current Data Waste Promo FILTERS Group 1 2 3 Select specific Groups assigned on PLU group assignment 1 2 3 EMPLOYEE Choose ALL or selected Employees From...

Page 154: ...Last End of Day Custom Period 1 DAY 1 WEEK 1 MONTH 3 MONTH 6 MONTH 1 YEAR SRART DATE END DATE FILTERS EMPLOYEE ALL or selected Employees JOB CODE Select All or specific job code from the list CLOSED c...

Page 155: ...it Use to edit the current time entry for the selected employee Delete Use this selection to delete the selected time entry for the selected employee New Time Entry 1 From the Report Mode select the T...

Page 156: ...ors Manual v2 9 Edit Time Entry 1 From the Report Mode select the Time In Out Report from the detailed reports menu then press SHOW to display the current employee time entries 2 Press the EDIT Button...

Page 157: ...END TIME column on Davros s time entry line 4 The END TIME dialog is displayed 5 Enter the new End Time and select OUT or BREAK TIME as appropriate The new time is entered for the Employee 6 Press SAV...

Page 158: ...Time Entry 1 From the Report Mode select the Time In Out Report from the detailed reports menu then press SHOW to display the current employee time entries 2 Select the time entry record you wish to...

Page 159: ...YEAR Additional selections in the Dates area are START DATE END DATE END OF DAY NUMBER and TERMINAL SELECTION OPTIONS Training Data Current Data Detailed Data Zero Skip Reporting By Employee Signed O...

Page 160: ...useful tool for searching reviewing and reprinting previously closed transactions 2 From the Report Mode select the EJ Report from the Detailed Reports menu 3 EJ Reports are sorted by Year Month Date...

Page 161: ...of the display the navigation icons can be used to go back one level on the memory device go to the root of the memory device EJ Report EDIT MODE The Edit Mode can be used to Print Merge Save and Del...

Page 162: ...include Today Last End of Day Custom Period 1 DAY 1 WEEK 1 MONTH 3 MONTH 6 MONTH 1 YEAR Additional selections in the Dates area are START DATE END DATE OPTIONS Training Data Time Period When unchecked...

Page 163: ...he Employee must have the authority to perform cash declarations If desired the cash drawer can be triggered to open when the cash declaration is performed by setting the option in the Drawer Options...

Page 164: ...nthly Totals Totals by Day of week Daily totals appear for each date of the month Summary Total for selected DAY of the month Summary Totals for the WEEK of the Year Touch the Calendar icon to open th...

Page 165: ...rmed from End Of Day screen This operates the same as the described in the Report Mode Cash Declaration example 1 From the main Program Mode menu press the END OF DAY icon Z position on the SAP 630 SA...

Page 166: ...y clicking the column header title RESET CONSECUTIVE Check this option to reset the consecutive transaction number that is printed on receipts RESET ORDER Check this option to reset the order number t...

Page 167: ...ogram Mode Options Options Report Option for this feature Check or uncheck the reports you want to clear and e mail Report Selections are Financial PLU Group Period Employee TIP and Product Mix 3 Chec...

Page 168: ...iod after verifying editing the time keeping has been performed run the End Of Pay to clear the Time Keeping data 1 Select the DATE and EMPLOYEES you wish to clear or select all 2 To clear the Time Ke...

Page 169: ...ons the End Of Day Not Found PLU report displays Note We can sort the displayed data by selecting the column headers on the End Of Not Found PLU to make selecting individual PLU s or groups of PLU s e...

Page 170: ...D DATA FILTERS TERMINAL NOT SELECTED EMPLOYEE ALL DESCRIPTION COUNT TOTAL PLU TOTAL 30 327 83 PRICE LEVEL01 30 327 83 PLU TOTAL 0 0 00 ADJST TOTAL A 30 327 83 NON TAX 0 00 TAX SALES TOTAL 327 83 TAX1...

Page 171: ...70 CHECK IN DRAWER 124 45 FD S IN DRAWER 0 00 MISC TEND SALES 0 0 00 CONVERSION TOTAL 0 00 DRAWER TOTAL 406 15 SAM4S CASH DRAWER 75 00 PROMO 1 12 00 1 12 00 WASTE 1 3 25 GUESTS 0 CHECKS PAID 0 0 00 OP...

Page 172: ...STE US AG E CO UN T TOT AL AMOUN T RATIO TOTAL 1 1 30 32 327 83 100 00 DRF SAM ADAMS 971 BEER NON E NON E 0 0 1 1 3 50 1 07 DRF GUINESS 968 BEER NON E NON E 0 0 1 1 5 00 1 53 DFR GOOSE ISL 967 BEER NO...

Page 173: ...4 4 4 92 1 5 PLU12122 1212 2 GROUP 14 NON E NON E 0 0 4 4 84 8 8 25 89 PLU12121 1212 1 GROUP 14 NON E NON E 0 0 4 4 48 4 8 14 79 CHKN MARSALA 121 DINNE RS NON E NON E 0 0 1 1 12 9 5 3 95 FISH CHIP DNR...

Page 174: ...6 6 100 70 30 72 GROUP14 0 0 12 12 138 28 42 18 SANDWICHES 0 0 1 1 19 95 6 09 SPECIALS 0 0 1 1 9 95 3 04 STARTERS 0 0 2 2 13 95 4 26 Period Report PERIOD REPORT ALL DATE 2017 10 04 14 31 AUTHOR MANAG...

Page 175: ...EPORT DATE 09 11 2018 08 27 AM AUTHOR MANNY DATA RANGE FILTERS GROUP 1 NOT USED GROUP 2 NOT USED GROUP 3 NOT USED PLU ALL DESCRIPTION PLU CODE COST GROUP STOCK MINIMUM STOCK EXTENDED COST TOTAL 0 00 7...

Page 176: ...7 62 WAIT STAFF 76 00 412 58 Food Cost Report Only used when Ingredients Recipes are used FOOD COST REPORT ALL DATE 02 20 2019 08 39 AM AUTHOR MANNY DATA RANGE 09 01 2018 02 28 2019 END OF DAY NUMBER...

Page 177: ...10 02 09 30 53 2017 10 02 15 38 00 OUT MODIFIED MANAGER JOB 9 2017 10 03 15 34 34 2017 10 03 15 40 00 OUT MODIFIED MANAGER JOB 9 2017 10 04 15 41 00 SERVER WAIT STAFF 2017 10 02 09 30 40 2017 10 02 15...

Page 178: ...tem Percentage Discount when NET N Sale Coupon Amounts Sale Percentage Discounts Sale Surcharge Amounts Net Sales GROSS SALES Amount Net Sales Negative PLU Total Item Coupon Total when NET Y Item Perc...

Page 179: ...l also need the PLU option Allow Price Change checked enabled The PLU INFO function key will also need to be created and assigned an MLU or FLU 1 In the Register Mode Press the PLU INFO key the PLU in...

Page 180: ...hout applying any changes 8 Continue editing PLU s as necessary press OK RETURN TO REG to save the new price and return to the register mode Adding PLU s Items not currently in the PLU file can be add...

Page 181: ...PLU Price for the item Group assignment PLU Status Group assignment 5 When finished press OK you are returned to the PLU INFO screen Pressing CANCEL will exit without applying any changes 6 Continue e...

Page 182: ...s well by pressing the label Print icon Specific setup is required for this feature 1 From the PROGRAM MODE main menu touch PLU to view the PLU program selection window touch PLU to view the PLU progr...

Page 183: ...tracking stock in this item Select the PRICE LEVEL and Enter the item PRICE for all price levels Type in the item PLU CODE or scan the new item in the INPUT PLU CODE field If the item code entered is...

Page 184: ...Individual items can be deleted as desired from the PLU Maintenance menu To delete multiple PLUs all at one time use the Edit Sort method refer to page 189 for details 1 Press and hold on the item you...

Page 185: ...Press and Hold the item to open the PLU Sub Menu selection list 3 Select the appropriate Copy operation from the menu to proceed Copy to New Item Copies the selected PLU to new items individually 1 F...

Page 186: ...PLU edit menu selection dialog Select COPY TO EXISTING ITEMS 3 Check the items from the list to copy the selected PLU to 4 The double Up Down Arrows go to the Beginning End respectively the single Up...

Page 187: ...g the X will clear the current entry Enter the last PLU in the range in the TO PLU field Press icon pressing the X will clear the current entry Enter the integer for the BETWEEN PLU For example enter...

Page 188: ...added using the add new record icon You can remove the default item status or change it to another PLU to suite your needs 1 From the PLU programming screen Press and Hold the PLU you wish to set as t...

Page 189: ...rint a barcode Press the exit icon to close the edit mode SORT Select SORT from the available selections Options to sort PLU s A TO Z or Z TO A PLU CODE PLU Status Group Group 1 Group 2 Group 3 Recipe...

Page 190: ...d mapped to the station Additional programming is required to utilize this feature consult with your local dealer for details 1 Select PLU from the PROGRAM MODE PLU menu selections The PLU programming...

Page 191: ...he EDIT MODE from the menu icon then select the one or more PLU s from the list Press the menu icon then Select Edit Mode Press the printer button Select PLU s 2 Press the printer button The PRINT LAB...

Page 192: ...programming maintenance screen for that category We can also enter the PLU code for a specific item to go to the programming for that specific PLU or add new PLU s to the database Quick PLU Edit Exist...

Page 193: ...go to the programming for that PLU 4 Type in the PLU CODE then press the Done icon 5 The PLU code is shown in the window as in the example 6 Press the OK button Alternately type or scan the PLU and pr...

Page 194: ...ntity if the item is a stock item Price Level Price Select the Price level and enter the price for the level OK Adds the new PLU to the database and returns to the main Quick PLU screen CANCEL Exits t...

Page 195: ...ist to the specific employee you wish to edit 4 If you have a large employee file you can sort the employee list alphabetically or by employee number You can also search for specific employees by name...

Page 196: ...yee will be allowed to perform manager functions without entering a manager password TRAINING EMPLOYEE If selected this employee will be in training regardless of the training mode status of the entir...

Page 197: ...ons Other authority levels could be defined for servers cashiers and managers that allow only the appropriate operations REG MODE SIGN IN OUT USING MCR This option forces the employee to use the Mag C...

Page 198: ...e to edit the time keeping reports NEED MANAGER FOR TIME IN OUT When selected employee needs manager to be able to clock in out TIME IN BEFORE SALE Select this option to require employees to clock in...

Page 199: ...es Job codes are used to break down the hours worked for all employees into different categories See Labor Groups report in the Operation Manual A breakdown of hours by job is also reported for each e...

Page 200: ...you can ADD EDIT or DELETE stations as necessary Stations can be sorted alphabetically if desired Description Type in a descriptor for the selected station you can use the X at the end of the descript...

Page 201: ...V cards are embedded with a microprocessor or smart chip that interacts with the merchant s point of sale device to make sure that the payment card is valid and with the use of a PIN that it belongs t...

Page 202: ...202 Appendix Sam4POS 6600 4800II Operators Manual v2 9 Configurations Sam4s SAM4POS Datacap ECR Configurations Single ECR...

Page 203: ...ch and work independent of each other separate batching separate reporting Multi ECR 4 or More NOTE If you have multiple PDC s and a TwinTran Server there is only one batch and it can be controlled at...

Page 204: ...if no EFT device already exists 3 Select DATACAP for the DEVICE MODEL choice press OK 4 In the GENERAL settings verify the Device Model is DATACAP and Communication Type is SERIAL 5 Set verify the SER...

Page 205: ...SAM4POS terminal 5 Select the station to assign the DataCap Device to Press the NEW button to assign a device The NEW item dialog for the selected device displays The NEW item input dialog is specific...

Page 206: ...devices Once the DataCap Device is mapped to the station the NEW button is grayed out This is because you can only have one DataCap Device mapped to a station c EDIT Allows changes to the printer and...

Page 207: ...EIPT Indicate the desire number of copies of the credit transaction receipt to be printed Set HASH Options Gift Cards sold are typically setup as HASH items The Sam4POS series registers have various o...

Page 208: ...er Tender If this option is checked only the amount of the sale or greater are accepted Need Manager for Under Tender when checked the manager is needed to approve the transaction if the amount entere...

Page 209: ...would set the HALO as 50 00 TAX EXEMPT Use this setting to exempt the specified tax rates 1 10 when food stamps are redeemed DRAWER Open Drawer This is option is selected by default uncheck this opti...

Page 210: ...e PLU GIFT CARD ITEM option ACTIVATE Activate a new Gif Card ADD Add value to an existing Gift Card 5 Assign the PLU Status Group to the associated PLU Load the EMV Parameters After connecting the new...

Page 211: ...nformation on the approvals at the register This is required to be able to perform By Record transactions Currently if a Local Transaction Report is run we print the information from the approvals How...

Page 212: ...e merchant receives voice authorization the transaction can be entered into the batch with this operation Pin Pad Reset Not Used this function to initialize the Datacap EFT device for NON EMV applicat...

Page 213: ...function key assigned to the Real Keyboard or to a MLU on the display select the desired operation from the list 2 Enter the shortcut numeral for the operation and press the EFT OPERATION function ke...

Page 214: ...EFT Select Initialize EFT to verify communications software versions and installed networks 1 From the main PROGRAM MODE menu screen select DEVICE then touch EFT OPERATION 2 Select Datacap_Operation f...

Page 215: ...d a new batch is automatically opened for the next day 1 From the main PROGRAM MODE menu screen select DEVICE then touch EFT OPERATION 2 Select Datacap_Operation from the selections 3 Select CLOSE BAT...

Page 216: ...4 At the prompt enter the transaction Invoice number 5 At the prompt enter the Original transaction amount 6 The message WORKING displays until the void is completed The receipt and merchant voucher p...

Page 217: ...stored in ECR memory for tip and record updating The transactions here may not be the same as the transactions in the current batch SAM4POS TERMINAL 2017 09 27 22 37 WED LOCAL TRANSACTION REPORT INV...

Page 218: ...wed for GIFT Card transactions Tips must be entered using a PLU prior to finalization with a Gift Card 1 Select GRATUITY ENTRY from the EFT OPERATION function key menu in the Register Mode or from the...

Page 219: ...This operation does not adjust any other cash register totals or counters Parameter Download Use this operation to load the EMV parameters into the PIN Pad Perform this operation after loading the Da...

Page 220: ...the PIN Pad keypad to continue 3 At the prompt swipe the Gift Card on the PIN Pad 4 The balance will be recalled and printed SAM4POS TERMINAL 10 11 2016 11 57 WED MERCHANT ID 19497807 CLERK ID test BA...

Page 221: ...e device will call Datacap s host PC and load itself 1 From the main PROGRAM MODE menu screen select DEVICE then touch EFT OPERATION 2 Select Datacap_Operation from the selections 3 Scroll down the li...

Page 222: ...mber entry dialog will display 5 If necessary Press 0 and then ENTER to print a list of diagnostic options Note Selections may vary depending upon your installed application SAM4POS TERMINAL DATE 06 2...

Page 223: ...he CLOSE CURRENT BATCH command is performed Some sites are set to Auto Batch and some processors only allow Auto Batch It was confusing to end users to perform CLOSE CURRENT BATCH when they were set f...

Page 224: ...005 999 MERCHNAT ID 19497801 CLERK ID 3 VERIFY CARD VISA 0010 ENTRY METHOD CHIP DATE 10 10 2017 TIME 12 20 15 INVOICE 00005 REFERENCE 00005 AUTH CODE 59981A AMOUNT USD 0 00 USD 0 00 APPROVED THANK YOU...

Page 225: ...line if the transaction is under the configured amount usually set at 25 In the EMV integration the register receives the receipt data from the Datacap device and the signature line is included in the...

Page 226: ...base backup operations for the current program files Database Backup 1 From the PROGRAM MODE touch SYSTEM then select DATABASE The Database Backup Restore screen displays 2 Press the DATABASE BACKUP t...

Page 227: ...e may ask to receive the terminals Log s with the Database We can also send the log data to an FTP site if desired Backing up to an FTP site requires access to an active internet connection 1 From the...

Page 228: ...d when backing up to FTP 8 If selecting to backup to FTP you have the option to select all terminals in the IRC system 9 Press YES to send the backup from all terminals in system eliminates having to...

Page 229: ...he FTP Backup Fails If the backup to the FTP site fails some things to check would be 1 Verify the FTP setting is correct a IP Address crsftp crs usa com b Port Number 0 2 Check to see if there are an...

Page 230: ...ll return an error response back to the user system due to a communication or operational problem Register a transaction and tender with EMV Credit If Customer does not press anything at the Pin Pad r...

Page 231: ...Sam4POS 6600 4800II Operators Manual v2 9 Appendix 231 If Customer presses OK at the Pin Pad and then does nothing at the Pin Pad result is 499 0 TRANSACTION_NOT_COMPLETE_ _NO_Response_from_Pin Pad 0...

Page 232: ...ssword is 1 ALPHA ALPHA 6 6 8 3 1 Press ENTER Alpha is a black key located directly above the 2 key Enter is the Green key 3 Press 2 for Edit Parameters Press ENTER 4 Select 1 for Group ID The passwor...

Page 233: ...info Register Mode Updated screens Program Maintenance Integrated Payment Transactions draft examples v2 0 3 8 2019 Combined SAP 6600 SAP 630 manuals Updated Authority Level Allow EOD in REG Mode v2 1...

Reviews: