24
Detailed Editing for a Patch (PATCH Parameters)
Some of the waves that make up a tone key are stereo.
With stereo waves, the name of a left-channel wave ends in “L”, while
the name of a right-channel wave ends in “R.”
The left and right waves are numbered consecutively; the right-channel
wave number is one greater than the left-channel wave number.
You can use the following procedure to first select either the left or
right wave, and then select the other wave.
1.
Select a patch.
2.
Make sure that [SUMMARY] or [WG] is selected in the Navigation
block.
3.
Use WAVE NUMBER L to select the left-channel wave of the stereo
wave.
4.
Double-click WAVE NUMBER R.
The corresponding right-channel wave will be selected.
You can also use WAVE NUMBER R to select the right-channel
wave and then double-click WAVE NUMBER L to select the left-
channel wave.
Changes you make are temporary, and will be discarded when you
turn off the power or select another patch. If you want to keep a patch
you’ve modified, save it at number 501 or following in the internal
memory.
When you click the [WRITE] button located in the top line of the main
window, the data will be written to the JUNO-Di.
If you’ve edited a patch in Performance mode, you should also save
the performance after saving the patch (p. 57).
When you save, the data that previously occupied the save
destination will be overwritten.
Never turn off the power while data is being saved.
Stereo Wave Settings
Saving a Patch
Note when selecting a waveform
The JUNO-Di uses complex PCM waveforms as the basis for its
sounds. For this reason, you should be aware that if you specify a
waveform that is very different than the original waveform, the result
may not be what you expect.
The JUNO-Di’s internal waveforms can be categorized into the
following two types.
One-shot:
These are sounds with a short decay time. One-shot waveforms
contain the entire duration of the sound from the attack until it
decays to silence. Some of these waveforms capture a complete
sound such as a percussion instrument, but there are also many
attack component sounds such as the hammer strike of a piano
or the fret noise of a guitar.
Loop:
These are sounds with a long decay, or sustaining sounds.
Looped waveforms will repeatedly play a portion of a sound
once it has reached a relatively stable state. These sounds also
include numerous component sounds, such as a vibrating piano
string or a resonating pipe.
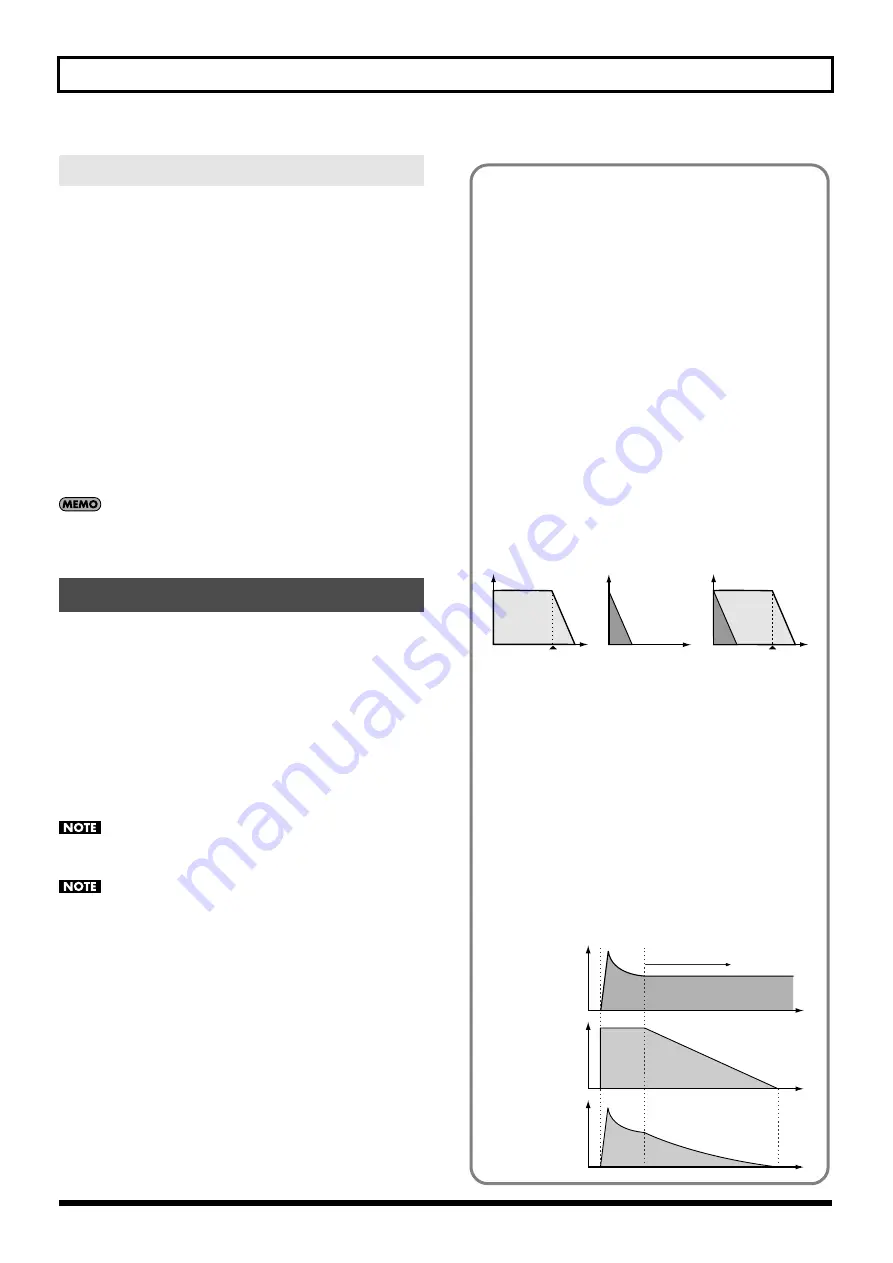
The following illustration shows an example of a sound created by
combining a one-shot waveform with a loop waveform. (This example
is of an electric organ.)
fig.Waveform1-e.eps
Note when selecting a one-shot waveform
It’s not possible to use the envelope settings to give a one-shot
waveform a longer decay than the original waveform contains,
or to make it a sustaining sound. Even if you made this type of
envelope setting, you would be trying to bring out something
that doesn’t exist in the original waveform.
Note when selecting a looped waveform
Many acoustic instruments such as piano or sax are marked by
a sudden change in timbre at the very beginning of the sound,
and this rapid change is what gives the instrument its distinctive
character. When using these waveforms, it’s best to use the
complex tonal changes in the attack portion of the sound without
attempting to modify them; use the envelope only to modify the
decay portion of the sound as desired. If you use the envelope to
modify the attack as well, the envelope settings will be affected
by the attack of the waveform itself, and you may not get the
result you intend.
fig.Waveform2-e.eps
TVA ENV for looped Organ
waveform (sustain portion)
Note off
Time
Level
Resulting TVA ENV
change
TVA ENV for one-shot Key
-click waveform (attack portion)
Note off
+
=
Tone change stored
with the wave
Envelope
for the TVF filter
Resulting
tone change
Looped portion
Time
Level


