© Copyright Qvis® All documentation rights reserved.
120
Add/Modify User
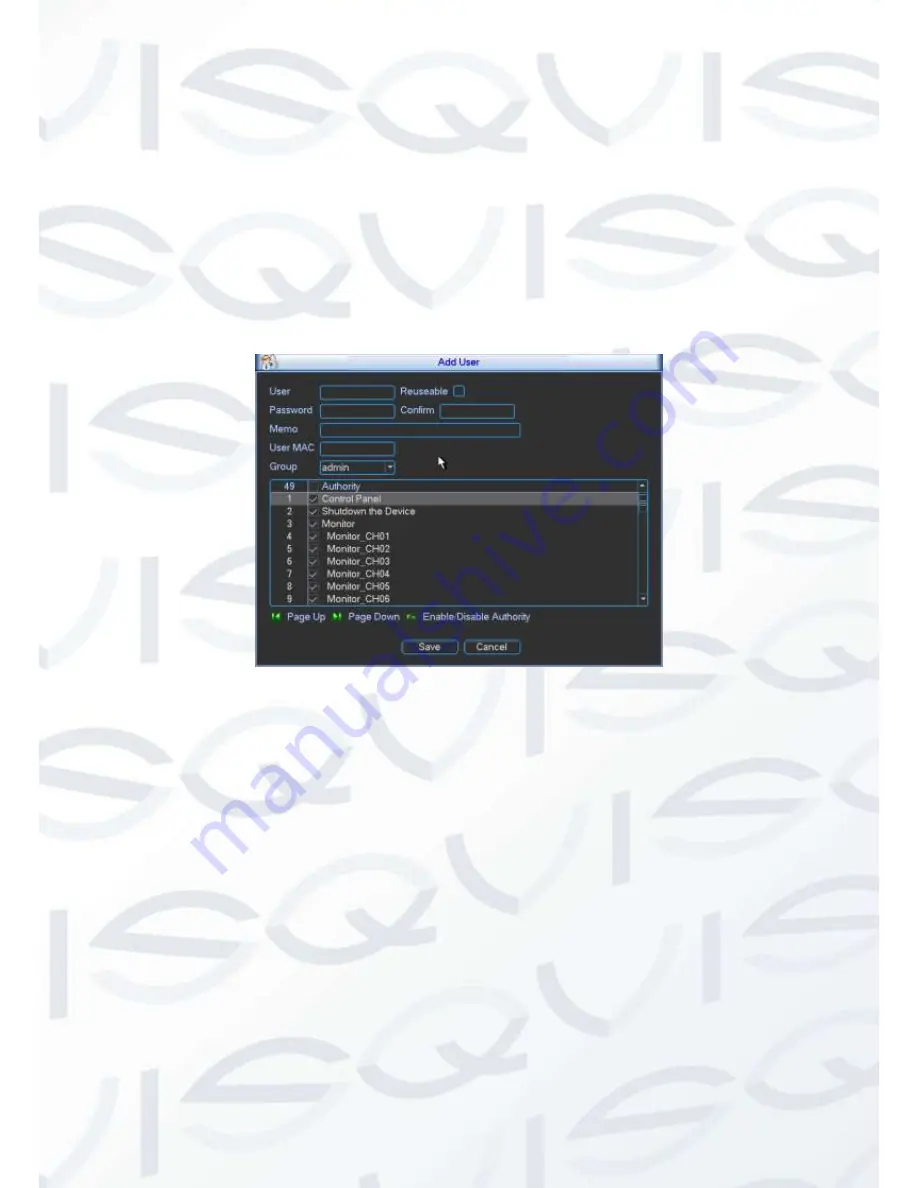
Click add user button, the interface is shown as in Figure 5-57.
Please input the user name, password, user MAC address and select the group it belongs to
from the dropdown list. Then you can check the corresponding rights for current user.
For convenient user management, usually we recommend the general user right is lower than
the admin account.
The modify user interface is similar to Figure 5-57.
Figure 5-57
When you create a new user, you can input the corresponding MAC address of current user. If
you leave this item in blank, any MAC address user can share this user account to login. Please
note system needs to check the validity of MAC. Only the 12-digit 0-f format address can pass
the validity verification. System only saves small character even you input capitalized one. You
can see the corresponding prompt if there is any illegal input.
5.5.6 Auto Maintenance
Here you can set auto-reboot time and auto-delete old files setup. You can set to delete the files
for the specified days. See Figure 5-58.
You can select proper setup from dropdown list.
After all the setups please click save button, system goes back to the previous menu.
Summary of Contents for IAPOLLO HDRT HD
Page 2: ...Copyright Qvis All documentation rights reserved i...
Page 51: ...Copyright Qvis All documentation rights reserved 42 iApollo PRODC...
Page 69: ...Copyright Qvis All documentation rights reserved 60 Figure 4 20...
Page 75: ...Copyright Qvis All documentation rights reserved 66 Figure 4 26 Figure 4 27 Figure 4 28...
Page 101: ...Copyright Qvis All documentation rights reserved 92 Figure 5 16 Figure 5 17 Figure 5 18...
Page 177: ...Copyright Qvis All documentation rights reserved 168 Figure 7 39 Figure 7 40 Figure 7 41...
Page 186: ...Copyright Qvis All documentation rights reserved 177 Figure 7 55 Figure 7 56 Figure 7 57...


