


3
rd
Generation Rack-
Mount RDMS™
128
Quasonix, Inc.
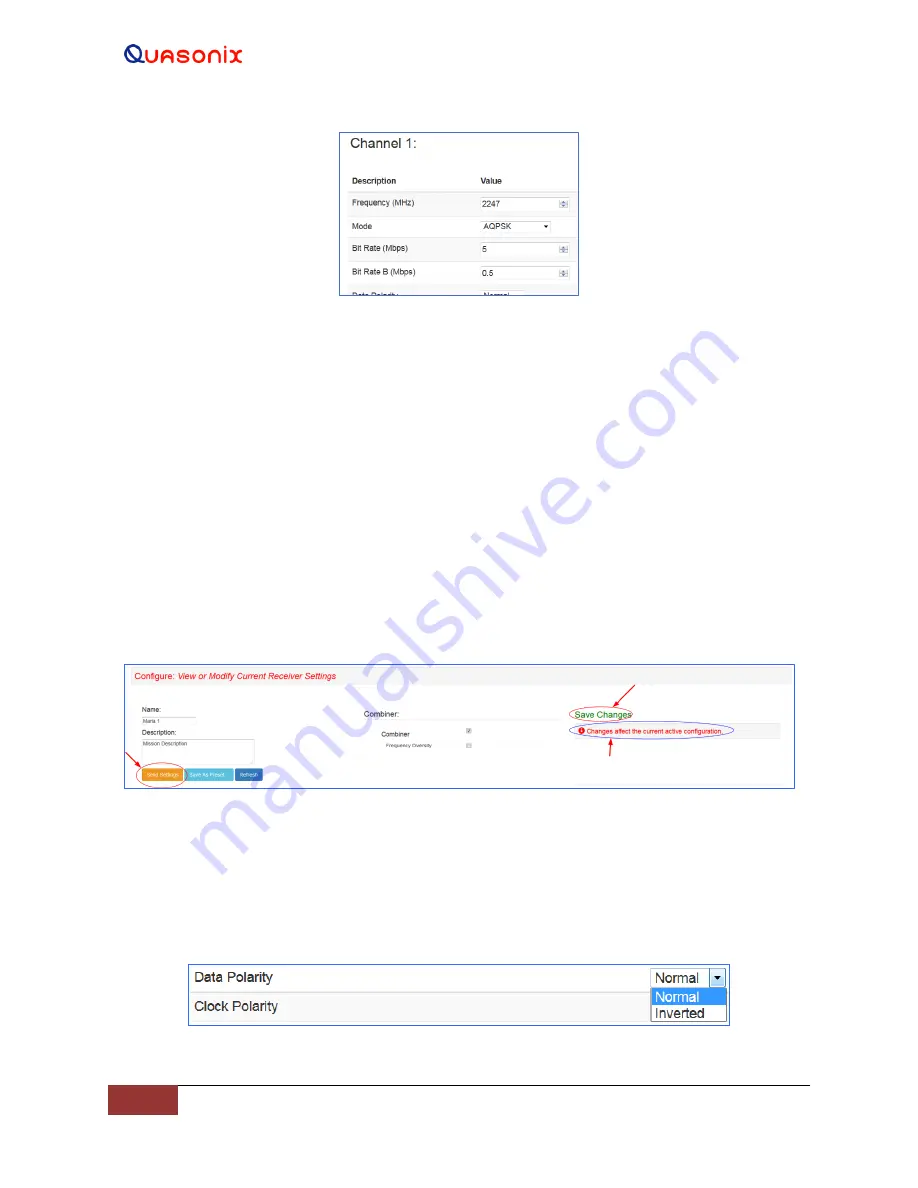
Figure 216: Configure Basic Settings Window-AQPSK Mode, Two Bit Rates
The settings can be adjusted by clicking on a check box (to enable or disable an option), clicking on a drop down
menu and making a selection, or, in the case of Frequency and Bit Rate, typing the number directly or using
up/down scroll arrows to select the desired value.
To save the current configuration as a preset, click on the Save as a Preset button, or click on the Refresh button to
refresh the settings without saving. To create or modify other presets, use the Browser Interface Presets screen.
When selecting new settings on the Browser Interface Configure screen, these settings are not sent to the receiver
and activated until the user clicks on the Save Presets button.
New options are provided to the user when certain
options are selected
, for example, Frequency Diversity and Time Aligner are only available after Combiner is
enabled
and saved
. Then other options may be changed
and saved
.
The Browser Interface alerts the user whenever a Save or Refresh is required. When a Save is necessary, the Send
Settings button changes color (from green to gold), and a Save Changes message displays in the message area on the
right side of the screen, as shown in Figure 217. Other notifications display in red text on the right side.
Figure 217: Configure Screen, Messages and Alerts
4.5.3.2.1 Data and Clock Polarity Settings
The Data Polarity and Clock Polarity are set by clicking on drop down arrow to display the menu, then selecting the
desired option, Normal or Inverted, as shown in the Data Polarity example in Figure 218.
Figure 218: Settings Window, Data Polarity Selection


