49
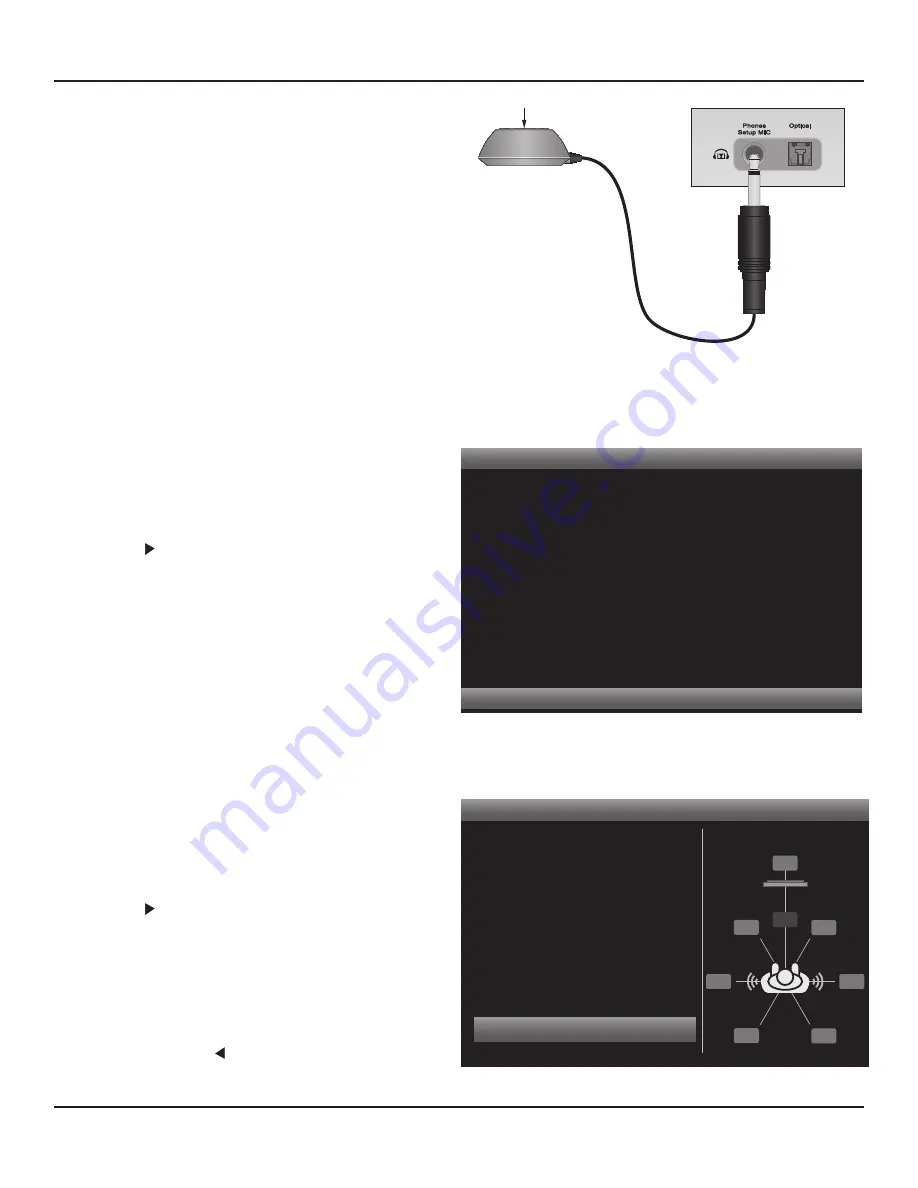
M80 Front Panel
Smart EQ Microphone
Diagram 46
SmartEQ Microphone Connection
SmartEQ
Test Error:
Please check that the microphone is connected.
Press < to Return
Diagram 47
SmartEQ Test Error Message
SmartEQ
AutoDetected Speaker
Status:
Checking Noise Level
Subwoofer
Cancel
BSL
SL
SR
BSR
FL
FR
SW
C
Diagram 48
SmartEQ Configuration
from a given speaker during the SmartEQ process.
By sampling the frequency response, level and delay
from each speaker, the M80 will be able to optimize each
speaker’s settings to compensate for speaker placement
and room characteristics so surround audio content will
be reproduced exactly as it was created in the studio and
synthesized modes will be properly balanced.
Important Note:
Before starting SmartEQ, eliminate as
much ambient noise from the room as possible. Close
windows and doors, turn off fans or any other devices in
the room that are generating sound.
If staying in the room while Smart EQ is in progress, do
not block ‘line of sight’ between any speaker and the
measurement microphone and try not to move or make
any noise.
Warning:
The sound levels generated during SmartEQ
can become uncomfortable to persons with sensitive
hearing. Quietly leaving the room or use of some form of
ear protection is recommended. Disconnected closed-air
headphones can be used or earplugs can be purchased in
better drug stores, musical instrument stores or building
supply outlets where heavy tools are sold.
1.
Press . The SmartEQ Connect Microphone screen
will appear. 7.1 speaker configuration will be high-
lighted by default.
Diagram 45
2.
Connect the measurement microphone as shown
in
Diagram 46.
The speakers will be turned OFF
until SmartEQ starts. For a single user, position the
microphone in the Ideal Listening Zone as shown in
Diagrams 5 & 6
. If there will be more than one lis-
tener, position the microphone in a position centered
to where the users would typically be seated, or for a
large room, position the microphone in the center of
the room. Position the microphone to typical seated
ear level. (Turning the M80 box on end and placing it
in the user’s seated position makes a convenient mic
stand.)
3.
In the SmartEQ Connect Microphone screen,
Dia-
gram 45
, position the highlight bar over 7.1 or 5.1 as
appropriate for the speaker system being calibrated.
Press .
Note:
SmartEQ will not initiate for a 7.1 configuration
if Amplifier Back Amp is set to Zone 2. See section:
Amplifier Setup
for additional information.
4.
If the Test Error screen appears,
Diagram 47
, connect
the microphone or if connected, disconnect and then
re-connect the mic to assure that it is properly seated
in the jack. Press to return to the Speaker Setup
Menu,
Diagram 44
and repeat
Step 3
.
SPEAKER SETUP
Summary of Contents for M80
Page 1: ...Audio Systems M80 7 1 Channel Surround A V Receiver Installation User Guide ...
Page 7: ...7 notes ...
Page 107: ...107 notes ...


