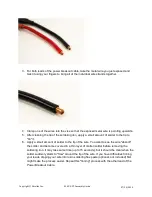
your leads, dipping your wire into rosin soldering flux paste (optional, not included) first
might make the process easier. Repeat this "tinning" process with every wire.
5. Place a Male bullet connector into the vise, with the shallow “cup” end facing up. If you
are using the block, clamp it into the vise and seat the bullet connector into the hole.
6. Hold the soldering iron to the small hole on the side of the “cup” of the bullet connector,
and apply solder slowly into the “cup” until it is half full. Put the solder down.
Copyright © Parallax Inc.
ELEV-8 V2 Assembly Guide
07/26/2018
Summary of Contents for ELEV-8 V2
Page 14: ...Copyright Parallax Inc ELEV 8 V2 Assembly Guide 07 26 2018...
Page 19: ...Copyright Parallax Inc ELEV 8 V2 Assembly Guide 07 26 2018...
Page 37: ...Results at end of this step Copyright Parallax Inc ELEV 8 V2 Assembly Guide 07 26 2018...
Page 39: ...Copyright Parallax Inc ELEV 8 V2 Assembly Guide 07 26 2018...
Page 47: ...Copyright Parallax Inc ELEV 8 V2 Assembly Guide 07 26 2018...
Page 57: ...Copyright Parallax Inc ELEV 8 V2 Assembly Guide 07 26 2018...
Page 67: ...Copyright Parallax Inc ELEV 8 V2 Assembly Guide 07 26 2018...
Page 87: ...Copyright Parallax Inc ELEV 8 V2 Assembly Guide 07 26 2018...
Page 91: ...Copyright Parallax Inc ELEV 8 V2 Assembly Guide 07 26 2018...
Page 96: ...Copyright Parallax Inc ELEV 8 V2 Assembly Guide 07 26 2018...
Page 98: ...Copyright Parallax Inc ELEV 8 V2 Assembly Guide 07 26 2018...
Page 107: ...Copyright Parallax Inc ELEV 8 V2 Assembly Guide 07 26 2018...
Page 114: ...Copyright Parallax Inc ELEV 8 V2 Assembly Guide 07 26 2018...
Page 123: ...Copyright Parallax Inc ELEV 8 V2 Assembly Guide 07 26 2018...
Page 130: ...Copyright Parallax Inc ELEV 8 V2 Assembly Guide 07 26 2018...


