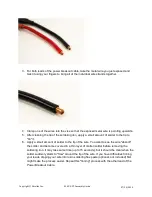
7. Now take one of the "female" bullet connectors supplied with the EC3 connector and
place it in your vise.
8. After tinning the tip of the soldering iron, hold it on the rim of the bullet connector, and
apply solder slowly into the “cup” until it is 1/3 full. Put the solder down. (try not to use
too much solder in order to prevent excess solder from flowing to the outside of the bullet
connector in the next instruction)
9. Continuing to hold the soldering iron in place, bring the battery lead to connector and
slowly insert into the cup.
Copyright © Parallax Inc.
ELEV-8 V2 Assembly Guide
07/26/2018
Summary of Contents for ELEV-8 V2
Page 14: ...Copyright Parallax Inc ELEV 8 V2 Assembly Guide 07 26 2018...
Page 19: ...Copyright Parallax Inc ELEV 8 V2 Assembly Guide 07 26 2018...
Page 37: ...Results at end of this step Copyright Parallax Inc ELEV 8 V2 Assembly Guide 07 26 2018...
Page 39: ...Copyright Parallax Inc ELEV 8 V2 Assembly Guide 07 26 2018...
Page 47: ...Copyright Parallax Inc ELEV 8 V2 Assembly Guide 07 26 2018...
Page 57: ...Copyright Parallax Inc ELEV 8 V2 Assembly Guide 07 26 2018...
Page 67: ...Copyright Parallax Inc ELEV 8 V2 Assembly Guide 07 26 2018...
Page 87: ...Copyright Parallax Inc ELEV 8 V2 Assembly Guide 07 26 2018...
Page 91: ...Copyright Parallax Inc ELEV 8 V2 Assembly Guide 07 26 2018...
Page 96: ...Copyright Parallax Inc ELEV 8 V2 Assembly Guide 07 26 2018...
Page 98: ...Copyright Parallax Inc ELEV 8 V2 Assembly Guide 07 26 2018...
Page 107: ...Copyright Parallax Inc ELEV 8 V2 Assembly Guide 07 26 2018...
Page 114: ...Copyright Parallax Inc ELEV 8 V2 Assembly Guide 07 26 2018...
Page 123: ...Copyright Parallax Inc ELEV 8 V2 Assembly Guide 07 26 2018...
Page 130: ...Copyright Parallax Inc ELEV 8 V2 Assembly Guide 07 26 2018...


