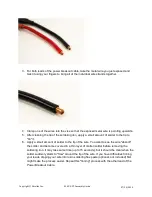
4. Clamp one of the wires into the vise so that the exposed metal wire is pointing upwards.
5. After cleaning the tip of the soldering iron, apply a small amount of solder to the tip to
"tin" it.
6. Apply a small amount of solder to the tip of the wire. You want to see the wire "absorb"
the solder and become covered in a thin layer of molten solder before removing the
soldering iron. It may take some time (up to 30 seconds or more), but it should be clear
when the solder suddenly starts to "flow" around the tip of the wire. If you have
difficulties tinning your leads, dipping your wire into rosin soldering flux paste (optional,
not included) first might make the process easier. Repeat this "tinning" process with the
other lead of the Power Breakout Cable.
Copyright © Parallax Inc.
ELEV-8 V2 Assembly Guide
07/26/2018
Summary of Contents for ELEV-8 V2
Page 14: ...Copyright Parallax Inc ELEV 8 V2 Assembly Guide 07 26 2018...
Page 19: ...Copyright Parallax Inc ELEV 8 V2 Assembly Guide 07 26 2018...
Page 37: ...Results at end of this step Copyright Parallax Inc ELEV 8 V2 Assembly Guide 07 26 2018...
Page 39: ...Copyright Parallax Inc ELEV 8 V2 Assembly Guide 07 26 2018...
Page 47: ...Copyright Parallax Inc ELEV 8 V2 Assembly Guide 07 26 2018...
Page 57: ...Copyright Parallax Inc ELEV 8 V2 Assembly Guide 07 26 2018...
Page 67: ...Copyright Parallax Inc ELEV 8 V2 Assembly Guide 07 26 2018...
Page 87: ...Copyright Parallax Inc ELEV 8 V2 Assembly Guide 07 26 2018...
Page 91: ...Copyright Parallax Inc ELEV 8 V2 Assembly Guide 07 26 2018...
Page 96: ...Copyright Parallax Inc ELEV 8 V2 Assembly Guide 07 26 2018...
Page 98: ...Copyright Parallax Inc ELEV 8 V2 Assembly Guide 07 26 2018...
Page 107: ...Copyright Parallax Inc ELEV 8 V2 Assembly Guide 07 26 2018...
Page 114: ...Copyright Parallax Inc ELEV 8 V2 Assembly Guide 07 26 2018...
Page 123: ...Copyright Parallax Inc ELEV 8 V2 Assembly Guide 07 26 2018...
Page 130: ...Copyright Parallax Inc ELEV 8 V2 Assembly Guide 07 26 2018...


