


W
ORKING
W
ITH
THE
C
ONTENT
U
PDATE
T
OOL
- 345 -
2.
Click
Next
.
S
TEP
R
ESULT
:
The
Configuration
page opens.
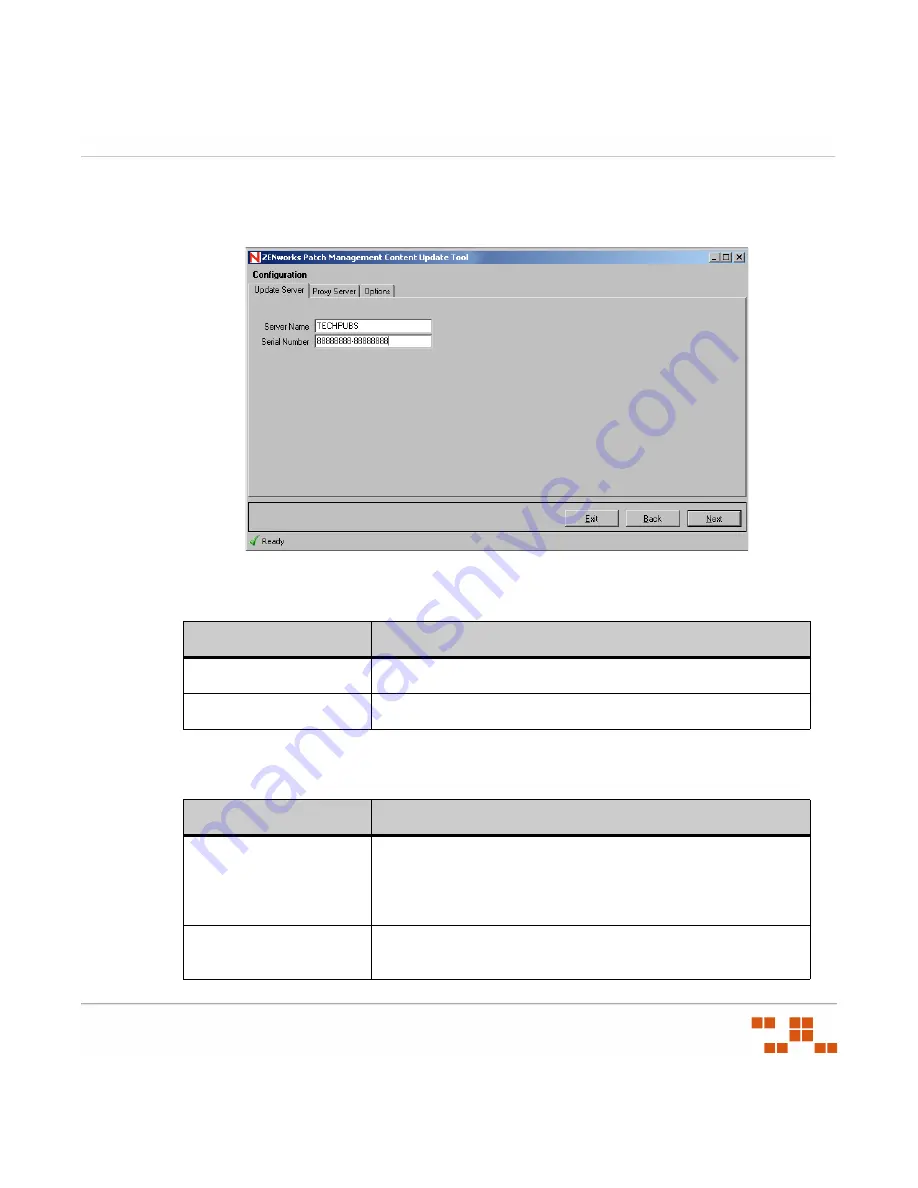
Figure C-3:
Content Update Tool - Configuration Page
3.
Select the
Server
tab and set the configuration options.
Table C-4:
Content Update Tool - Server Tab Configuration Options
4.
Select the
Proxy Server
tab and set the configuration options.
Table C-5:
Content Update Tool - Proxy Server Tab Configuration Options
Field
Description
Server Name
The name of your Patch Management Server.
Serial Number
The Patch Management Server serial number.
Field
Description
Use Proxy
Select if a proxy is required during the communication between
the Content Update Tool and your Patch Management Server.
Selecting this option will enable the
Proxy Server
and
Port
fields.
Proxy URL
The proxy server’s name.
Do not include the
http://
or
https://
prefix.
Summary of Contents for ZENWORKS PATCH MANAGEMENT 6.4 SP2 - SERVER
Page 1: ...User Guide ZENworks Patch Management 6 4 SP2 ...
Page 44: ...USING ZENWORKS PATCH MANAGEMENT 28 ...
Page 138: ...WORKING WITH DEPLOYMENTS 122 ...
Page 212: ...USING GROUPS 196 ...
Page 236: ...REPORTING 220 ...
Page 308: ...CONFIGURING DEFAULT BEHAVIOR 292 ...
Page 332: ...USING THE AGENT 316 The Agent Control Panel opens Figure 10 19 Agent Control Panel ...


