background image

Appendix A

Issue 1-0

45

P/N

NVM2EDBM1,

SEPTEMBER

1999

This gives the Subscriber Mailbox access to the System Administrator and/or Database

Management Menus.

7 2

SA

S

ystem

A

dministrator

This deletes the Security Code of the Subscriber Mailbox.

3 7

DS

D

elete

S

ecurity Code

This transfers a call to the Subscriber extension and releases it. If not answered, the call

is handled by the phone system, not the Voice Mail.

8 9

UX

Forced

U

nscreened

X

fer (Transfer)

This prevents an Auto Attendant caller from reaching the Subscriber extension. Voice

Mail lets the caller leave a message. Or you can have Voice Mail reroute the blocked

caller to another extension. See Next Call Routing Mailbox below.

2 2

BA

B

lock Auto

A

ttendant Calls

6 9

MW

M

essage

W

ait Lamp

This lights the Subscriber's Msg Lamp when there is a new message in the Subscriber's

Mailbox.

This assigns a Call Routing Mailbox (along with its Dial Action Table) to a Subscriber

Mailbox. This Call Routing Mailbox does the following:

Lets an outside caller dial 0 before or after leaving a message in a Subscriber Mailbox.

Dialing 0 reroutes the caller to another extension, typically the operator.

Automatically reroutes the callers who have been blocked from reaching the

Subscriber extension (see Block Auto Attendant Calls above).

In both cases, the Voice Mail reroutes the call using the Key 0 assignment in the Dial

Action table (see Dial Action Table Programming Menu). For example, if you assign Call

Routing Mailbox 803 as the Next Call Routing Mailbox, you will have to program Key 0 in

Dial Action Table 2. If you want the caller to go to the operator, you could select

"Unscreened Transfer to a Pre- Defined Extension (UX)" for the Key 0 action and the

operator's extension for the Key 0 number.

6 2

NC

N

ext

C

all Routing Mailbox

This assigns a name to the Mailbox for the Directory Dialing (name-dialing) feature.

NP

Mailbox

N

ame

P

rogramming

6 7

This determines the number of messages that a Subscriber Mailbox may hold. Setting

the number to 0 (zero) prevents the mailbox from receiving messages.

ML

Specify

M

essage Storage

L

imit

6 5

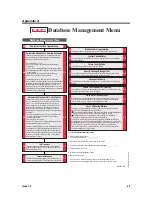
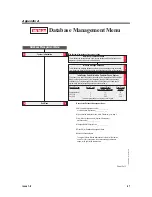
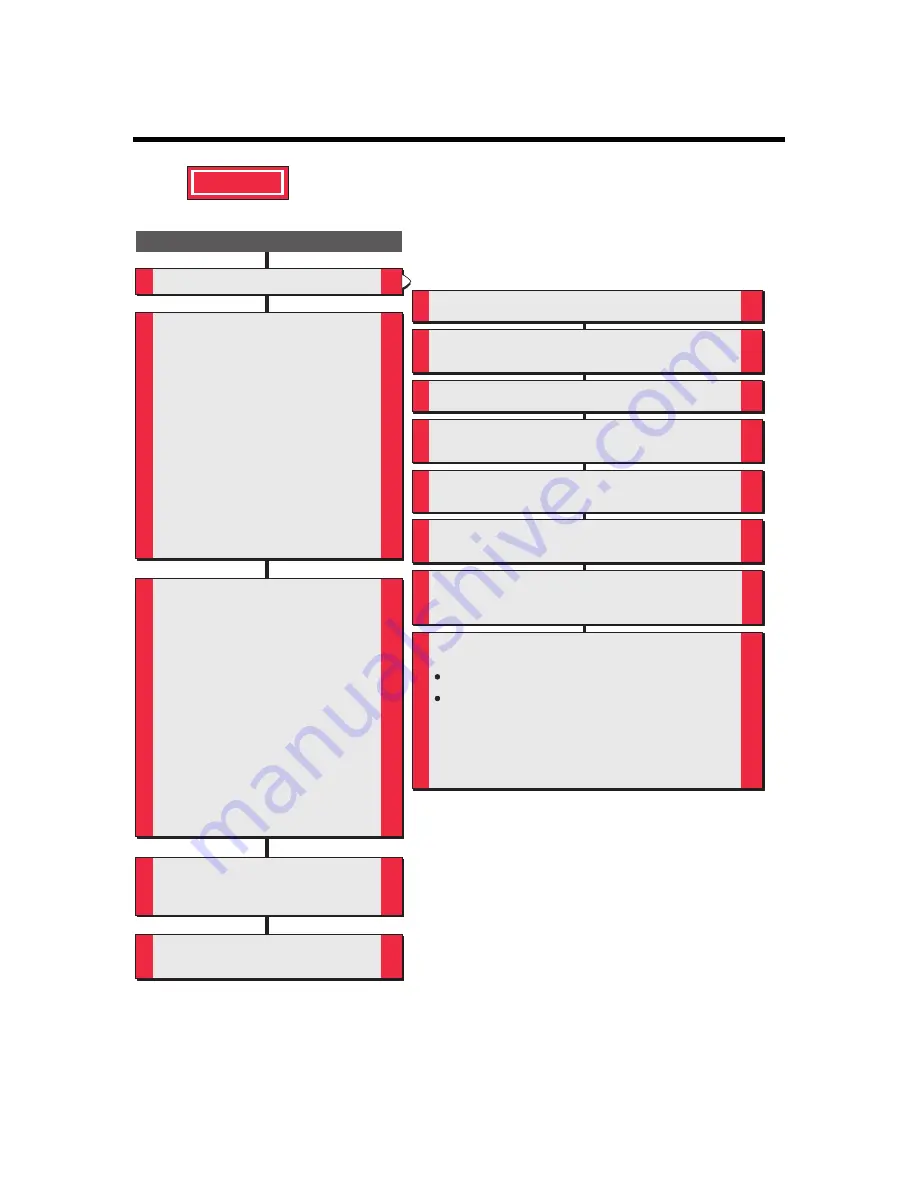
Database Management Menu

F

AX

T

ransfers

FT

3 8

This allows assigning an extension number to a FAX Machine

(using an extension number for a FAX reduces the number of

Subscriber Mailboxes to 49).

Automated Attendant

D

ial

A

ction Tables

DA

3 2

A Dial Action Table (DAT) sets up a menu of dialing options

(e.g., For Susan, press 1. For John, press 2. For Sales,

press 3., etc.) for Auto Attendant callers. You can set up a

menu using Keys 0-8 on the dialpad. To set up the menu, you

assign an action and number to each key. When the caller

presses the key, the Auto Attendant performs the action and

dials the number. An example for entering an action/number/key

is as follows:

1. Select the action: ET. The code ET is for action "Pre-Defined

Extension Transfer (Screened)" listed on the next page.

2. Select the number: 25.

3. Press the key for the action: 2.

The result is as follows: When the caller presses key 2, the Auto

Attendant transfers the call to extension 25.

Voice Mail provides 4 Dial Action Tables. Dial ActionTables (1-4)

are associated with Call Routing Mailboxes 802, 803, 804, 807

respectively. So if Call Routing Mailbox 802 is answering calls

(see Answering Schedules above), the Voice mail will let callers

use the menu of options in Dial Action Table 1. The available

actions are listed on sheet 2.

Automated Attendant

AN

swering Schedules

AN

2 6

This sets up answering schedules so the Automated Attendant

can greet/instruct callers differently depending on the day/date

and time. A schedule consists of 4 things:

1) A schedule number (1-20).

2) Day, date, or range of days that the greeting/instructions

should play.

3) Time of day that the greeting/instructions should start playing.

4) Call Routing Mailbox number (802, 803, 804, 807) that should

answer the call.

The greeting/instructions (called the Instruction Menu) is

actually recorded for the Call Routing Mailbox.

For example, suppose the data for Schedule 1 is: Monday -

Friday, 12:00 PM, 802. All people who call into the Auto Attendant

on Monday - Friday at 12:00 PM or later will hear the Instruction

Menu recorded for Call Routing Mailbox 802. To record the

Instruction menu, see the System Administrator Menu. To set up

dialing options for the Automated Attendant callers, see Automated

Attendant Dial Action Tables below.

Subscriber

M

ailbox

P

rogramming

MP

6 7

The Mailbox Programming Options are as follows:

S

ystem

I

nitialization

SI

7 4

This initializes the message database, the entire database and

the phone system integration. The available options are on sheet 3.

To access the Database Management Menu:

1. Dial Voice Mail extension number_______________

or Voice Mail outside number_______________.

2. If you hear the company greeting, dial #. Otherwise, go to step 3.

3. If a mailbox is requested, dial System Administrator mailbox number_______________.

4. If requested, dial Security Code_______________.

5. Press DM for Database Management Menu.

6. Select the desired feature.

To select a feature, dial the letters shown to the left of the feature name. For your

convenience, their corresponding numbers are shown to the right of the feature name.

Sheet 1 of 3

Database Management Menu

NVM-2e

Summary of Contents for NVM-2e

Page 1: ...NVM 2e Installation Instructions and Release Notes for Versions 1 08 and 1 08 02 Part No 17780INS04 Issue 1 0 September 1999...

Page 2: ...ange without notice and Nitsuko America has no obligation to provide any updates or corrections to this manual Further Nitsuko America also reserves the right without prior notice to make changes in e...

Page 3: ...tion time 10 ms during playback Default is 5 31 DTMF detection time 10 ms during record Default is 6 31 Call Processing Parameters 31 CmdInputTimeout sec Time limit for dialing commands for call routi...

Page 4: ......

Page 5: ...igures 1 and 2 for different views of the NVM 2e NVM 2e is flash RAM based Batteries are not required to back up system memory Note You should ignore the battery installation instructions in the NVM 2...

Page 6: ...he Installation Instructions tell you how to install the NVM 2e The Software Release Notes describe any new or enhanced features that are available in software release 1 08 and 1 08 02 Use this supple...

Page 7: ...Issue 1 0 3 NVM 2e Installation Instructions...

Page 8: ......

Page 9: ...equirements 7 Install NVM 2e 8 Connect a Laptop to the NVM 2e 9 Connect a Phone System to NVM 2e 11 Program NVM 2e for the Correct Phone System 14 Program Your Phone System for Voice Mail 14 Program N...

Page 10: ......

Page 11: ...t expose this product to rain or any type of moisture Do not locate the unit near heating appliances Do not expose the unit to direct sunlight Locate the unit away from devices that generate electrica...

Page 12: ...ed on the bottom of the cabinet Make sure that the ventilation slots are not blocked Position the cabinet so that the LEDs can be seen 2 Plug the Voice Mail power supply cord into the connector labele...

Page 13: ...ct a laptop to the NVM 2e To connect a laptop to NVM 2e 1 Connect the laptop computer to the connector labeled 2 on the Voice Mail using an RS 232 cable null modem See Figure 4 Make sure the RS 232 ca...

Page 14: ...onnect a Laptop to the NVM 2e cont d Figure 5 Required Pin outs for the RS 232 Cable 4 When the laptop is communicating with the Voice Mail you will see a menu screen and the prompt Main Menu Proceed...

Page 15: ...a Station Port on the Portrait Be sure to connect L1 to the Station Port based on the Portrait Setup you have See the Portrait Phone System Requirements in the NVM 2 Setup Guide 4 Repeat steps 1 throu...

Page 16: ...l ASI to the phone system Figure 7 shows connecting to a Dual ASI 3 Repeat steps 1 and 2 for Port 2 4 Repeat steps 1 and 2 for Ports 3 and 4 if your Voice Mail contains four ports Note Extensions will...

Page 17: ...modular jack See Figure 8 2 Repeat step 1 for Port 2 3 Repeat step 1 for Ports 3 and 4 if your Voice Mail has four ports Note Extensions will receive notification of new messages blinking Message Wai...

Page 18: ...il database for a particular phone system 5 Enter the code for the phone system you installed Valid codes are listed below 1 Portrait 2 28i 124i 3 Onyx VS or Businesscom DS01 6 Press Follow the voice...

Page 19: ...3 At the DOS prompt type sysedit and press Enter The System Configuration Management Program Main Menu appears and lists the phone system that you have installed with the Voice Mail System For example...

Page 20: ......

Page 21: ...Issue 1 0 17 NVM 2e Release Notes for Version 1 08 New and Enhanced Features...

Page 22: ......

Page 23: ...ms during record Default is 6 31 Call Processing Parameters 31 CmdInputTimeout sec Time limit for dialing commands for call routing 33 DtmfTimeout sec time allowed user between dialing digits for cal...

Page 24: ......

Page 25: ...riber Mailboxes in the Voice Mail always equals 50 the remaining mailboxes should be equal to the differences between 50 and the actual number of extensions in your system In most cases these mailboxe...

Page 26: ...em It is recommended that you do not change the first Trunk Mailbox number unless the trunks in your phone system start with a different number Phone System Default Subscriber Mailbox Numbering Defaul...

Page 27: ...the number exactly as it will be dialed Press Enter 6 Enter the number of mailboxes that will be in this range at the Number of consecutive mailboxes prompt and press Enter You will see Mailbox type...

Page 28: ...on In this example the Mailbox Extension Range consists of 4 sequences Each sequence is numbered consecutively and contains the following entries Sequence 1 10 through 15 A 10 is entered for the Start...

Page 29: ...Message Notification or both several Subscribers can be informed about the arrival of their new messages at the same time The number of Subscribers that can be so informed always matches the number of...

Page 30: ...outs Y N Yes Port 4 Options Allow Lamp callouts Y N No Allow Msg Notification callouts Y N Yes 3 Change the ports for Lamping and Message Notification as desired As each prompt is displayed press Y to...

Page 31: ...Configuration Management Program 1 Connect a laptop to the Voice Mail For instructions see page 9 Start up the System Configuration Management Program For instructions see page 15 The Main Menu for yo...

Page 32: ...mping to occur An H at the end of this string indicates that after checking a Subscriber Mailbox and finding new messages the Voice Mail will go off hook dial the lamp on string and then hang up The V...

Page 33: ...FAULT Depends on the phone system that is installed ENTRIES Up to 20 digits N None Special Codes F flash P pause M Monitor pause X extension W wait for dial tone G number of messages A analyzed pause...

Page 34: ...s in the System Configuration Management Program 1 Connect a laptop to the Voice Mail For instructions see page 9 Start up the System Configuration Management Program For instructions see page 15 The...

Page 35: ...ld increases the voice card s DTMF tone recognition capability It allows the Voice Mail to detect those DTMF tones with a shorter duration level that may be sent from some phone systems cordless phone...

Page 36: ...er To view modify O system Options R poRt Options G Global parameters C Channel parameters P call Processing parameters T Tone table M Mailbox Range Setup Q Quit 2 Press P call Processing parameters f...

Page 37: ...Voice Mail to detect the 100 Hz CNG tone that a FAX machine generates when it calls into the system DEFAULT 4 seconds ENTRIES 1 100 seconds Note In the NVM 2 the default value is 7 DtmfTimeout sec tim...

Page 38: ...p for unsupervised transfers this parameter has no affect on how the call is handled DEFAULT 10 seconds ENTRIES 1 100 seconds NormalGain Default volume setting for recorded messages Min 10 Max 10 Chan...

Page 39: ...not hear any voice prompt Each action on a Dial Action Table is associated with a code that you use when programming the action The programming code is represented by the letters or numbers in parent...

Page 40: ...ur paging service takes longer than the allowed 8 seconds to answer If the number is busy or if a reorder tone is received the Voice Mail will try the paging number again after 10 minutes The Voice Ma...

Page 41: ...Issue 1 0 37 NVM 2e Release Notes for Version 1 08 02 New and Enhanced Features...

Page 42: ......

Page 43: ...Table of Contents Issue 1 0 39 Changes and Additions in the System Configuration Management Program 41 Dial Strings 41 Revisions to the Names of Various Parameters 41...

Page 44: ......

Page 45: ...ring up to 20 digits N none Lamp off string up to 20 digits N none Access digits before callout up to 20 digits Call Processing Parameters DialToneStr dial string to wait for dial tone Revisions to th...

Page 46: ......

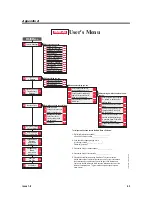
Page 47: ...your mailbox security code Message Notification Calls co worker or outside number when you get a msg Exit Menu S N 7 6 When done recording you can B BB E Listen to Messages L 5 FD 3 3 Record and Send...

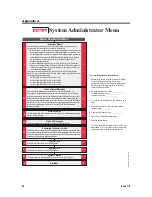
Page 48: ...Routing Mailbox 803 has Dial Action Table 2 Call Routing Mailbox 804 has Dial Action Table 3 Call Routing Mailbox 807 has Dial Action Table 4 To access the System Administrator Menu 1 Make sure you c...

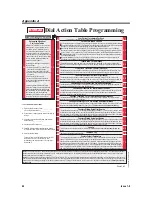
Page 49: ...ing Keys 0 8 on the dialpad To set up the menu you assign an action and number to each key When the caller presses the key the Auto Attendant performs the action and dials the number An example for en...

Page 50: ...he caller hears a prompt for recording a message for the lowest numbered extension Directory Dialing Using First Names This lets the caller press one key to access Directory Dialing by First Names The...

Page 51: ...oice Mail Database Initialize Message Database Initialize the Voice Mail with a Particular Phone System Phone System Portrait default 28i 124i Onyx VS 1 2 3 10 301 300 01 001 348 Entry Code Lowest Fir...

Page 52: ......

Page 53: ...03 926 5444 Customer Service FAX 203 926 5454 Technical Service 203 925 8801 Discontinued Product Service 900 990 2541 Technical Training 203 926 5430 Emergency Technical Service After Hours 203 929 7...

Reviews:

Related manuals for NVM-2e