Upgrading Your Server 9-19
Replacing a Failing Power Supply Unit
Replace only a failing power supply unit.
IMPORTANT:
Do not remove a power supply unit operating
normally.
NOTE:
If one power supply unit fails while the server contains two
power supply units in a redundant configuration, the failing power
supply unit can be replaced with the system operating (power-on state).
(Skip step 2.)
1.
Locate the failing power supply unit by the AC POWER LED on the rear of each power
supply unit. (The LED of the failing power supply unit is amber.)
2.
Shutdown the system, and press the POWER switch to turn off the power.
3.
Disconnect the power cord from the failed power supply.
4.
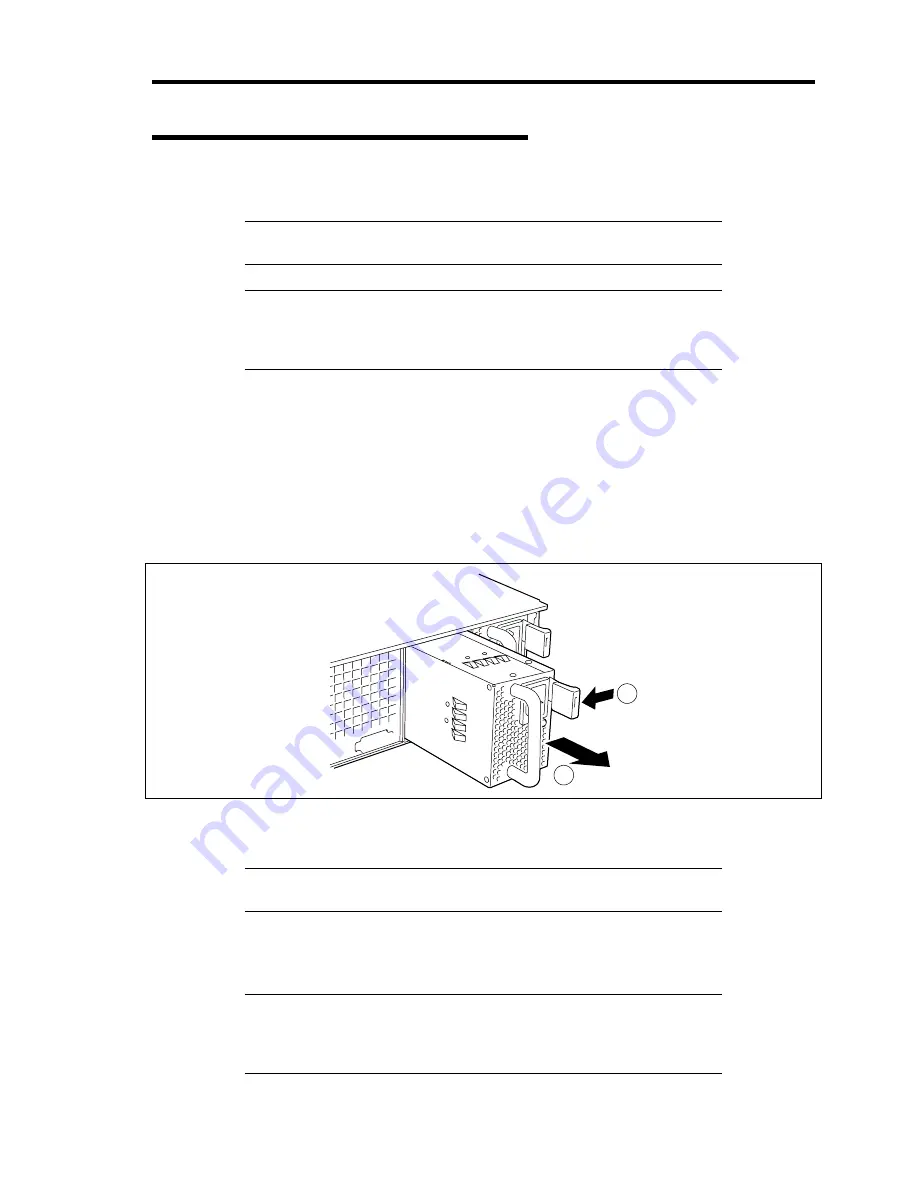
Hold the handle of the failing power supply.
5.
While pressing the lever, pull the power supply to remove if from the chassis.
2
1
6.
If operating the server with a single power supply unit without installing a new one, install
the cover you removed in step 3 of installation procedure.
IMPORTANT:
To maintain the cooling effect in the server, install the
blank cover in the vacant slot.
7.
Install the new power supply unit taking steps 4 to 8 of "Installation", and confirm that the
power supply unit is installed normally.
NOTE:
If one of the two power supply units of the server is replaced
while the power is on, the POWER LED of the new power supply unit
goes on. (If it is replaced while the power is off, the LED flashes. The
LED goes on when the power is turned on.)
Summary of Contents for Express5800/120Rj-2
Page 16: ...x This page is intentionally left blank ...
Page 19: ...Notes on Using Your Server 1 3 Internal View ...
Page 34: ...1 18 Notes on Using Your Server This page is intentionally left blank ...
Page 90: ...3 24 Setting Up Your Server This page is intentionally left blank ...
Page 164: ...4 74 Configuring Your Server 3 Setting menu for VD 0 is displayed ...
Page 172: ...4 82 Configuring Your Server This page is intentionally left blank ...
Page 240: ...7 12 Maintenance This page is intentionally left blank ...
Page 354: ...9 78 Upgrading Your Server This page is intentionally left blank ...
Page 364: ...C 2 IRQ This page is intentionally left blank ...
Page 412: ...E 24 Installing Windows Server 2003 This page is intentionally left blank ...
Page 414: ...F 2 Using a Client Computer Which Has a CD Drive This page is intentionally left blank ...
Page 418: ...G 4 Product Configuration Record Table This page is intentionally left blank ...


