Upgrading Your Server 9-11
5.
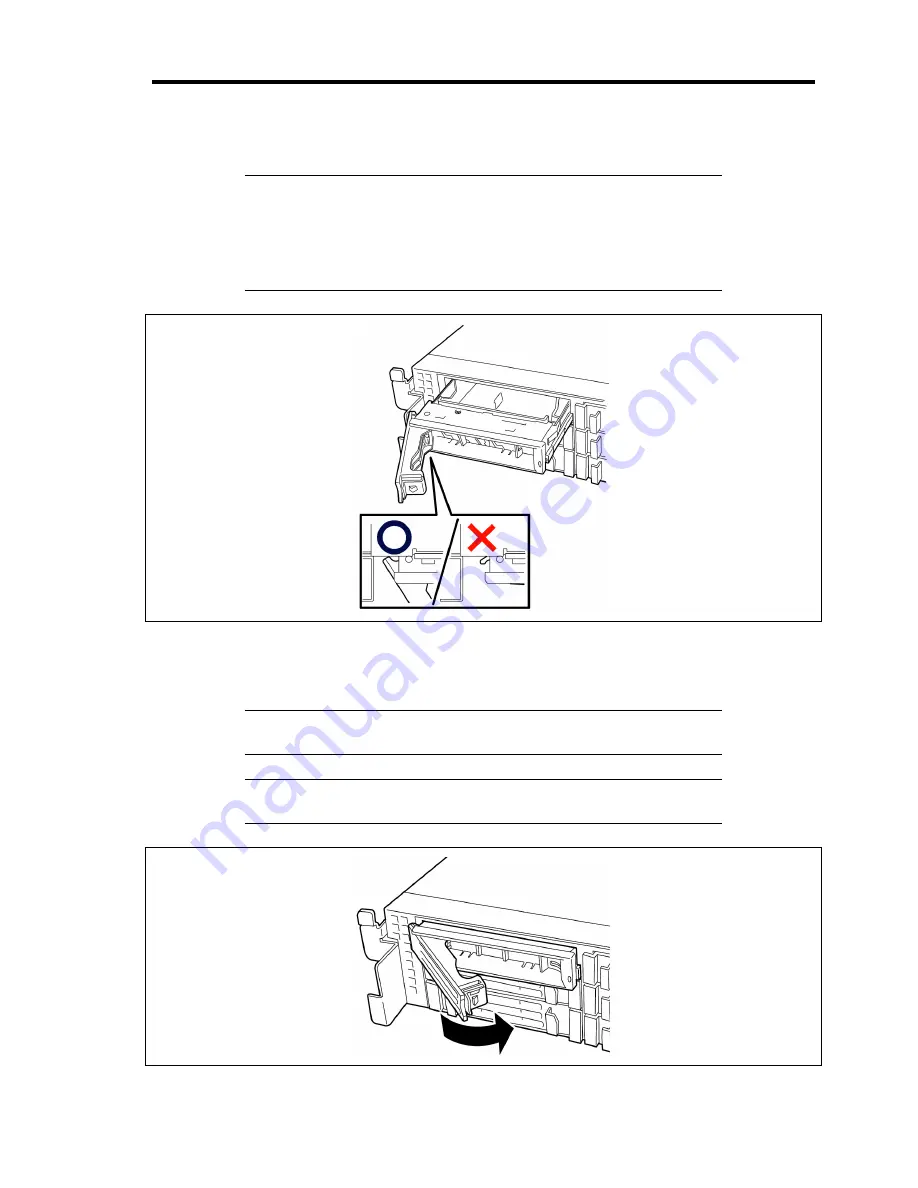
Firmly hold the drive carrier and the handle, then insert it into the slot.
IMPORTANT:
Push the hard disk drive carrier until the hook of the handle hits the
frame.
Hold the hard disk drive carrier with both hands securely and
carefully.
6.
Close the lever ensuring the drive is secured.
The handle is locked when a distinct "click" is heard.
IMPORTANT:
Be careful not to get your finger caught between the
handle and tray. Push the drive further to check if it is firmly secured.
NOTE:
Confirm that the handle is hooked to the frame when having
inserted the hard disk drive.
Summary of Contents for Express5800/120Rj-2
Page 16: ...x This page is intentionally left blank ...
Page 19: ...Notes on Using Your Server 1 3 Internal View ...
Page 34: ...1 18 Notes on Using Your Server This page is intentionally left blank ...
Page 90: ...3 24 Setting Up Your Server This page is intentionally left blank ...
Page 164: ...4 74 Configuring Your Server 3 Setting menu for VD 0 is displayed ...
Page 172: ...4 82 Configuring Your Server This page is intentionally left blank ...
Page 240: ...7 12 Maintenance This page is intentionally left blank ...
Page 354: ...9 78 Upgrading Your Server This page is intentionally left blank ...
Page 364: ...C 2 IRQ This page is intentionally left blank ...
Page 412: ...E 24 Installing Windows Server 2003 This page is intentionally left blank ...
Page 414: ...F 2 Using a Client Computer Which Has a CD Drive This page is intentionally left blank ...
Page 418: ...G 4 Product Configuration Record Table This page is intentionally left blank ...


