4-6
Using the InfoMonitor
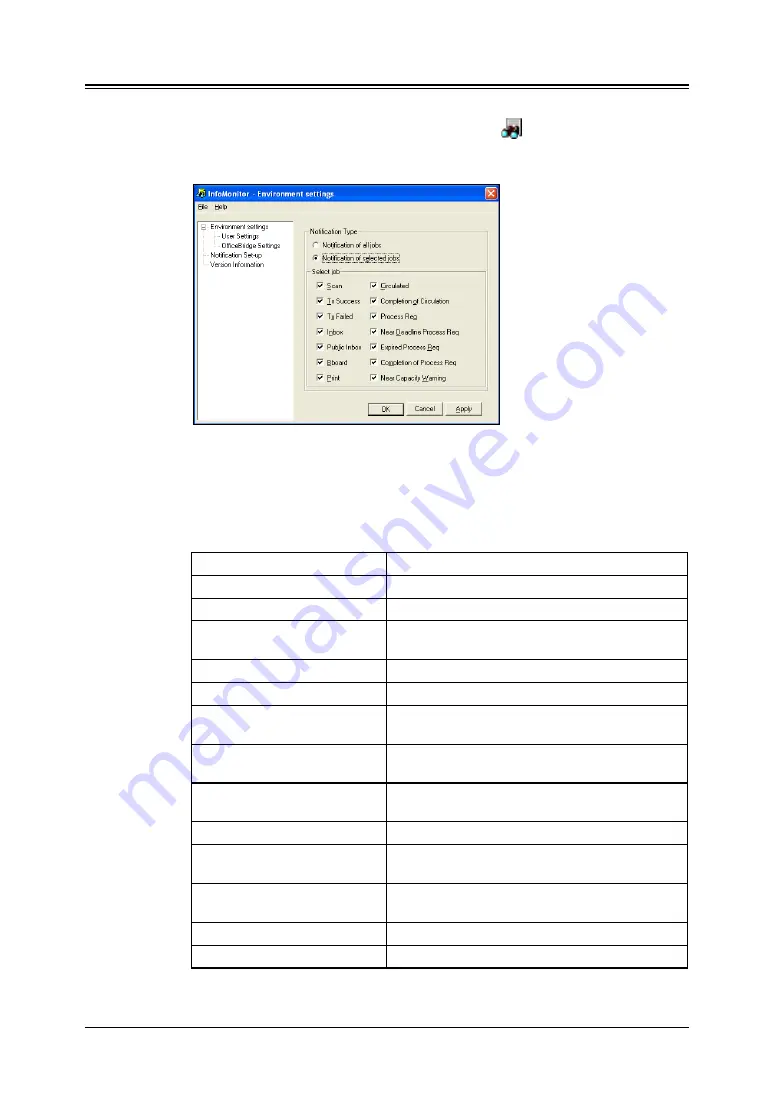
Notification Set-up
This will determine what events InfoMonitor will notify you of.
1
Double-click the OfficeBridge InfoMonitor icon
on the task tray while
OfficeBridge InfoMonitor is running.
2
Click “Notification Set-up”.
3
Select the “Notification Type”, from “Notification of all jobs” or “Notification
of selected jobs”.
4
If you have selected “Notification of all jobs”, skip to step 5.
If you have selected “Notification of selected jobs”, select the jobs to be noti-
fied by checking the corresponding box.
The job descriptions are listed below:
“Scan”
Newly received documents in the Scan box.
“Tx Success”
When document transmission is successful.
“Tx Failed”
When transmission did not end successfully
“Inbox”
Newly received documents in the “Personal
Inbox”.
“Public Inbox”
Newly received documents in the “Pubic Inbox”.
“Board”
Newly posted documents on the bulletin board.
“Print”
When document printing ended or a print error
occurred.
“Circulated”
Newly circulated documents in the circulation
box.
“Completion of Circulation”
When a circulation document has been read by
all the specified users.
“Process Req.”
When processing is requested.
“Near Deadline Process Req.”
When the set process period will be within 24
hours.
“Expired Process Req.”
When the process period has passed and the
notice is printed.
“Completion of Process Req.”
When the user has completed the processing.
“Near Capacity Warning”
Wen the server disk space is running low.
5
Click [OK].


