3-18 Using the Admin Tools
Importing user registration
You can import data from a vCard or CSV format file as “OfficeBridge” destina-
tion information data.
1
Registering to the Shared Address Book
2
In the “Address Book” dialog, select either “Shared Address Book” or “Per-
sonal Address Book” as the address book import category.
NOTE:
If the administrator is registered, you should log-in as an administrator to
import the data to the “Shared address book”.
3
Click [Import].
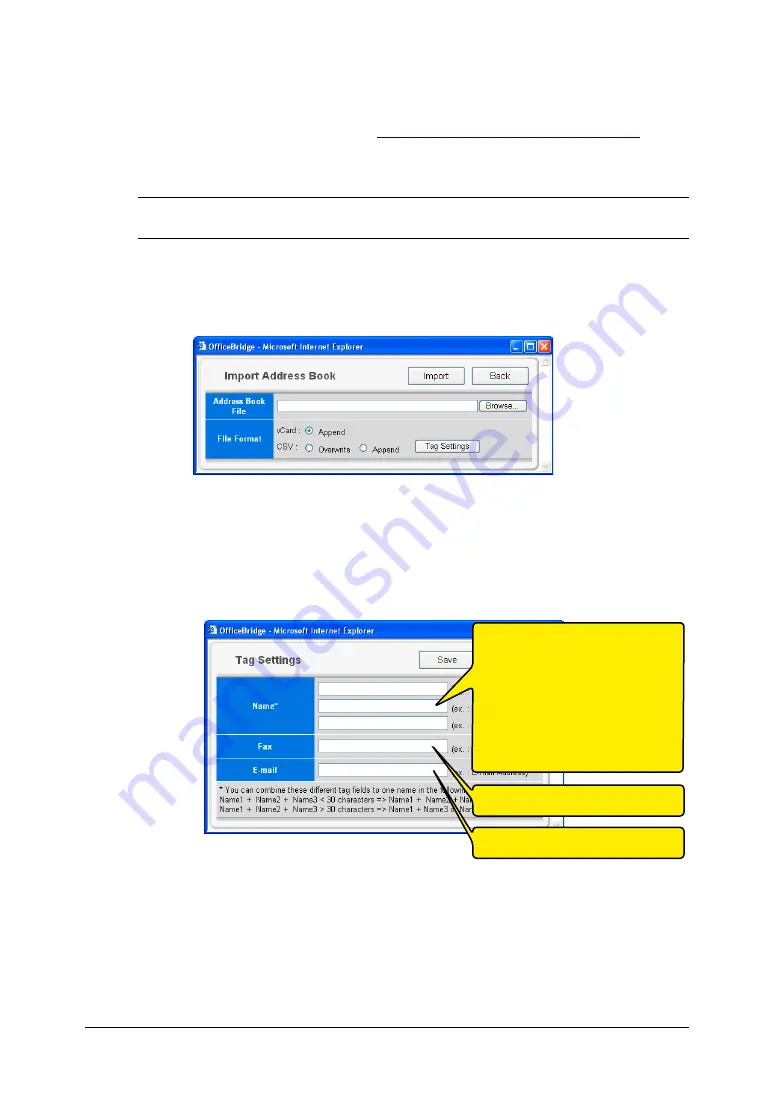
The “Import Address Book” dialog box will appear.
4
Type the file location and file name you want to import. If you are not sure
of the file location or file name, click [Browse].
5
Select the file format, vCard or CSV.
If you select CSV format, you can set the following options:
• Select “Overwite” or “Append”.
• Tag Settings:
If your address book data contains separate fields for the destination’s
first name, middle name and last name, click [Tag Settings] to merge the
information into one field.
6
Click [Import].
Import confirmation dialog box will appear.
7
Click [OK].
The data will be imported.
8
Click [Close] in the “Address Book” screen to close the “Address Book”
screen.
Enter the field name you want to
merge.
You can merge up to three fields.
However, if the sum of characters in
these three fields is over 30 charac-
ters, the field entered in the middle
box will not be merged, or the field
entered in middle and bottom box will
not be merged with the upper box’s
field.
Enter the field name you want to
import as facsimile telephone number.
Enter the field name you want to
import as e-mail address.


