6-5
Using the CoverPage Editor
1
2
3
5
6
7
8
9
10
11
4
13
AI
12
Using the CoverP
age Editor
Editing the CoverPage
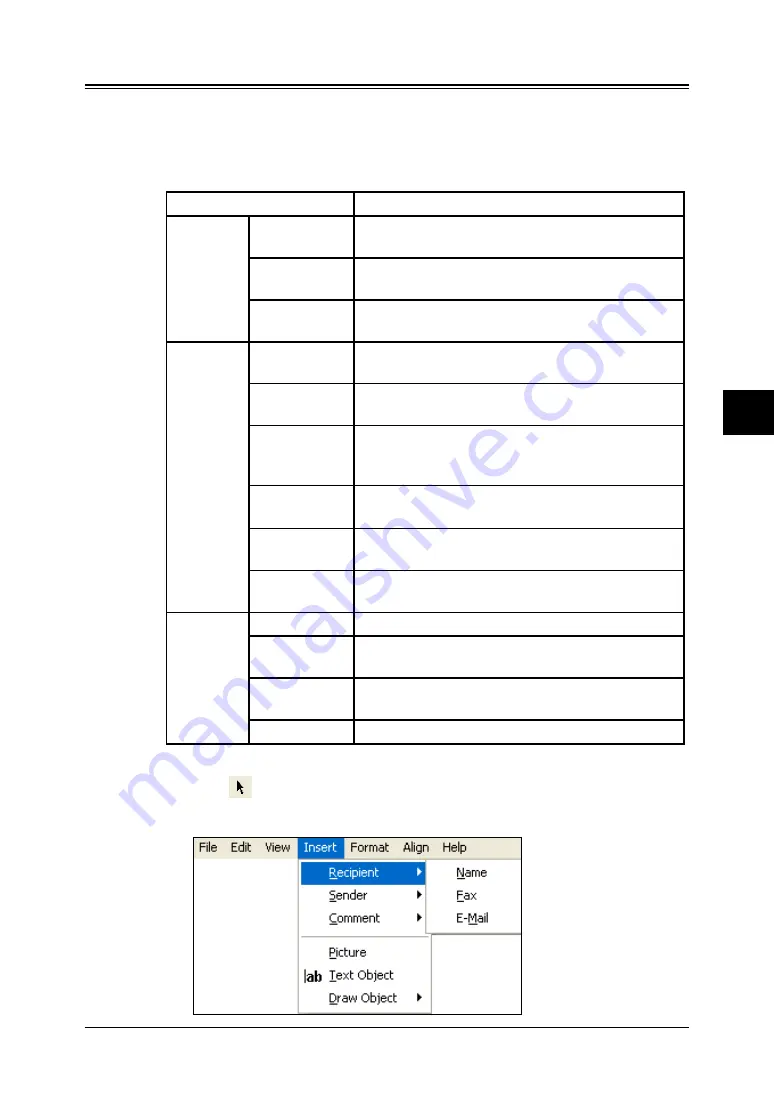
Inserting data from the OfficeBridge Memory
Such data will be inserted automatically every time you user the cover page
from the OfficeBridge.
The commands are located under
Insert
.
Data
Item
Recipient
“Name”
The name registered in the “Address Book” field
will be inserted to this field.
“Fax”
The fax number registered in the “Address
Book” field will be inserted to this field.
“e-mail”
The e-mail address registered in the “Address
Book” field will be inserted to this field.
Sender
“Name”
The user name registered in the “User Set-up”
field will be inserted here.
“Company”
The company name registered in the “User Set-
up” field will be inserted here.
“Department” The department registered in the “Department/
Group” of “User Set-up” field will be inserted
here.
“Telephone”
The telephone number registered in the “User
Set-up” field will be inserted here.
“Fax”
The fax number registered in the “User Set-up”
field will be inserted here.
“e-mail”
The e-mail address registered in the “User Set-
up” field will be inserted here.
Comment
“Date”
The machine-holding date will be inserted here.
“Subject”
The subject you input in the “Edit Cover Page”
field will be inserted here.
“Message”
The subject you input in the “Edit Cover Page”
field will be inserted here.
“Pages”
The total number of pages will be inserted here.
How to inserted the data:
1
Click
to select the commands.
2
Click
Insert
and then select the desired data.


