M70V Series Connection Manual
4.2 Connection of Control Unit
107
4.2.5.1 Connecting with MDS-D2/DH2 Series
(1) When using one power supply unit
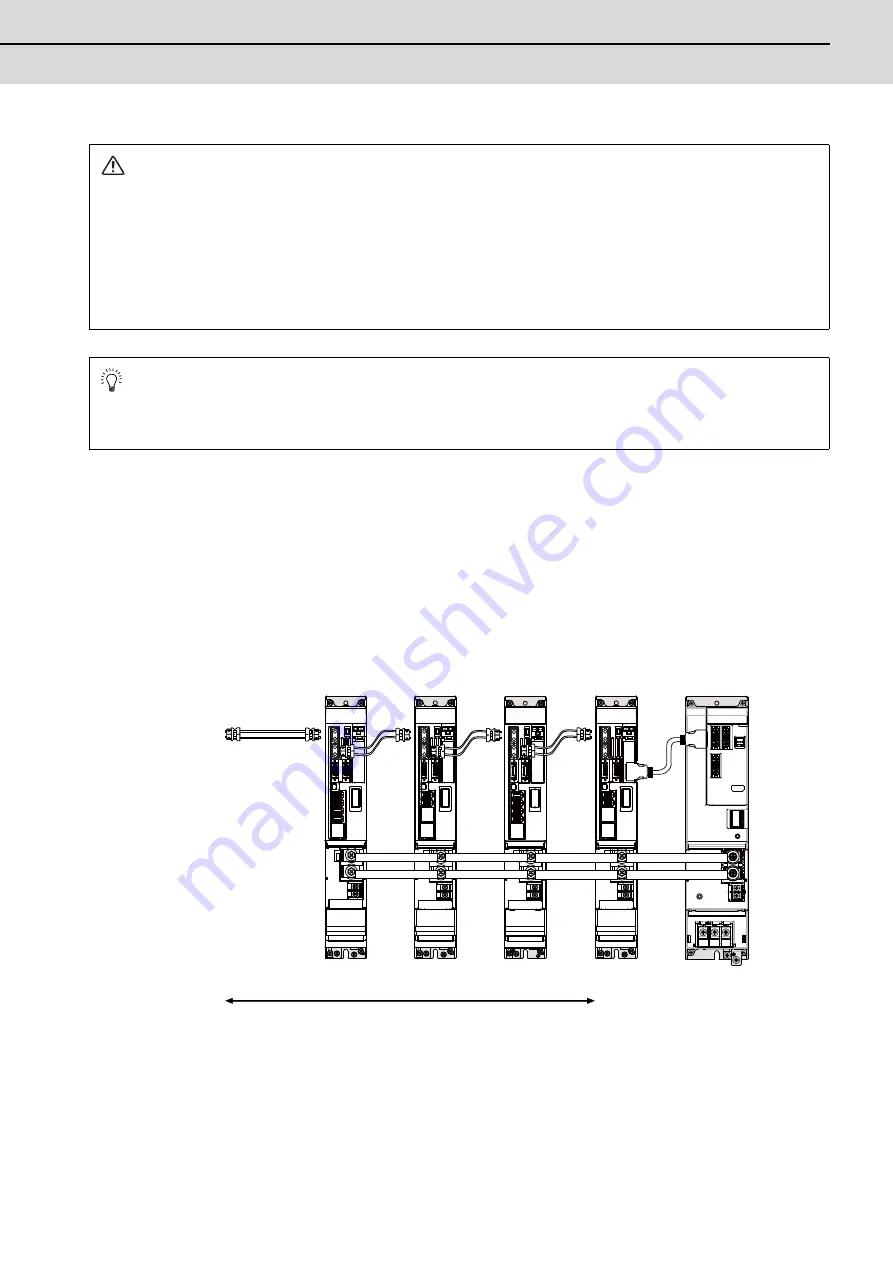
Connect the largest-capacity spindle drive unit to the final axis of the NC communication bus in order to control the
power supply unit. The spindle drive unit must be installed adjacent to the power supply unit. In the system with
servo only, a servo drive unit for controlling unbalance axis must be installed in the same manner in the same way.
< Connection >
CN1A : CN1B connector on NC or previous stage's drive unit
CN1B : CN1A connector on next stage's drive unit
CN4 : Connector for communication between power supply unit (master side) and drive unit
Connection when using one power supply unit
CAUTION
1. Connect the NC and the drive units by the optical communication cables. The distance between the NC and the
final drive unit must be within 30m and the bending radius within 80mm.
2. For the main circuit wiring of the drive unit and power supply unit, the drive unit of 200V series is to be wired
with MDS-D2-CV, and the drive unit of 400V series is to be wired with MDS-DH2-CV.
3. A spindle drive unit that controls the high-speed synchronous tapping (OMR-DD control) has to be connected
on the farther side from the NC than the subject synchronous tapping control.
POINT
Axis Nos. are determined by the rotary switch for setting the axis No. (Refer to the instruction manual of Drive
unit.) The axis No. has no relation to the order for connecting to the NC.
CN4
CN4
The optical communication cables from the NC to the
final drive unit must be within 30m.
Optical
communication
cable
Connected
to the NC
MDS-D2/DH2-V2
1st/2nd axis
MDS-D2/DH2-V1
3rd axis
MDS-D2/DH2-SP
6th axis
(Final axis)
MDS-D2/DH2-CV
MDS-D2-SP2
4th/5th axis
Summary of Contents for M70V Series
Page 1: ......
Page 13: ......
Page 15: ......
Page 17: ......
Page 19: ......
Page 21: ......
Page 25: ......
Page 26: ...1 1 System Configuration ...
Page 36: ...11 2 General Specifications ...
Page 110: ...85 3 Installation ...
Page 120: ...95 4 Connection ...
Page 173: ...4 Connection MITSUBISHI CNC 148 ...
Page 174: ...149 付録 Ap 1 章 149 Appendix 1 Cable ...
Page 220: ...195 付録 Ap 2 章 195 Appendix 2 EMC Installation Guidelines ...
Page 232: ...207 付録 Ap 3 章 207 Appendix 3 Restrictions for Lithium Batteries ...
Page 241: ...Appendix 3 Restrictions for Lithium Batteries MITSUBISHI CNC 216 ...
Page 242: ...217 付録 Ap 4 章 217 Appendix 4 Precautions for Compliance to UL c UL Standards ...
Page 246: ......
Page 250: ......


