Replacing a Print Unit Assembly
94
By printing the Statistics page or by using PageScope Light, the percentage
of life remaining on the toner cartridges and the current print units can be
checked.
However, if the life of the print unit reaches 0% but the toner in the attached
toner cartridge has not yet reached 0%, the message “
PRINT UNIT END/
REPLACE KMCY
” will not appear in the message window of the printer.
It will not be necessary to replace the print unit until the toner cartridge runs
out of toner. This allows for efficient use of the toner cartridge and print unit.
When lives of both the print unit and the toner cartridge have reached 0%, the
message “
PRINT UNIT END/ REPLACE KMCY
” appears.
When this message appears, replace the print unit with the toner cartridge
attached to it.
After the new print unit is installed into the printer, attach a new toner
cartridge to the new print unit.
Follow the instructions below to replace the print unit assembly. All print units
are replaced in the same way. The only difference is the specific cartridge slot
into which they’re placed.
Attention
Be careful not to spill toner inside the printer or on yourself while
removing a print unit or toner cartridge. If toner spills, immediately wipe
it off with a soft, dry cloth.
Installing a Print Unit
1
Check the message window to see which color print unit needs replacing
(Y = Yellow, M = Magenta, C = Cyan, and K = Black). In this example,
we’ll assume that the yellow print unit needs to be replaced.
2
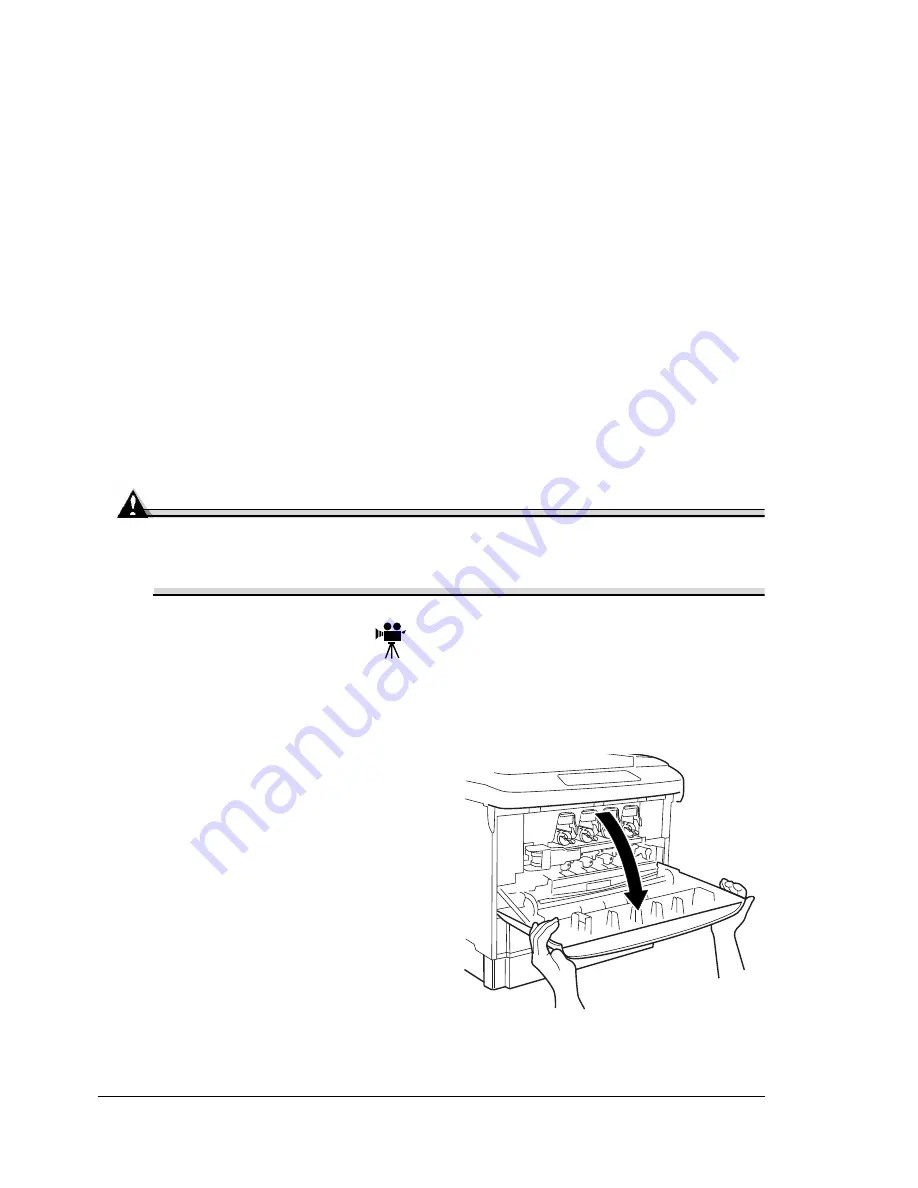
Open the printer’s front door.
Summary of Contents for magicolor 7300
Page 1: ...magicolor 7300 User s Guide 1800698 001A...
Page 8: ...Contents vi...
Page 9: ...1 Software Installation...
Page 17: ...2 Using Media...
Page 40: ...Loading Media 32 Envelopes Postcards...
Page 46: ......
Page 47: ...3 Working with the Printer...
Page 64: ......
Page 65: ...4 Working with the Printer Driver...
Page 75: ...5 Working with Color...
Page 82: ......
Page 83: ...6 Working with the Status Monitor...
Page 87: ...7 Replacing Consumables...
Page 126: ......
Page 127: ...8 Maintaining the Printer...
Page 133: ...9 Installing Accessories...
Page 172: ......
Page 173: ...10 Troubleshooting...
Page 218: ......
Page 219: ...A Technical Specifications...


