Loading Media
25
4
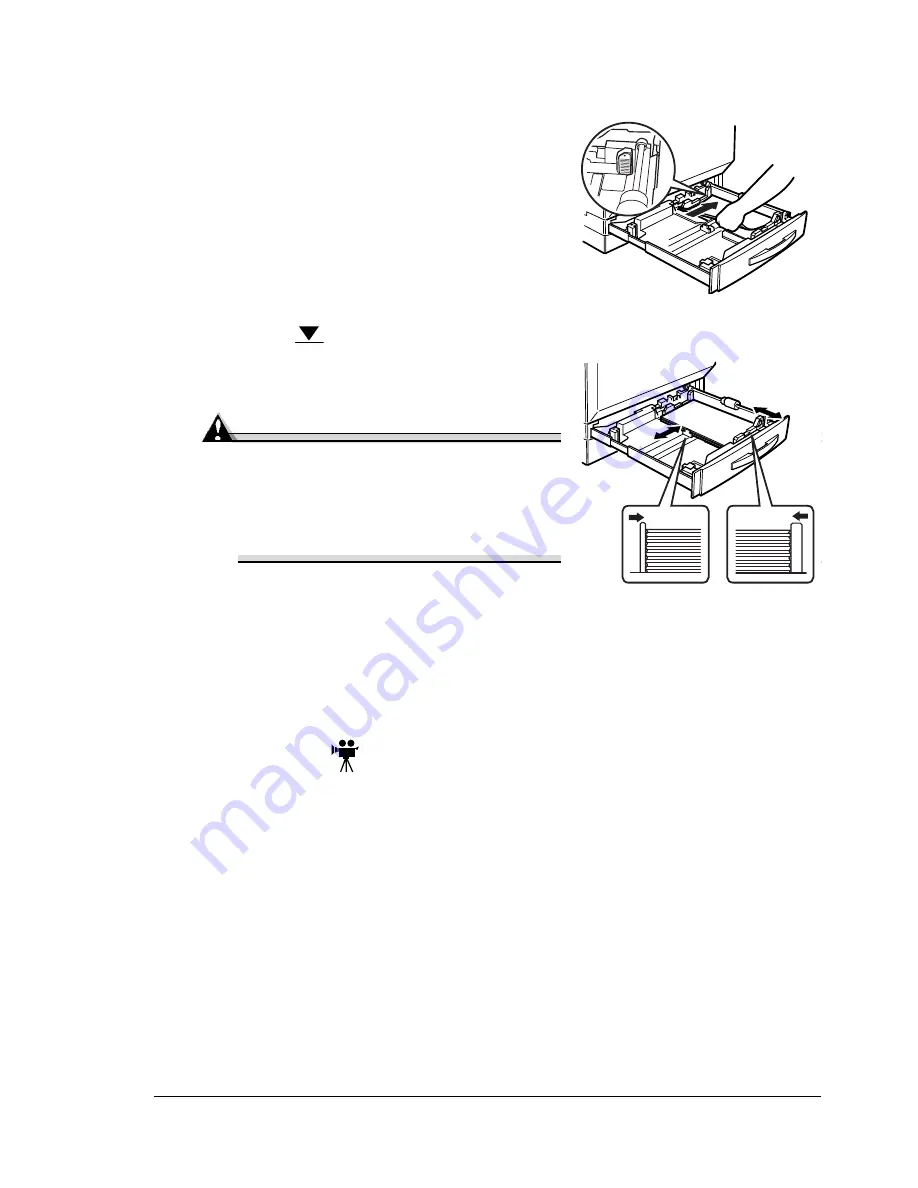
Align the edges of up to 250 sheets of paper, and then load it face up.
If the media is curled, flatten it before loading it.
Often, an arrow on the media package
label indicates the face-up (print) side
of the media.
If you’re loading letterhead, load
the letterhead or logo side
oriented toward the back side of
the tray.
Do not load media above the
media limit mark.
5
Slide the media guides against the
edges of the media.
Attention
Always adjust the media guides
after inserting media. Guides that
are not properly adjusted can cause
poor print quality, media jams, or
printer damage.
6
Close Tray 1.
7
In the printer driver, select Plain Paper and the appropriate media size.
If you’re using custom-size media, set the printer for custom-sized
media in the printer driver.
8
Print the job.
Envelopes
Print on the envelope front (address side) only. Some parts of the envelope
consist of three layers of paper—the front, back, and flap. Anything printed in
these layered regions may be lost or faded.
1
Flex a stack (including the edges) of up to 50 envelopes to remove any
stiffness.
2
Correct any bent corners, and then tap the envelopes on a flat surface to
align them.
3
Place the envelopes on a flat surface, and press them down to flatten
them and make sure that all air is removed.
Make sure that the folds of the flaps are firmly pressed; otherwise, the
envelopes may become wrinkled or a media jam may occur.
Summary of Contents for magicolor 7300
Page 1: ...magicolor 7300 User s Guide 1800698 001A...
Page 8: ...Contents vi...
Page 9: ...1 Software Installation...
Page 17: ...2 Using Media...
Page 40: ...Loading Media 32 Envelopes Postcards...
Page 46: ......
Page 47: ...3 Working with the Printer...
Page 64: ......
Page 65: ...4 Working with the Printer Driver...
Page 75: ...5 Working with Color...
Page 82: ......
Page 83: ...6 Working with the Status Monitor...
Page 87: ...7 Replacing Consumables...
Page 126: ......
Page 127: ...8 Maintaining the Printer...
Page 133: ...9 Installing Accessories...
Page 172: ......
Page 173: ...10 Troubleshooting...
Page 218: ......
Page 219: ...A Technical Specifications...


