Dual In-Line Memory Module (DIMM)
131
3
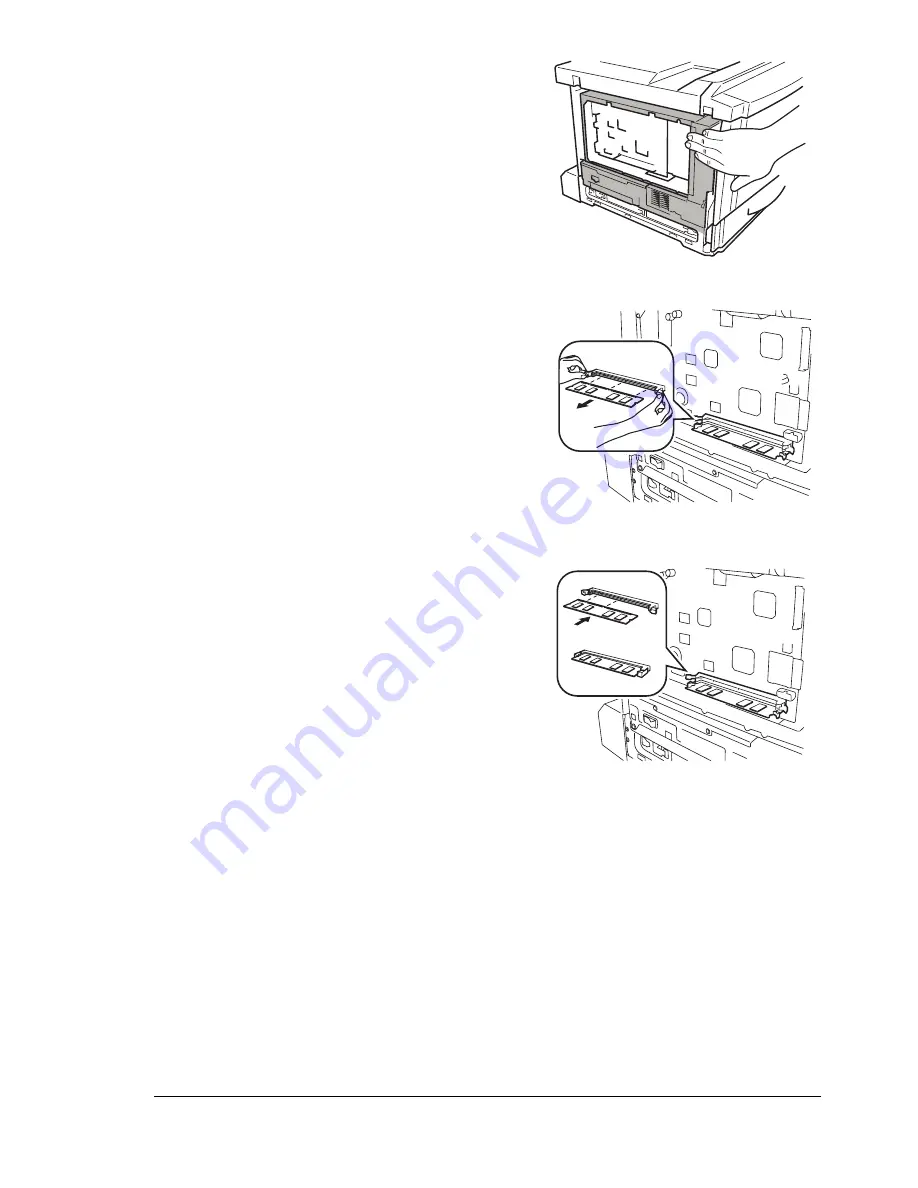
Use an antistatic wrist strap or
touch the area of the printer frame
indicated in the illustration.
4
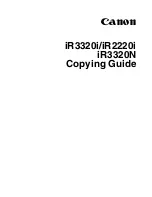
If you need to remove an existing
DIMM, using both thumbs, pull the
latches (one on each side of the
DIMM connector) outward.
Lift the DIMM straight out of the
DIMM connector.
5
To insert a new DIMM, observe the
keyed (notched) side of the new
DIMM and align it with the
connector.
6
Fully insert the DIMM straight into
the DIMM connector until the
latches, one on each end of the
socket, snap into the locked
position.
If you cannot snap the DIMM into place, do not push it with
extreme force. Reposition it and reinsert it perpendicular to the
socket, making sure that the DIMM is seated completely and firmly
in the connector.
Summary of Contents for magicolor 7300
Page 1: ...magicolor 7300 User s Guide 1800698 001A...
Page 8: ...Contents vi...
Page 9: ...1 Software Installation...
Page 17: ...2 Using Media...
Page 40: ...Loading Media 32 Envelopes Postcards...
Page 46: ......
Page 47: ...3 Working with the Printer...
Page 64: ......
Page 65: ...4 Working with the Printer Driver...
Page 75: ...5 Working with Color...
Page 82: ......
Page 83: ...6 Working with the Status Monitor...
Page 87: ...7 Replacing Consumables...
Page 126: ......
Page 127: ...8 Maintaining the Printer...
Page 133: ...9 Installing Accessories...
Page 172: ......
Page 173: ...10 Troubleshooting...
Page 218: ......
Page 219: ...A Technical Specifications...


