SECTION 3
OPERATING PRINTER
64
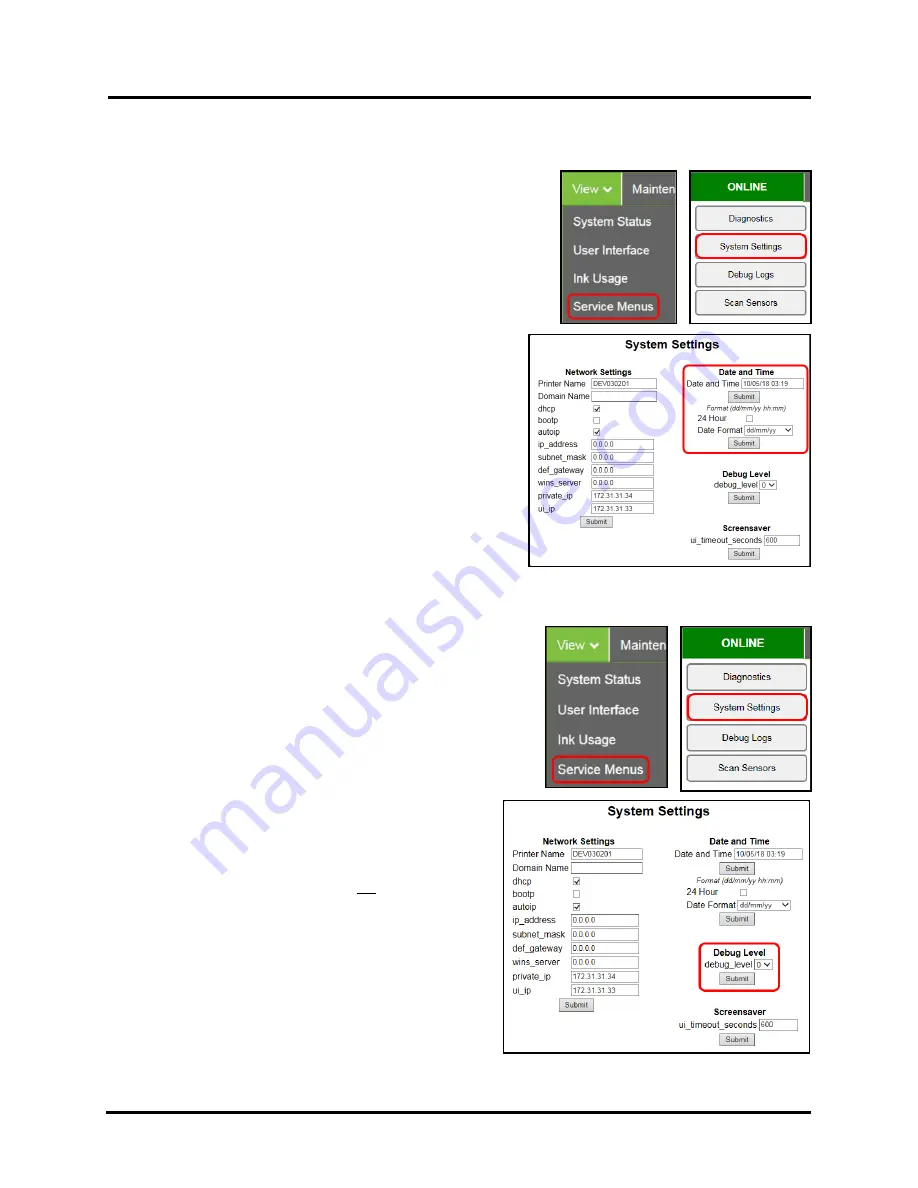
Date and Time
– Set the date and time or change the format of how the date and time will appear in the Toolbox
and Touchscreen.
To set or format Date and Time:
1.
From the Toolbox,
select
“View”
drop-down menu, click
“Service Menus”
then click
“System Settings”
.
2.
“System Settings”
page opens. Use the following
Date and
Time options
to enter, edit and format the Date and Time for
the Printer.
Date and Time
– set/adjust date and time here.
NOTE
: This field is always displayed as “dd/mm/yy hh:mm”.
Hours and minutes always displayed as “24 Hour” clock.
Format for this field will
not
change when you change the
choices below.
24 Hour
– Select (check) this box for 24 Hour clock.
Un-check this box for 12 Hour clock.
Date Format
– Select between the following date formats.
dd/mm/yy, dd-mmm-yy, mm/dd/yy, mmm-dd-yy,
yy/mm/dd, yy-mmm-dd
3.
Click
“Submit”
.
Debug Level
– Set the detail level of the Debug Logs.
NOTE
: If experiencing a persistent issue; you may be asked to
provide a Debug Log from your printer. A technician may ask you to
set the Debug Level to 1 or 2, and reproduce issue, before providing
them with the Debug Log file.
To change the Debug Level:
1.
From the Toolbox,
select
“View”
drop-down menu, click
“Service Menus”
, and then click
“System Settings”
.
2.
“System Settings”
page opens. Go to
Debug Level
options and select 0, 1, or 2 to set the desired detail
level for the Printer. (0 = least detailed, 2 = most
detailed).
NOTE:
Because of the amount of data collected and
stored; the
Debug Level
should not be left at a setting
above 0 (zero), unless asked to do so by a service
technician. Please set the
Debug Level
back to zero
after providing the requested Debug Log file.
3.
Click
“Submit”
.
Summary of Contents for Quadient Rena MACH 6
Page 1: ...Digital Color Inkjet Printer MACH 6 User Guide...
Page 131: ......
Page 132: ...2 1 2020 Quadient April 9 2020...


