Operation
43
Subject to technical changes.
200114
BA-42820-02-V03
Water sampling station
EASYPRO
Operating instructions
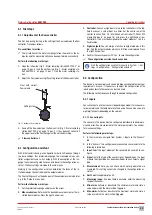
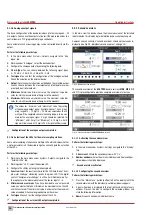
7. Time:
Configure the timer to the desired duration.
8. “Off” or “Active”:
It will be displayed here whether the timer is cur-
rently active. If this is the case, the display will show how long it is still
active.
9. “Start” and “Stop” button:
The timer can be started or stopped
manually, e. g. for a shock chlorination.
ü
Configuration completed.
Configure switching via ECO control
A limit value control is defined for the "Economy mode”. The limit value
control is generally used to reduce the circulation capacity.
If the measured values are located within the setpoints, the output is
closed. If the digital input is also switched for switching to another refer-
ence set, “Economy mode” is active and the switch will be made to the
desired reference set.
Pre-conditions for actions:
ü
The limit value control is configured as described in section „Limit
value control“ on page 33.
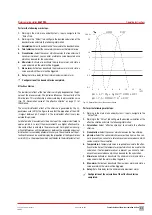
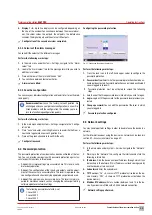
To configure, working in the “Setpoints” menu item, select the “Switch-
ing” tab.
Perform the following work steps:
1. Automatically switching the reference sets:
Set a checkmark
here.
2. Switch-over:
Select “Switching input”.
3. Function:
Select “ECO control”.
4. Reference set:
Select the reference set to which is to be switched.
5. Digital input:
The digital input in use is indicated here.
ü
Configuration "Switchover via ECO control” completed.
9.6.3.2 Switching via timer
Up to ten timers can be configured parallel to the switching via a digital
switching input (see section 9.6.3.1 „Switching via digital inputs“ on page
42). Times are defined for the point at which the timers should switch
to a certain reference set.
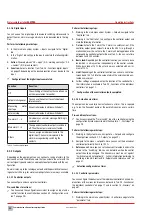
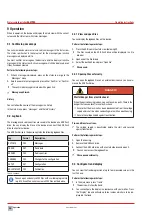
To configure, working in the “Setpoints” menu item, select the “Switch-
ing” tab.
Perform the following work steps:
1. Automatically switching the reference sets:
Set a checkmark
here.
2. Switch-over:
Configure up to ten timer switches and state the fol-
lowing information.
3. Off/Active:
Switch on the timer.
4. Time:
Configure a time at which the switch-over is to be made. State
the hour and minutes.
5. Monday – Sunday:
Set a checkmark against every weekday on
which the timer should be active.
6. Reference set:
Select the reference set to which is to be switched.
ü
Configuration "Switchover via timer” completed.
9.7 Access via network
Accessing the device via a network requires that it is connected to an ex-
isting Ethernet or RS485 network.
Further information about connection to an existing network is specified
in sections 7.11 „Connecting Ethernet“ on page 26, 7.12 „RS485 inter-
face“ on page 26 and 8.5 „Network settings“ on page 35.
i
If connection problems are experienced during access via net-
work, check the configuration of your security software.
Modbus
You can access certain data on the device via the Modubus protocol using
both Ethernet and the RS485. You need the Modbus protocol e.g. For the
connection with a control panel or a PLC. Modbus TCP/IP is supported for
Ethernet and Modbus RTU is supported for the RS485 interface.
The Modbus addresses of your device are stated in section 13 „Modbus
addresses“ on page 51.
Web browser (only Ethernet)
You can access the device data using all network devices which are fitted
with a web browser. You will require the IP address, subnetmask and pos-
sibly the MAC address of the device.
The network settings of your device are listed under Main menu > System
> Service > Network.
Open the web browser of your end device and enter the IP address of the
device in the address row. The page of the device will open and provide a
range of information.
TFTP protocol (only Ethernet)
You can access the device memory via a TFTP client software as long as
TFTP is activated in the network settings. You need the device IP address
for access.
i
The network settings of your device are listed under Main
menu > System > Service > Network.

