Installation
20
BA-42820-02-V03
Water sampling station
EASYPRO
Operating instructions
7 Installation
7.1 Installation location of the water sampling station
EASYPRO
This section takes you through the installation step by step. The following
criteria must be taken into account when selecting the assembly location:
n
The installation surface is even.
n
The installation height is chosen so that the display of the controller is
at eye level for the user.
n
Below the water sampling station there must be at least 20 cm free
space to route the inflow and outflow pipes.
n
All lines and cables must be routed without kinks.
n
The sample water must reach the water sampling station from the ex-
traction point in as short a distance as possible in order to avoid
measured value deviations.
n
Avoid direct sunlight or heat radiation.
7.2 Wall mounting
Resources required:
@
Mounting set
@
Drill
@
Phillips screwdriver
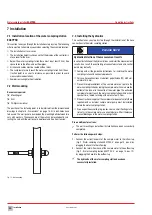
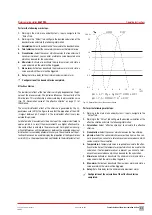
The position of the fastening point is to be inferred from the dimensioned
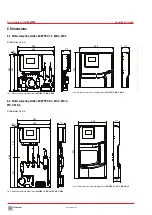
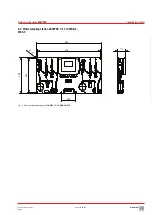
drawings in chapter 6 „Dimensions“ on page 18. All 6 drill-holes have
to be used. The wall panel is clamped on the mounting bolts between two
nuts with washers. The unevenness of the wall can be levelled out by ad-
justing the nuts until the wall panel is kept level and free from tension.
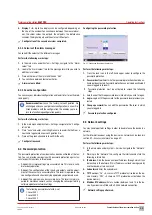
Fig. 12: Wall mounting
7.3 Installing the hydraulics
This section takes you step by step through the installation of the hose
connections to the water sampling station.
PLEASE NOTE
Hydraulic distortion of the measurement results
Incorrect installation of the hydraulic lines can distort the measurement
results. As a result, the controlling of connected systems and control
points may be faulty.
ð
Comply with all the guideline instructions for installing the water
sampling station and connected products.
ð
Only use hose connections made from polyethylene (PE) with a di-
ameter of 6/8 mm.
ð
Prevent misrepresentations of the sample water en route to the
water sampling station by taking the sample water 30 cm above the
bottom of the tank or in the centre of the water pipe. The extracted
sample water must reach the water sampling station within a short
space of time, thereby arriving with a pressure of 0.2 bar.
ð
If the extraction or supply of the sample water does not satisfy these
requirements, an external sample water pump must be installed
before the water sampling station.
ð
If you expect heavy soiling (e.g. leaves, coarse, small floating mate-
rials, etc.) in the sample water, use an external pre-filter. It helps you
prevent blockages in the water sampling station.
Pre-conditions for actions:
ü
The wall mounting and electrical installation have been successfully
completed.
Perform the following work steps:
1.
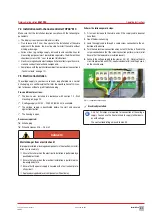
Connect the extraction point of the sample water to the inflow tap
(Fig. 2 „Water sampling station EASYPRO 4“ on page 10, pos. 5) by
plugging the hose into the inflow tap.
2.
Connect the return-flow hose of the sample water to the outflow tap
(Fig. 2 „Water sampling station EASYPRO 4“ on page 10, pos. 12)
by plugging the hose into the outflow tap.
ü
The hydraulic of the water sampling station have been
successfully installed.

