Operation
42
BA-42820-02-V03
Water sampling station
EASYPRO
Operating instructions
9.6.1 Setting the setpoints
You can configure and save the setpoints via the menu item “Setpoints”.
Perform the following work steps:
1.
Working in the main menu under “Setpoints” navigate to the “Active”
tab.
2. Active:
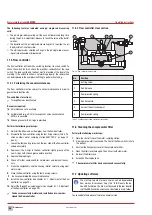
You can view the reference set currently active in the “Active”
tab.
4
The individual setpoints are displayed. If you change one of the val-
ues, it will immediately be activated as a new setpoint.
3. Save:
You can save the active setpoints as a reference set. Select a
reference set for this and press “Save".
4. Setpoints 1 – 4:
The possible setpoints for the controller follow in se-
quence. The following information is displayed from left to right:
- S1 − S4/V1 − V4 indicates the sensor input or virtual input.
- O1 − O4 indicates the output. The “timer” indicates that the output
is actuated directly.
- The measured value of this input follows, e. g. free chlorine, pH or
the text “No control function” if this controller is inactive.
An upwards or downwards arrow indicates the control direction.
Raise or lower.
- This is followed by the setpoint. Pressing on the setpoint enables
you to change it immediately. If it is a 2-side control, two setpoints
must be entered. Both for the control direction “Raise” or “Lower”.
Changing these setpoints does not have an impact on the savable
reference sets. To do so, you must perform step 3.
5. Capacity:
You can activate or deactivate the flow. This enables you to
reduce the flow by between 0 % and 100 %. The value of the flow is
multiplied with the output Y. If the output is e.g. 80 % but the flow is
only 50 %, this produces an output capacity of: Control variable Y Y =
80 % ∙ 50 % = 40 %.
ü
Setpoints set.
9.6.2 Loading reference sets
You can load a reference set.
Perform the following work steps:
1.
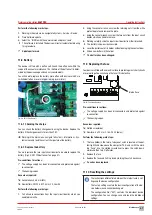
Working in the main menu under “Setpoints”, navigate to the “Refer-
ence set” tab.
2.
Select the desired reference set.
3.
Press "Load”.
4
The desired reference set is active immediately.
ü
Reference set loaded.
9.6.3 Switching between setpoints
The reference sets set in the previous section can be switched manually
or automatically. You have two possibilities to activate automatic switch-
ing.
1.
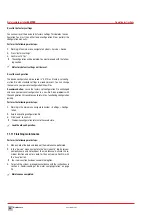
Working in the “Setpoints” menu item, navigate to the “Switching”
tab. Set a checkmark against “Switch setpoints automatically”.
2.
Working in the “Manual mode” menu, set a checkmark against
“Switch setpoints automatically”.
You can use a digital input (see section 9.6.3.1 „Switching via digital in-
puts“ on page 42) and multiple internal timers (see section 9.6.3.2
„Switching via timer“ on page 43) for automatic switching. The switch-
ing has priority over a digital input. Switching via a timer only occurs if no
switching is active via a digital input.
9.6.3.1 Switching via digital inputs
Before you can use a digital input for switching to a particular reference
set, you must configure the digital input in accordance with section
8.3.1.6 „Digital inputs“ on page 32.
Switching can be performed in three different forms: externally-controlled
switching; switching via an internal timer and the “ECO control” function,
which includes the limit value control.
Configure external switchover
In the case of external actuation, switching to the desired reference set is
performed as long as the digital input has been activated.
If the digital input is deactivated, the device switches back to the previous
reference set.
To configure, working in the “Setpoints” menu item, select the “Switch-
ing” tab.
Perform the following work steps:
1.
Configure the switching and state the following information.
2. Automatically switching the reference sets:
Set a checkmark
here.
3. Switch-over:
Select “Digital input”.
4. Function:
Select the point “External switching”.
5. Reference set:
Select the reference set to which is to be switched.
6. Digital input:
The digital input in use is indicated here.
ü
Configuration of the external switching completed.
Switching via a timer
During switching via a timer, the desired reference set is active until the
set period has been completed. The previous reference set is re-activated
after the time has elapsed.
You can also start the timer manually, thereby e.g. triggering shock chlo-
rination.
To configure, working in the “Setpoints” menu item, select the “Switch-
ing” tab.
Perform the following work steps:
1.
Configure the switching and state the following information.
2. Automatically switching the reference sets:
Set a checkmark
here.
3. Switch-over:
Select “Digital input”.
4. Function:
Go to “Timer“.
5. Reference set:
Select the reference set to which is to be switched.
6. Digital input:
The digital input in use is indicated here.

