Operation
41
Subject to technical changes.
200114
BA-42820-02-V03
Water sampling station
EASYPRO
Operating instructions
Perform the following work steps:
1.
Working in the Main menu under “Calibration”, navigate to the “Out-
puts” tab.
2.
Working under “Output”, select the output which is to be adjusted.
3.
Press the “Compensate potentiometer” button.
4.
A further window with a progress bar opens; this indicates the posi-
tion feedback.
5.
Compensation is started using the “Start” button.
4
The motor starts and runs to top speed, then stops. This can take a
number of minutes.
6.
Completion of the compensation is signalled with “Compensation
OK”.
ü
Calibration of an servomotor with position feedback complet-
ed.
9.5.7.3 Servomotor without position feedback
You can actuate servomotors without a position feedback. To this end, you
need to measure how quickly the motor starts and then set the controller
accordingly.
Pre-conditions for actions:
ü
The servomotor is switched on and has been connected properly.
ü
The output has been configured correctly (see Tab. 20 „Functions of
the individual controllers“ on page 17).
Resources required:
@
Timer.
Perform the following work steps:
1.
Working in the main menu, navigate to the “Manual mode” menu
item.
2.
Activate the manual mode of the output with “On” and set the control
output as 0 %.
4
The servomotor now stops completely.
3.
Observe the drive and wait until it has stopped completely.
4.
Set the output to 100 % and at the same time, start to measure the
time for the complete opening of the drive.
4
The servomotor now starts and runs to top speed.
5.
Observe the drive and wait until it has stopped completely.
6.
Deactivate manual mode with “Off”.
7.
Working in the main menu under System > Outputs, navigate to the
“Controller” tab.
8.
Working under “Output”, select the output of the runtime which you
have just measured.
9.
Working under “Runtime”, enter the time which you have just meas-
ured.
ü
Runtime set!
9.5.7.4 Calibration of an servomotor 20 mA
Pre-conditions for actions:
ü
The servomotor is switched on and has been connected properly.
ü
The output has been configured correctly (see Tab. 20 „Functions of
the individual controllers“ on page 17).
Perform the following work steps:
1.
Working in the Main menu under “Calibration”, navigate to the “Out-
puts” tab.
2.
Working under “Output”, select the output which is to be adjusted.
3.
Press the “Compensation” button.
4
A further window with a progress bar opens; this indicates the posi-
tion feedback.
4.
Compensation is started using the “Start” button.
5.
The motor starts and runs to top speed, then stops. This can take a
number of minutes.
6.
Completion of the compensation is signalled with “Compensation
OK”.
ü
Calibration of an servomotor 20 mA completed.
9.5.7.5 Calibrating the 20 mA output
If, whilst performing the previous compensation, you have determined
that the output signal does not completely conform with the motor posi-
tion, you can adjust the output signal. You can adjust both the lower signal
range (0/4 mA) and the upper signal range (20 mA) to the motor position.
Perform the following work steps:
1.
Working in the Main menu under “Calibration”, navigate to the “Out-
puts” tab.
2.
Working under “Outputs, select the output that you wish to adjust.
3.
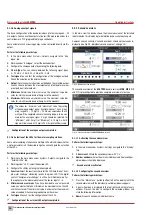
Press the “1 point” button to calibrate just the upper area or the “2
points” button for the upper and lower areas.
4.
A further window will open in which you can set a tolerance. You can
change this by maximum -50 to +50 depending on whether you wish
to calibrate the upper or lower area. The maximum change corre-
sponds c. to a current of 1 mA.
5.
Check the output signal using a multimeter or a servomotor and
make sure that the motor is now under exact control.
6.
Save the current offset by pressing the “Save” button.
ü
Calibrating the 20 mA output completed.
9.6 Setpoints and reference sets
You can determine various setpoints which should actuate the device. You
have four different sets of setpoints; the controller can switch between
them automatically. The reference sets can be used to vary the control at
different times of the day or in different operating conditions.
The following section describes the possibilities of controlling using set-
points and their configuration.

