Each light is added individually by invoking this dialog. When all lights are entered,
NorthStar
will verify your lighting controller(s) software is up-to-date, and update the
controller(s) if necessary.
NorthStar
will then be ready to control your lighting system.
After a light is entered it is controlled from the
Lights and Zones
page. All lights can
be controlled by clicking the
On/Off
switch on the blue "All" zone panel or dragging
the slider to a specific illumination level.
Each individual light may be controlled similarly by clicking the
On/Off
switch on
the light panel for each individual light or dragging the slider to create a specific
brightness level for a light.
4.6.3
Adding
Sensors
Sensors contribute to the "intelligence" of your lighting system. With sensors in place
your system will be able to respond to events such as a person entering or leaving
the area. Switches are a type of sensor that provides a manual way to activate lights
without needing to log in to the
NorthStar
interface.
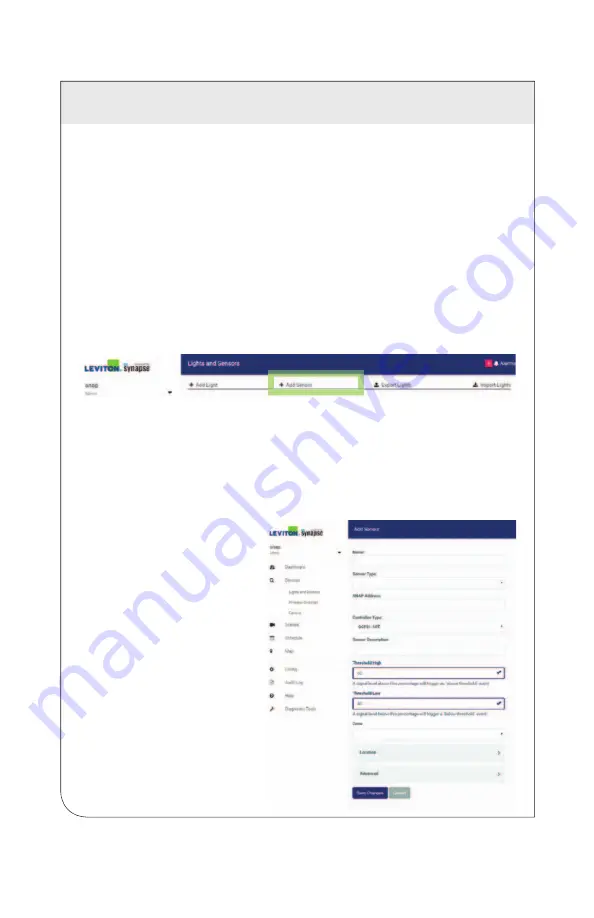
To add new sensor:
1.
Click
the
Devices & Zones
menu choice in the Left Menu Bar.
2.
Click
the
Add Sensor
button near the top of the page.
3.
Using the provided fields, enter the desired name for the sensor or switch, the
SNAP Address for the controller the sensor is attached to, and the controller type.
You'll also need to select a sensor type from the
Sensor Type
drop-down list.
4.
In
the
Zone
field, enter the Zone the sensor will affect.
NOTE:
A scene can control up to eight zones.
5.
Steps 2 - 4 are required
as a minimum. Other
information may be
entered as desired
including a description and
location. The Threshold
High and Threshold Low
fields are used to fine
tune the sensitivity of
attached sensors, but only
for cases of weak sensor
response. Most sensors
work fine with default
settings.
6.
Click the
Save Changes
button to save, or the
Cancel
button to exit
without saving changes.
4 CONFIGURATION
29
WEB
VERSION


