


81
Making Printer Settings
1. Open the printer properties dialog box.
2. Click the [Maintenance] tab.
3. Click [Adjust Print-head Positions].
4. In the [Select a test pattern:] list, select a test pattern.
Select a resolution. To adjust print-head positions for all resolutions, repeat this procedure selecting the
other resolution.
[Quality priority/Speed Priority] is selected here as an example.
5. Click [Next >].
6. Check that A4/Letter size paper is loaded in the paper tray.
7. Click [Next >].
A test pattern to adjust print-head positions is printed.
Do not perform other operations during printing.
The "High quality" test pattern differs from the "High Speed" test pattern.
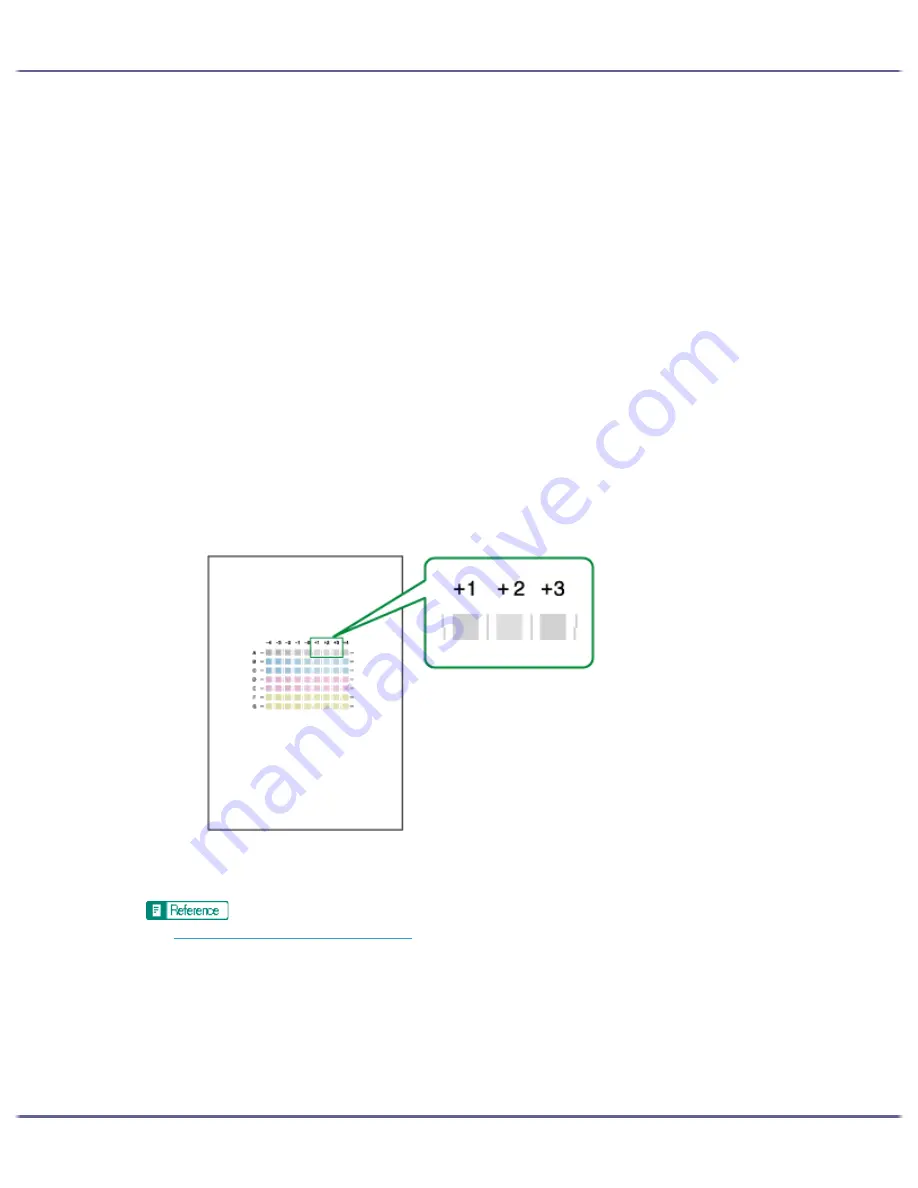
8. Check the optimal adjustment values on the printed test pattern.
The optimal adjustment value is the column number that appears above the lightest gray square with
straight vertical lines on both sides. When the column number is "+2" for the "A" line, the optimal adjustment
value is "+2" for "A".
9. Enter the optimal adjustment values.
10. Click [Finish].
z
p.168 "Two Types of Printer Properties Dialog Box"
Summary of Contents for GX5050
Page 1: ...your document management partner GX5050 User s Guide...
Page 2: ...J011 USER GUIDE...
Page 3: ......
Page 13: ...10 RSA BSAFE 266 OpenSSL 266 OpenSSL License 267...
Page 89: ...86 Making Printer Settings z p 168 Two Types of Printer Properties Dialog Box...
Page 135: ...132 Troubleshooting z p 135 Where to Inquire...
Page 145: ...142 Maintaining Disposing Consult with an authorized dealer to dispose of the printer...
Page 279: ...8 Copyright 2006 Printed in China EN USA J010 6606 J0106606...


