9
C
N
2
33
33
F
33
34
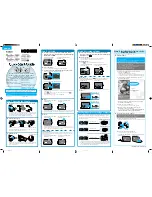
左上カバーの取り付け
23.
左上カバー(F) の爪 (33)6 箇所を挿入し、
前側へスライドさせる。
24.
はめ込み部 (34) をはめ込み、
左上カバー(F) を取り付ける。
Anbringen der oberen linken Abdeckung
23.
Schieben Sie die 6 Laschen (33) an der oberen linken Abdeckung (F)
in Position und schieben Sie die Abdeckung nach vorne.
24.
Setzen Sie die Raste (34) ein, um die obere linke Abdeckung (F)
anzubringen.
Installieren der Hefterabdeckung
25.
Die Hefterabdeckung (C) mit drei Schrauben befestigen.
Unten: Die in Schritt 2 entfernten zwei Schrauben (2) benutzen.
Oben rechts: Die M3 × 6 Schraube (N) benutzen.
26.
\Die linke Abdeckung (11) und die Frontabdeckung (1) schließen.
Colocación de la cubierta superior izquierda
23.
Colocar las 6 lengüetas (33) en la ranura de la cubierta superior
izquierda (F) y deslizar la cubierta hacia el frente.
24.
Instalar el pestillo (34) para fijar la cubierta superior izquierda (F).
Instalación de la cubierta de grapas
25.
Fije la cubierta de grapas (C) utilizando tres tornillos.
Inferior: Utilice dos tornillos (2) sacados en el paso 2.
Superior derecho: Utilice el tornillo M3 × 6 (N).
26.
Cierre la cubierta izquierda (11) y la cubierta frontal (1).
Fixation du capot supérieur gauche
23.
Disposer lles 6 pattes (33) en position sur le capot supérieur gauche
(F) et faire glisser le capot vers l'avant.
24.
Insérer le verrou (34) pour fixer le capot supérieur gauche (F).
Installation du capot de l’agrafeuse
25.
Fixez le capot de l’agrafeuse (C) à l’aide de trois vis.
Côté inférieur: Utilisez les deux vis (2) retirées auparavant lors de
l’étape 2.
Côté supérieur droit: Utilisez une vis M3 × 6 (N).
26.
Refermez le capot gauche (11) et le capot avant (1).
Attaching the upper left cover
23.
Slot the 6 clips (33) on the upper left cover (F) into place and slide the
cover to the front.
24.
Fit the latch (34) to attach the upper left cove
Installing the staple cover
25.
Fix the staple cover (C) using two screws.
Lower: Use the screw (2) removed in step 2.
Upper right: Use M3 × 6 screw (N).
26.
Close left cover (11) and the front cover (1).
Montaggio del coperchio superiore sinistro
23.
Inserite le 6 linguette (33) sul coperchio superiore sinistro (F) in
posizione e slittate il coperchio in avanti.
24.
Inserite il fermo (34) per fissare il coperchio superiore sinistro (F).
Installazione del coperchio della pinzatrice
25.
Fissate il coperchio della pinzatrice (C) utilizzando tre viti.
Lato inferiore: utilizzate due viti (2) rimosse nel passo 2.
Lato superiore destro: utilizzate una vite M3 × 6 (N).
26.
Chiudete il coperchio sinistro (11) e il coperchio anteriore (1).
安装左上盖板
23.
将 6 处夹片(33)插入左上盖板(F)并将盖板滑至前侧。
24.
安装嵌入板(34)以便安装左上盖板。
安装装订器盖板
25.
用 2 个螺丝固定装订器盖板 (C)。
下侧 :在步骤 2 拆下的 1 个螺丝 (2)
右上侧 :1 个螺丝 M3 × 6(N)
26.
关闭左盖板 (11) 和前盖板 (1)。
ステープルカバーの取り付け
25.
ビス 2 本でステープルカバー(C) を固定する。
下側:手順 2 で外したビス (2)1 本
右上側:ビス M3 × 6(N)1 本
26.
左カバー(11) および前カバー(1) を閉じる。
Summary of Contents for TASKalfa 181
Page 1: ...SERVICE MANUAL Published in October 2009 842KJ112 2KJSM062 Rev 2 TASKalfa 181 TASKalfa 221 ...
Page 4: ...This page is intentionally left blank ...
Page 10: ...This page is intentionally left blank ...
Page 14: ...2KJ 2KH This page is intentionally left blank ...
Page 114: ...2KJ 2KH 1 3 74 This page is intentionally left blank ...
Page 152: ...2KJ 2KH 1 4 38 This page is intentionally left blank ...
Page 292: ...INSTALLATION GUIDE FOR PAPER FEEDER ...
Page 306: ...INSTALLATION GUIDE FOR DUPLEX UNIT ...
Page 315: ...INSTALLATION GUIDE FOR BUILT IN FINISHER ...
Page 327: ...INSTALLATION GUIDE FOR JOB SEPARATOR ...
Page 336: ...INSTALLATION GUIDE FOR FAX System R ...
Page 351: ...INSTALLATION GUIDE FOR Scan System F B ...
Page 354: ......
Page 355: ......


